So you’re craving something tasty but too lazy to spend forever in the kitchen, huh? Same. We’ve all been there: staring into the fridge, dreaming of something sweet, but the thought of a complicated recipe makes us want to just… nap. Well, put that napping pillow away, because today we’re making an Easy Moist Chocolate Marble Cake that’s so straightforward, you’ll wonder if you accidentally became a pastry chef overnight. (Spoiler: you totally did.)
Why This Recipe is Awesome
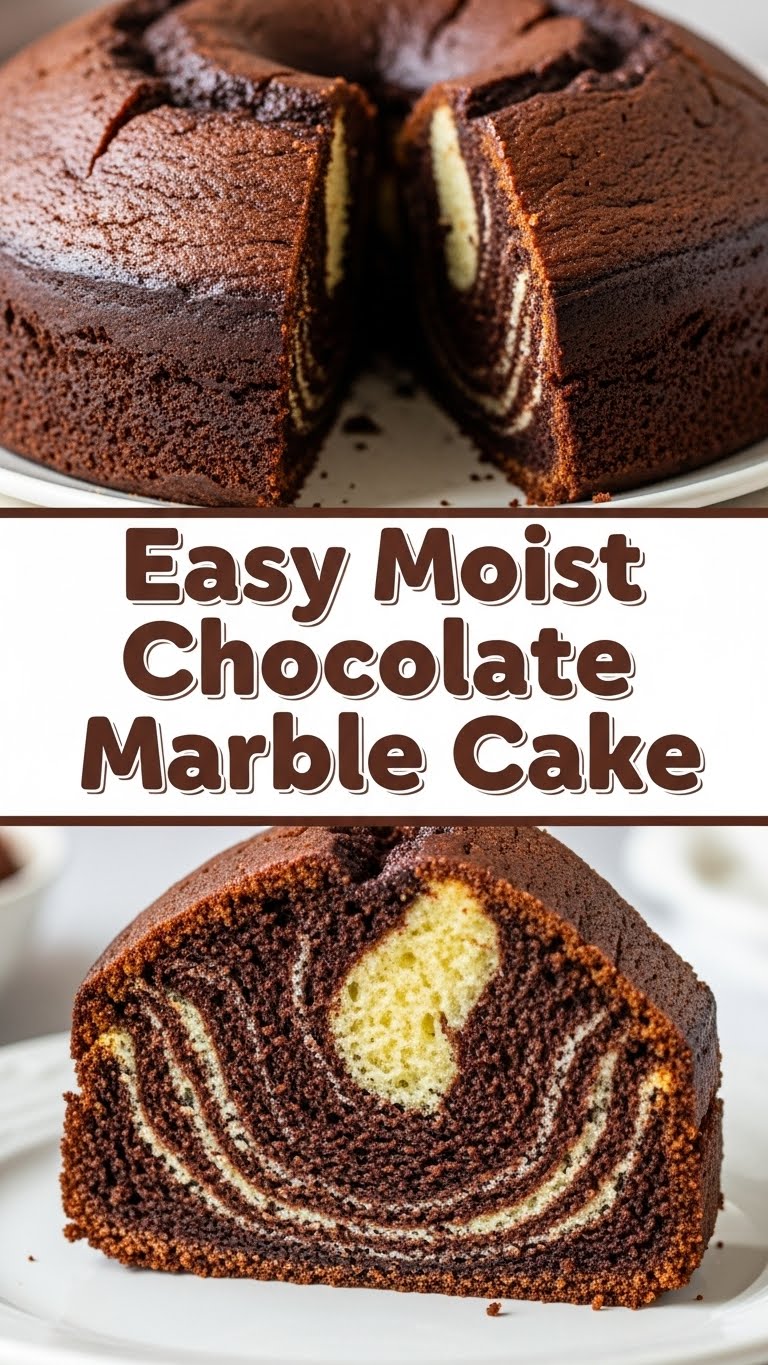
Let’s be real, who doesn’t love a cake that looks fancy but requires minimal effort? This isn’t just a cake; it’s a masterpiece of deception. It looks like you spent hours lovingly swirling chocolate and vanilla batter, but in reality, you probably whipped it up during a commercial break. It’s **idiot-proof**, I swear, even I didn’t mess it up (and that’s saying something). Plus, it’s ridiculously moist, incredibly flavorful, and gives you the best of both worlds: vanilla AND chocolate. No more fighting with your inner sweet tooth about what flavor to pick!
Ingredients You’ll Need
Grab your apron (or just wear whatever, who cares?) and let’s get these simple goodies together:
- 1 ½ cups All-Purpose Flour: The backbone of our cakey dreams.
- 1 ½ teaspoons Baking Powder: Our little lift-off specialist.
- ½ teaspoon Salt: Don’t skip it! It brings out all the flavors, like a good wingman.
- ½ cup (1 stick) Unsalted Butter: Softened, please! This is where the moisture magic begins. The good stuff, not the “spread” your aunt uses.
- 1 cup Granulated Sugar: For that sweet, sweet goodness.
- 2 Large Eggs: Room temperature, if you can remember to take them out. If not, don’t stress, it’ll still work!
- 1 teaspoon Vanilla Extract: The OG flavor enhancer. Go for the good stuff, your taste buds will thank you.
- ¾ cup Milk: Any milk works – whole, 2%, even almond if you’re feeling adventurous.
- ⅓ cup Unsweetened Cocoa Powder: For the chocolate swirl. Because we need that dark side.
- 2 tablespoons Hot Water or Coffee: To make our cocoa extra rich and fudgy. FYI, coffee really makes chocolate sing!
Step-by-Step Instructions
- Preheat & Prep: First things first, turn your oven to **350°F (175°C)**. Grease and flour a 9×13 inch baking pan. Or, line it with parchment paper for easy removal. Trust me, it’s worth the extra step.
- Whisk the Dry Stuff: In a medium bowl, whisk together your flour, baking powder, and salt. Set it aside.
- Cream the Wet (ish) Stuff: In a large bowl, using an electric mixer, beat the softened butter and sugar together until it’s light and fluffy. This usually takes about 2-3 minutes.
- Add Eggs & Vanilla: Beat in the eggs, one at a time, making sure each is fully incorporated before adding the next. Then stir in that lovely vanilla extract.
- Alternate Wet & Dry: Now, add about a third of your dry ingredient mixture to the wet ingredients and mix on low speed until just combined. Pour in half of your milk and mix again. Repeat this process, ending with the dry ingredients. **Don’t overmix!** Lumps are fine, it’s not a beauty contest (yet).
- Divide & Conquer: Spoon about ⅔ of the batter into a separate bowl. This will be your vanilla base.
- Chocolate Swirl Time: In the bowl with the remaining ⅓ of batter, whisk together the cocoa powder and hot water (or coffee) until smooth. Add this chocolate mixture to the smaller portion of batter and gently fold until just combined.
- Marble Magic: Dollop spoonfuls of the vanilla batter into your prepared pan, alternating with spoonfuls of the chocolate batter. Don’t worry about perfection; it’s supposed to be rustic!
- Swirl it Up: Grab a knife or a skewer and gently swirl through the batters a few times to create that beautiful marble effect. Be careful not to over-swirl, or you’ll end up with brown cake instead of marble!
- Bake It Off: Pop your masterpiece into the preheated oven and bake for **30-35 minutes**, or until a wooden skewer inserted into the center comes out clean.
- Cool Down: Let the cake cool in the pan for about 10-15 minutes before transferring it to a wire rack to cool completely. Patience is a virtue, especially when cake is involved.
Common Mistakes to Avoid
We all make mistakes, but let’s try to avoid these common cake blunders, shall we?
- Thinking you don’t need to preheat the oven: Rookie mistake! Your cake will rise unevenly and not bake through properly. Just do it, it takes 15 minutes.
- Overmixing the batter: Treat your batter like a delicate flower, not a punching bag. Overmixing develops the gluten too much, leading to a tough, dry cake. Gentle strokes, my friend, gentle strokes.
- Not using room temperature ingredients: Cold eggs and butter don’t emulsify as well, meaning your cake won’t be as smooth or moist. A quick hack for eggs? Pop ’em in warm water for 5 minutes.
- Cutting the cake too soon: I know, the smell is intoxicating. But cutting it while it’s hot can lead to a crumbly mess. Let it cool; it’s worth the wait. Promise.
Alternatives & Substitutions
Feeling creative? Or just missing an ingredient? No worries, we’ve got options!
- Milk Swap: Out of regular milk? Buttermilk adds a lovely tang and extra moisture. If you don’t have buttermilk, add 1 tablespoon of lemon juice or white vinegar to regular milk and let it sit for 5 minutes before using.
- Butter vs. Oil: While butter gives the best flavor (IMO), you can swap it for an equal amount of neutral oil (like vegetable or canola) for an even softer, slightly denser cake. Just know you might lose a little of that buttery richness.
- Spice it Up: Want to add a little something extra? A pinch of cinnamon or a tiny bit of instant espresso powder in the chocolate batter will deepen the flavor beautifully.
- Frosting Fun: This cake is amazing on its own, but a simple chocolate glaze (melted chocolate + a splash of cream) or a basic vanilla buttercream would take it to the next level.
FAQ (Frequently Asked Questions)
- Can I use margarine instead of butter? Well, technically yes, but why hurt your soul like that? Butter just tastes better, period. But if you *must*, make sure it’s a good quality stick margarine.
- My cake turned out dry! What went wrong? Most likely, you either overbaked it or overmixed the batter. Keep an eye on the baking time and stick to gentle folding!
- How long does this cake last? Covered tightly at room temperature, it’s usually good for 3-4 days. In the fridge, it can last up to a week. If it lasts that long, you’re a stronger person than me.
- Can I freeze this cake? Absolutely! Wrap individual slices or the whole cooled cake tightly in plastic wrap, then foil. It’ll keep in the freezer for up to 3 months. Just thaw at room temp.
- What if I don’t have a 9×13 inch pan? You can use two 8-inch round cake pans or a 9-inch round pan, but you’ll need to adjust the baking time (likely less) and keep a close eye on it. A Bundt pan works too, but grease it REALLY well!
Final Thoughts
See? That wasn’t so bad, was it? You just whipped up a ridiculously delicious, moist, and impressive chocolate marble cake without breaking a sweat (or a single expensive kitchen gadget, probably). This cake is perfect for impressing guests, bribing coworkers, or simply treating yourself because, let’s face it, you deserve it. Now go impress someone—or yourself—with your new culinary skills. You’ve earned it!


