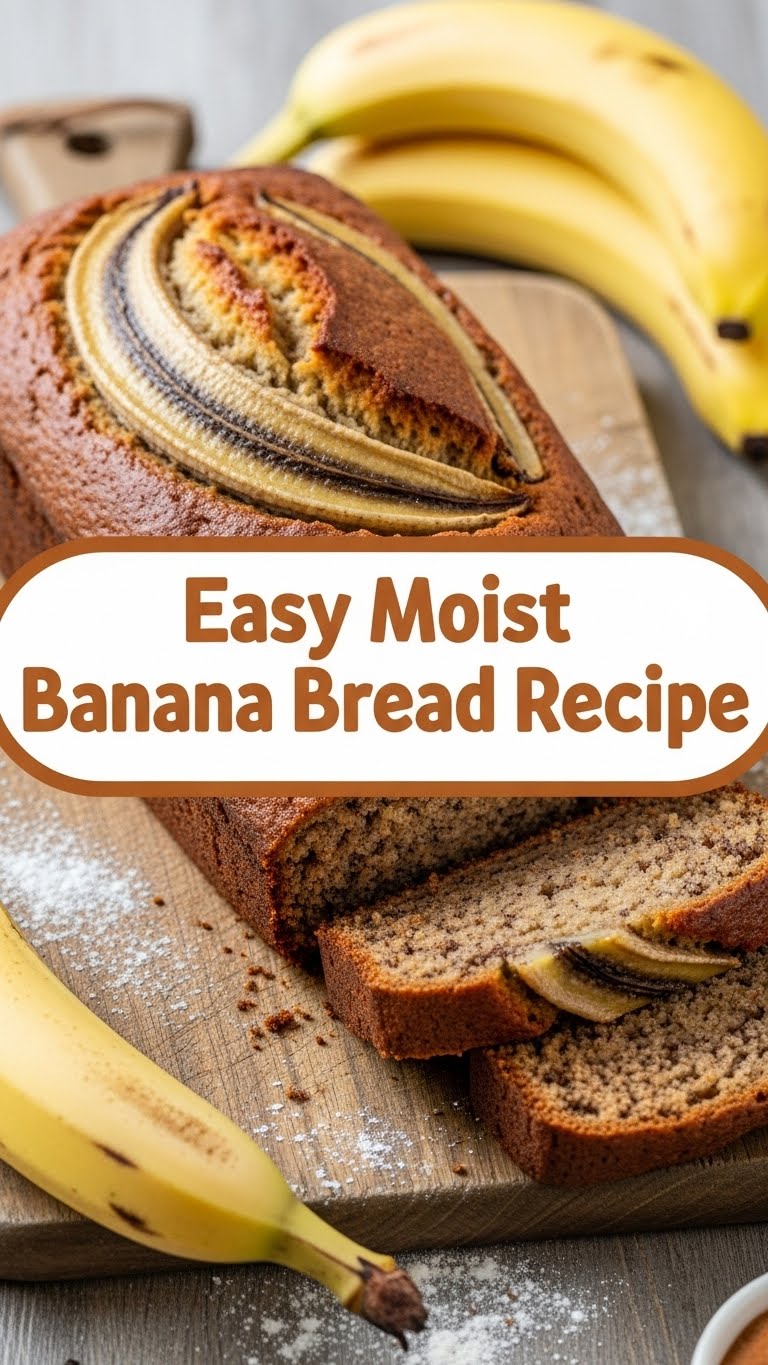
Got a few sad, spotty bananas glaring at you from the counter? Don’t toss ’em! They’re not going bad; they’re just getting *ready* for their starring role in something delicious. And guess what? You’re about to be their hero (and your own, because, well, banana bread!). This isn’t your grandma’s fussy, hours-long recipe; this is the “I want amazing banana bread *now*, and I want it to be easy” recipe. So, let’s get baking!
Why This Recipe is Awesome
Okay, let’s be real. We all want to bake like a pro without actually, you know, *being* a pro. This recipe is your secret weapon. It’s so mind-numbingly simple, it practically bakes itself. Here’s why it’s about to become your go-to:
- It’s practically **one-bowl magic** (okay, maybe two, but who’s counting?). Fewer dishes mean more time for eating.
- **Super moist**, like “did I just eat a cloud?” moist. No dry, crumbly sadness here!
- It transforms those forgotten, overripe bananas into a golden, fragrant masterpiece. You’re basically a food waste superhero.
- It’s so forgiving, even if you’re a baking newbie, you’ll look like a seasoned chef.
- The aroma alone is worth the effort (which, let’s be honest, is minimal).
Ingredients You’ll Need
Gather your troops! These are the simple heroes of your banana bread journey. Don’t worry, nothing too fancy, just good old kitchen staples.
- 1½ cups (about 190g) All-Purpose Flour: The backbone of our bread. Use unbleached if you’re feeling fancy.
- 1 teaspoon Baking Soda: The magic leavening agent that makes it rise and get all fluffy.
- ½ teaspoon Salt: Just a pinch to balance the sweetness and make everything pop. Don’t skip it!
- ½ teaspoon Ground Cinnamon (optional, but highly recommended): For that warm, cozy, “what IS that delicious smell?” factor.
- ½ cup (1 stick or 113g) Unsalted Butter: **Melted!** This is key for that easy, moist texture. No need to soften, just melt and let it cool slightly.
- ¾ cup (150g) Granulated Sugar: Because life is short, and we deserve sweetness.
- 2 Large Eggs: Room temperature, if you remember. They’re our binders.
- 1 teaspoon Vanilla Extract: The liquid gold. Don’t even think about skipping this!
- 3-4 Very Ripe Bananas: The star of the show! We’re talking brown spots, even black spots. The uglier, the better for sweetness and moisture!
Step-by-Step Instructions
Alright, apron on (or not, we don’t judge). Let’s make some magic happen, friend.
Prep Time! Preheat your oven to 350°F (175°C). Grab a 9×5-inch loaf pan and give it a good spray with cooking non-stick spray, or butter and flour it. Trust me, you want that bread to come out easily!
Mash ‘Em Up: In a medium bowl, mash those gloriously spotty bananas with a fork until they’re mostly smooth but still have a few little lumps. A little texture never hurt anyone!
Wet Mix Magic: In a separate (or the same if you’re feeling bold and efficient!) large bowl, whisk together the melted and slightly cooled butter and the sugar until combined. It doesn’t need to be super fluffy, just incorporated.
Egg-cellent Addition: Crack in your eggs one at a time, whisking well after each addition. Stir in the vanilla extract. Your wet ingredients are looking good!
Dry Mix Dash: In a small bowl, whisk together your flour, baking soda, salt, and cinnamon (if using). This helps distribute everything evenly so you don’t get a random pocket of salt, **FYI**.
Combine and Conquer: Add the mashed bananas to your wet ingredients, stir well. Then, gently fold in the dry ingredients into the wet mixture. **Mix until *just* combined.** A few streaks of flour are totally fine. Overmixing is the enemy of moist banana bread!
Pan It Up: Pour your glorious batter into your prepared loaf pan. You can sprinkle a few extra chocolate chips or nuts on top if you’re feeling extra. Pop it into your preheated oven.
Bake ‘Til Golden: Bake for 55-65 minutes. How do you know it’s done? A wooden skewer or toothpick inserted into the center should come out clean (or with just a few moist crumbs, not wet batter). If the top is browning too fast, you can loosely tent it with foil.
Cool Down, Then Devour: Let the banana bread cool in the pan for about 10-15 minutes before carefully turning it out onto a wire rack to cool completely. Or, you know, cut yourself a warm slice immediately. Your call, no judgment here!
Common Mistakes to Avoid
Baking is fun, but sometimes we make oopsies. Here’s how to steer clear of the most common banana bread blunders:
- Using Under-Ripe Bananas: Seriously, this is the #1 mistake. Green or yellow bananas won’t give you the sweetness or moisture you need. **Wait for those brown spots!** They’re like little flavor bombs.
- Overmixing the Batter: Once you add the flour, treat that batter gently. Overmixing develops the gluten too much, leading to tough, chewy bread. We want tender, moist, melt-in-your-mouth goodness.
- Not Preheating Your Oven: Patience, young padawan! A properly preheated oven ensures even baking from the start. Don’t rush it.
- Opening the Oven Door Too Soon: I know, it’s tempting to peek, but resist for at least the first 40 minutes. Opening the door can cause your bread to sink in the middle.
- Forgetting to Grease Your Pan: Unless you want to chisel your banana bread out of the pan, please, for the love of all that is good, grease it well.
Alternatives & Substitutions
This recipe is super flexible! Feel free to jazz it up or swap things around to suit your cravings or what’s in your pantry.
- Add-Ins: Feeling adventurous? Stir in ½ – 1 cup of chocolate chips (milk, dark, white – your choice!), chopped walnuts, pecans, shredded coconut, or even a handful of dried cranberries. Do it!
- Spices: Want more warmth? A pinch of nutmeg, allspice, or even a tiny bit of ginger can really elevate the flavor profile.
- Sugar Swap: You can swap out some or all of the granulated sugar for brown sugar for a deeper, more caramel-like flavor. Delicious!
- Butter Alternative: In a pinch, you can use a neutral-flavored oil (like vegetable or canola) instead of butter. It’ll still be moist, but the butter definitely adds a richness that’s hard to beat, **IMO**.
- Whole Wheat Flour: You can substitute up to half of the all-purpose flour with whole wheat flour for a slightly healthier, nuttier bread.
FAQ (Frequently Asked Questions)
Got questions? I’ve got answers (and probably a joke or two).
- How ripe should my bananas *really* be?
Seriously ripe! We’re talking yellow with lots of brown and black spots, almost entirely black, squishy-soft. The riper they are, the sweeter and more flavorful your bread will be. It’s like nature’s sugar boost!
- Can I use frozen bananas?
Absolutely! Just thaw them completely, drain any excess liquid (there will be some!), and then mash them. They work perfectly and are a great way to save those overripe beauties for later.
- My banana bread sank in the middle! What happened?
This usually means it was underbaked, or you opened the oven door too early, letting cold air rush in. Next time, give it a few more minutes, and ensure that toothpick comes out clean!
- Can I make muffins instead of a loaf?
You bet! Just divide the batter among 12 muffin cups (greased or lined). Bake at the same temperature for about 20-25 minutes, or until a toothpick comes out clean. Muffin time!
- How long does banana bread last?
Leftovers? What are those?! Kidding! It’ll last covered at room temperature for 2-3 days, or in the fridge for up to a week. It also freezes beautifully for up to 3 months.
- Can I use margarine instead of butter?
Well, technically yes, but why hurt your soul like that? Butter just provides a superior flavor and texture that margarine can’t quite replicate. But if it’s all you have, it’ll still be banana bread!
Final Thoughts
And there you have it, folks! Your very own, incredibly easy, ridiculously moist banana bread. You just transformed some forgotten fruit into a comforting masterpiece. Pat yourself on the back, you culinary genius!
Now, go impress someone—or just yourself—with your new baking prowess. Grab a slice, maybe a cup of coffee, and revel in the simple joy of homemade goodness. You’ve earned it!

