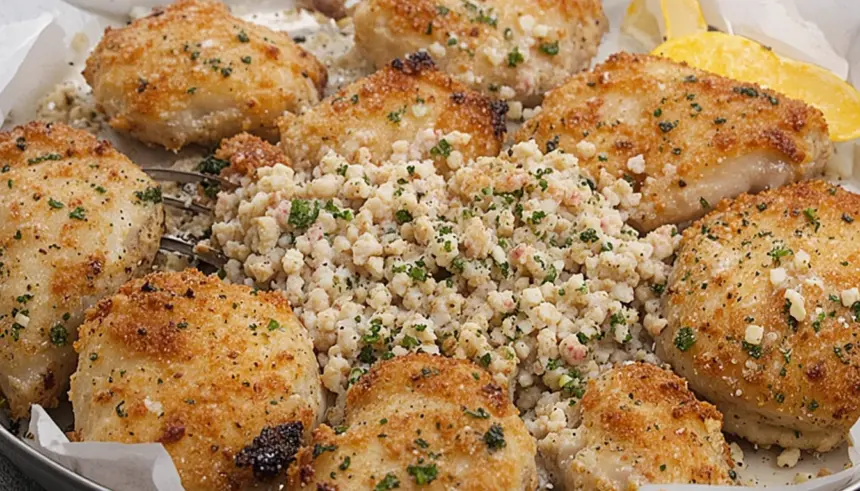
So, you’re staring into the abyss of your fridge, the “what’s for dinner” siren song is wailing, and your motivation levels are hovering somewhere around “nap time.” Been there, done that, bought the stretchy pants. But fear not, my fellow culinary adventurers (or just hungry humans), because I’ve got your back with some ridiculously easy chicken tender recipes that are practically foolproof. Think deliciousness without the drama!
Why This Recipe is Awesome
Honestly, it’s the hero of busy weeknights. Chicken tenders are already pre-cut, pre-portioned, and basically begging to be transformed into something amazing. Plus, these recipes are so simple, you could probably make them with your eyes closed (though I don’t recommend that for safety reasons, duh). We’re talking minimal prep, maximum flavor, and a clean-up that won’t make you want to move into a cardboard box. It’s basically edible magic, and who doesn’t love a little magic?
Ingredients You’ll Need
- Chicken Tenders: Duh. Get the good stuff, or whatever’s on sale.
- Your favorite seasonings: Think salt, pepper, garlic powder, paprika, maybe some chili flakes if you’re feeling spicy.
- Oil: Olive oil, vegetable oil, avocado oil – whatever you’ve got lurking in the pantry.
- A little bit of courage: You can do this!
Step-by-Step Instructions
- First things first, preheat your oven to a toasty 400°F (200°C). If you’re pan-frying, get that skillet nice and hot over medium-high heat.
- Pat those chicken tenders dry. Nobody likes soggy chicken. This is a crucial step, trust me.
- Toss them in a bowl with a drizzle of oil and all your glorious seasonings. Get in there with your hands – it’s more fun that way! Make sure they’re all coated like little edible jewels.
- For Baking: Spread them out on a baking sheet in a single layer. Don’t overcrowd the pan, or they’ll steam instead of getting that lovely crisp. Bake for about 15-20 minutes, flipping halfway through, until they’re golden brown and cooked through.
- For Pan-Frying: Carefully place them in the hot skillet, making sure not to overcrowd. Cook for about 3-5 minutes per side, until they’re beautifully browned and cooked through.
Common Mistakes to Avoid
- Overcrowding the pan/baking sheet: Seriously, give your tenders some personal space. They need to breathe (and crisp up!).
- Not preheating the oven/skillet: This is a fast track to sad, bland chicken. Patience, grasshopper!
- Underseasoning: Chicken can be a blank canvas, so give it some love with those spices! Don’t be shy.
- Overcooking: Nobody likes a dry, rubbery chicken tender. Keep an eye on them – they cook faster than you think!
Alternatives & Substitutions
Feeling fancy? Try tossing your tenders with some Panko breadcrumbs before baking for an extra crunchy coating. Or, if you’re feeling super lazy (we’ve all been there), grab a bag of your favorite seasoned breadcrumbs and use those instead of plain seasonings. For a little zing, a squeeze of lemon or a dash of your favorite hot sauce after cooking can be a game-changer. IMO, a little creativity never hurt anyone. And hey, if you’re out of chicken tenders, you can totally do this with chicken breasts cut into strips!
FAQ (Frequently Asked Questions)
Q: Can I just throw these in with frozen fries?
A: You *could*, but the cooking times might be different, and you might end up with… well, soggy fries and possibly overcooked chicken. It’s usually best to give them their own culinary stage.
Q: What if I don’t have any oil?
A: Uh oh. This is where it gets tricky. You *could* try a tiny bit of butter, but it’s more likely to burn. Maybe a quick run to the store is in order? Or, if you’re truly desperate, you could try dry seasoning and baking, but it won’t be quite the same.
Q: Can I make these ahead of time?
A: While they’re best fresh, you *can* cook them and reheat them gently in the oven or a skillet. Just don’t expect them to be as crispy as when they were first made.
Q: My chicken is still a little pink inside! What happened?
A: Oops! That means it needs a bit more time. Don’t panic. Pop it back in the oven or skillet for a few more minutes. Just make sure it’s fully cooked before you dive in. Safety first, deliciousness second!
Q: Can I use this basic method for other types of chicken?
A: Absolutely! Just adjust cooking times based on the thickness of your chicken pieces. Boneless, skinless thighs would also be fantastic here.
Q: Are these kid-friendly?
A: Heck yes! This is prime kid-food territory. Just go easy on the spicy seasonings, and they’ll likely devour them. Dipping sauces are highly recommended for maximum kid appeal.
Final Thoughts
See? Easy peasy, lemon squeezy (though we didn’t actually use lemons, unless you substituted!). You’ve just whipped up a fantastic meal with minimal fuss and maximum deliciousness. So go ahead, pat yourself on the back. Now go impress someone – or yourself – with your new culinary skills. You’ve earned it!

