So you’re craving something tasty but too lazy to spend forever in the kitchen, huh? Same. Honestly, who has the time (or the patience) for a gazillion steps and a sink full of dishes just for a sweet treat? Not me, and probably not you either, my friend. Good news: I’ve got your back with a recipe so easy, it practically bakes itself. Well, almost.
Why This Recipe is Awesome
Let’s be real, this isn’t just a cookie recipe; it’s a life hack. We’re talking minimal ingredients you probably already have lurking in your pantry (unless you’re on a diet, in which case… oops?). It’s one of those magical recipes that comes together faster than you can decide what to watch on Netflix. Plus, it’s pretty much **idiot-proof**. And I say that with love, having messed up my fair share of “easy” recipes. Seriously, even I didn’t mess this one up, and my kitchen skills sometimes peak at microwaving popcorn.
Ingredients You’ll Need
Get ready for the shortest shopping list ever. Or, more likely, a quick rummage through your cupboards.
- 1/2 cup (1 stick) unsalted butter, softened. And yes, butter is key. Don’t skimp on the good stuff, your taste buds will thank you.
- 1/2 cup granulated sugar. Because sweetness makes the world go ’round, right?
- 1 teaspoon vanilla extract. This is where the magic happens, a tiny splash makes a huge difference.
- 1 1/4 cups all-purpose flour. The unsung hero, the binder of dreams.
- 1/4 teaspoon salt. Just a pinch! It balances out the sweetness and makes everything pop. Trust me on this one.
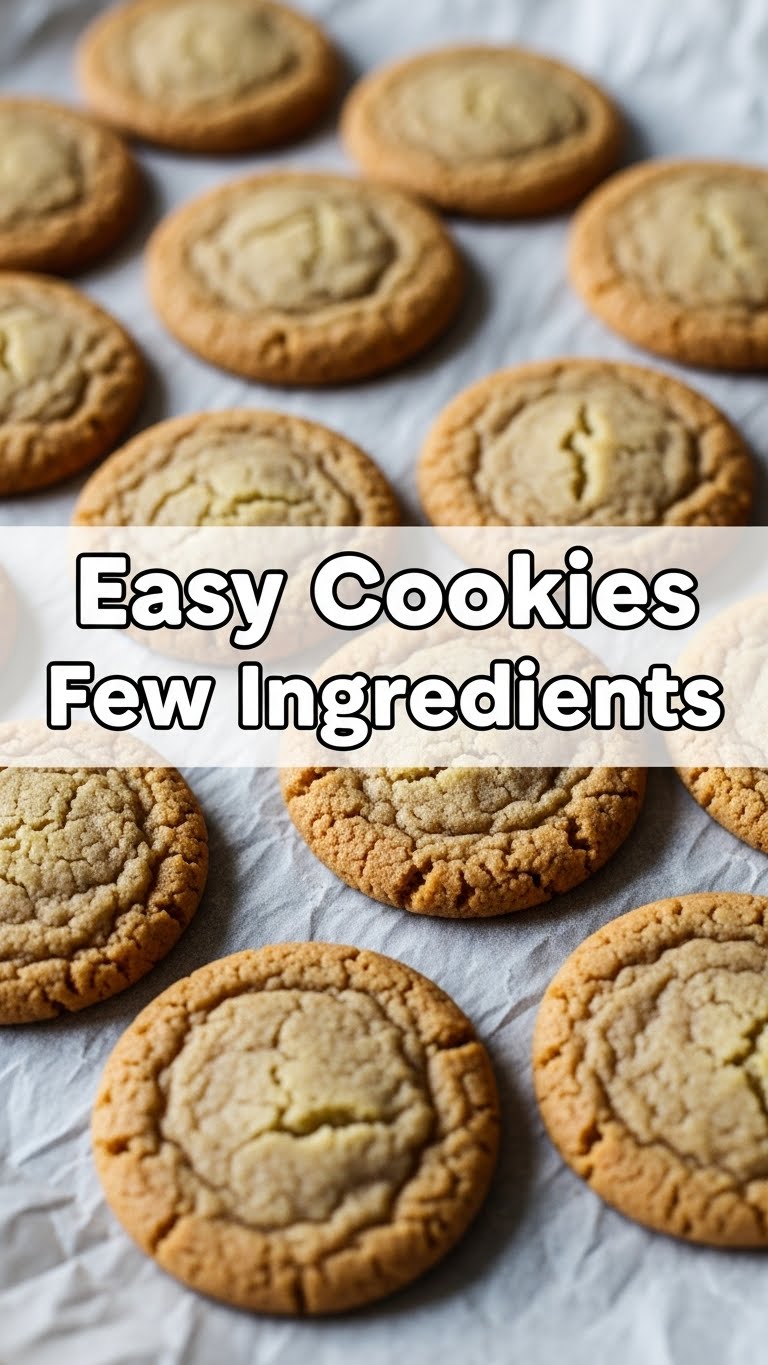
Step-by-Step Instructions
- Preheat your oven to 350°F (175°C). Line a baking sheet with parchment paper. This makes cleanup a breeze, FYI.
- In a medium bowl, cream together the softened butter and granulated sugar. Beat them with an electric mixer (or a sturdy spoon and some elbow grease) until they’re light and fluffy. This usually takes about 2-3 minutes.
- Stir in the vanilla extract. Give it a good mix to make sure that delightful aroma is distributed evenly throughout.
- Gradually add the flour and salt to the wet ingredients. Mix on low speed, or by hand, until just combined. Be careful not to overmix; we’re going for tender cookies, not tough ones.
- Scoop out tablespoon-sized portions of dough and roll them into balls. Place them about 2 inches apart on your prepared baking sheet. You can flatten them slightly with the bottom of a glass or just leave them as cute little dough balls.
- Bake for 10-12 minutes, or until the edges are lightly golden. Don’t wait for them to look super brown in the middle; they’ll firm up as they cool.
- Let them cool on the baking sheet for a few minutes before transferring them to a wire rack to cool completely. Or, you know, eat one while it’s still warm and gooey. I won’t judge.
Common Mistakes to Avoid
Even though this recipe is practically foolproof, there are a few rookie errors that can happen. Let’s make sure you don’t fall victim!
- Not preheating the oven: Seriously, don’t skip this. A cold oven equals sad, unevenly baked cookies. It’s like jumping into a cold pool – nobody wants that.
- Overmixing the dough: Once you add the flour, mix until just combined. Overmixing develops the gluten too much, leading to tough, chewy cookies. We want tender, melt-in-your-mouth goodness!
- Using cold butter: Your butter *needs* to be softened, not melted, not straight-from-the-fridge-hard. Cold butter won’t cream properly, and melted butter will make your cookies spread like crazy.
- Forgetting the parchment paper: Sure, you can grease a pan, but parchment paper is your best friend for easy removal and no sticky mess. Your future self will thank you.
Alternatives & Substitutions
Feeling a little adventurous? Or just realized you’re missing one tiny thing? Here are some simple swaps and fun additions:
- No vanilla? No problem (mostly): You can omit it in a pinch, but the cookies won’t have that classic, warm flavor. IMO, it’s worth the trip to the store if you’re out!
- Add some flair: Feeling extra? Stir in a handful of chocolate chips, sprinkles, or even some lemon zest for a different vibe. Just don’t go overboard, we’re still aiming for “few ingredients” simplicity.
- Brown sugar swap: For a slightly chewier cookie with a hint of caramel flavor, you can swap out half or all of the granulated sugar for packed light brown sugar. Delicious!
- Plant-based butter: If you’re dairy-free, a good quality plant-based butter (like Miyoko’s Kitchen or Earth Balance sticks) can work in a 1:1 ratio. Just make sure it’s softened properly.
FAQ (Frequently Asked Questions)
Got questions? I’ve got casual, slightly sarcastic answers.
- Can I use margarine instead of butter? Well, technically yes, but why hurt your soul like that? Butter just tastes better, period. Margarine might change the texture and flavor, and not always for the better.
- Do I need a fancy mixer for this? Nope! A hand mixer makes it quicker, but a good old wooden spoon and some arm strength will absolutely get the job done. Consider it a pre-cookie workout.
- How long do these cookies last? Honestly? Not very long in my house! But if you manage to hide them, they’ll stay fresh in an airtight container at room temperature for about 3-4 days.
- My cookies spread too much! What happened? Likely culprits: your butter was too soft/melted, your oven wasn’t preheated correctly, or your dough was too warm. Next time, try chilling the dough for 15-20 minutes before baking!
- Can I double the recipe? Absolutely! If you’re baking for a crowd (or just a very hungry you), feel free to multiply everything. Just make sure your mixing bowl is big enough.
- What if I don’t have parchment paper? You can lightly grease your baking sheet. But seriously, go get some parchment paper. It’s a game-changer.
Final Thoughts
See? I told you it was easy! You just whipped up some delicious cookies with minimal fuss and maximum payoff. Now go impress someone—or just yourself—with your new culinary skills. You’ve earned it! And maybe, just maybe, share one or two. Or don’t. Your cookies, your rules!

