Alright, Let’s Talk Chicken Tenders!
So you’re craving something tasty but too lazy to spend forever in the kitchen, huh? Same. We’ve all been there. The fridge stares back, mocking you with its emptiness, and the thought of elaborate cooking makes you want to order pizza. But fear not, my fellow culinary adventurers (or just hungry humans), because I’ve got the ultimate weapon in your arsenal for those “I want delicious, but I’m kinda over it” moments. We’re talking EASY chicken tenders, people!
Why This Recipe is Pure Genius (IMO)
Let’s be honest, sometimes recipes feel like they’re written by people who have a personal chef on standby. This one? Not so much. It’s ridiculously simple, requires minimal effort, and the cleanup is a dream. Plus, who doesn’t love a good chicken tender? It’s basically a hug in edible form. We’re talking crispy, juicy perfection without the fuss. It’s idiot-proof, even I didn’t mess it up the first time.
Ingredients You’ll Need (Don’t Panic!)
Here’s the lowdown on what you’ll need to snag. Nothing fancy, I promise.
- 1 pound boneless, skinless chicken breasts or tenders (whichever is cheaper, my friends!)
- 1 cup all-purpose flour (the glue that holds everything together)
- 2 large eggs (our binder-upper supreme)
- 1.5 cups Panko breadcrumbs (for that epic crunch factor. Don’t skimp here!)
- 1 teaspoon garlic powder (because garlic makes everything better)
- 1 teaspoon onion powder (adds a little *oomph*)
- Salt and freshly ground black pepper (to taste, you’re the boss!)
- Cooking spray or a little oil (to prevent sticking and encourage crispiness)
Step-by-Step, You Got This!
Let’s get this chicken party started.
- **Prep Your Chicken:** If you bought breasts, cut them into bite-sized tender pieces. No need for perfection, just aim for roughly uniform sizes so they cook evenly. Pat them dry with paper towels – this helps the coating stick like a champ.
- **Set Up Your Dredging Stations:** Get three shallow bowls or plates. In the first, put your flour. In the second, whisk your eggs with a splash of water or milk. In the third, mix your Panko breadcrumbs with the garlic powder, onion powder, salt, and pepper.
- **Coat Your Chickens:** Take a piece of chicken, dredge it in the flour, shaking off any excess. Then dip it into the egg wash, letting the extra drip off. Finally, press it firmly into the Panko mixture, making sure it’s completely coated. Repeat for all your chicken pieces.
- **Get Them Crispy:** Preheat your oven to 400°F (200°C). Lightly grease a baking sheet with cooking spray or oil. Arrange your coated chicken tenders in a single layer on the baking sheet. Don’t crowd them! Give them some space to breathe (and get crispy).
- **Bake to Perfection:** Bake for 20-25 minutes, flipping them halfway through. They should be golden brown and cooked through. The internal temperature should reach 165°F (74°C) if you’re feeling fancy and want to use a thermometer.
Common Mistakes to Avoid (Don’t Be *That* Person)
We’ve all made culinary faux pas. Here are a few to steer clear of:
- **Skipping the Drying Step:** Wet chicken = soggy coating. It’s a sad, sad situation.
- **Overcrowding the Baking Sheet:** Your tenders will steam instead of crisp. Give them space!
- **Not Preheat Your Oven:** Thinking you don’t need to preheat the oven—rookie mistake. Your chicken will be sad and pale.
- **Undercooking:** No one wants to play roulette with their digestion. Cook ’em through!
Alternatives & Substitutions (Because We’re All About Options)
Feeling a little adventurous? Or maybe you’re out of something? No sweat.
- **For the Breadcrumbs:** If you’re out of Panko, regular breadcrumbs work, but they won’t give you that same epic crunch. You can also crush up some cornflakes or even some lightly seasoned crackers. Just saying!
- **For the Spices:** Feel free to add other spices like paprika, a pinch of cayenne for a kick, or some dried herbs like parsley or thyme. Get creative!
- **For the Egg Wash:** If you’re not a fan of eggs or have an allergy, a mixture of milk and a little Dijon mustard can work in a pinch. It’s not my first choice, but it gets the job done.
FAQ (Frequently Asked Questions)
Got questions? I’ve got (somewhat) authoritative answers.
- **Can I deep-fry these instead?** Absolutely! If you’re feeling more ambitious (and have a deep fryer or a safe pot of oil), go for it. Just follow your usual deep-frying methods, but keep an eye on them as they cook faster.
- **Can I make these ahead of time?** You can bread them ahead and refrigerate them on a baking sheet, but I’d recommend baking them just before serving for maximum crispiness. Leftovers are still pretty good reheated, though!
- **Are these kid-friendly?** Um, hello? They’re chicken tenders! Of course, they’re kid-friendly. You might even get them to eat a vegetable alongside them – a true miracle!
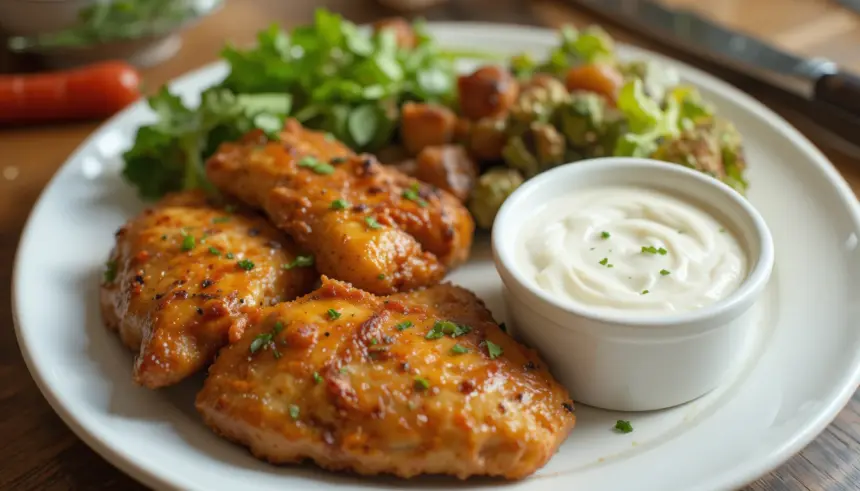
- **What can I serve with these?** Literally anything! Fries, salad, mac and cheese, a simple veggie… the possibilities are endless. They’re like the Swiss Army knife of weeknight meals.
- **Can I use chicken thighs?** Yes, you can! Just cut them into bite-sized pieces and adjust the cooking time as they might take a little longer than breast meat.
- **Do I *really* need Panko?** Okay, I’m gonna be honest. Panko gives you the best crunch. If you use regular breadcrumbs, you might not get that same airy, crispy texture. But hey, if that’s all you have, go for it!
Final Thoughts
And there you have it! Delicious, ridiculously easy chicken tenders that will make you feel like a culinary wizard without breaking a sweat. Go forth and conquer your hunger, my friends. Now go impress someone—or yourself—with your new culinary skills. You’ve earned it! Happy cooking!


