Listen up, dessert enthusiasts! If you’ve been staring at that can of apple pie filling in your pantry wondering “what the heck do I do with this besides make another pie?” – I’ve got you covered. This apple crisp recipe is about to become your new best friend for those days when you want something warm, comforting, and impressively delicious without the whole peel-core-slice apple drama. Let’s get crisping!
Why This Recipe is Awesome
First off, we’re using canned apples here, people! That means someone else has already done the annoying part of apple prep for you. Second, this recipe requires minimal brain power and dirty dishes – perfect for those “I want dessert but I also want to stay in my pajamas” kind of evenings. And finally, despite being ridiculously simple, it still creates that magical moment when your kitchen smells like a fall-scented candle shop exploded in the best possible way.
Ingredients You’ll Need
For the apple layer:
- 2 cans (21 oz each) of apple pie filling – the hero of our lazy baking story
- 1 teaspoon cinnamon – because obviously
- 1 tablespoon lemon juice – to wake those canned apples up a bit
- 1 teaspoon vanilla extract – the little black dress of baking
For the crisp topping:
- 1 cup old-fashioned oats – not the instant kind, have some standards
- 1 cup all-purpose flour – the most forgiving flour in existence
- 1 cup brown sugar, packed – “packed” means really get in there, don’t be shy
- ½ teaspoon salt – to make the sweet things taste sweeter (science!)
- ½ teaspoon cinnamon – because why stop at just one layer of cinnamon?
- ½ cup cold butter, cubed – the colder, the better (just like my ex’s heart)
- ½ cup chopped nuts (optional) – walnuts or pecans work great here
Step-by-Step Instructions
- Preheat your oven to 350°F (175°C). Yes, you actually need to do this first. No, your oven doesn’t magically reach temperature the moment you turn it on.
- Grab a 9×13 baking dish and give it a light spray with cooking spray. This prevents the “I’ll just soak this pan for three days” situation later.
- Open those cans of apple pie filling and dump them into a bowl. Add the cinnamon, lemon juice, and vanilla. Stir gently – we’re not making apple sauce here.
- Pour this apple mixture into your prepared baking dish and spread it evenly. This is literally the easiest part of any recipe ever.
- In another bowl, combine the oats, flour, brown sugar, salt, and cinnamon for your topping. Mix well.
- Add those cold butter cubes to your dry mixture. Now, get your hands dirty and work the butter in until the mixture looks like coarse crumbs. Think of it as stress relief – squish away!
- If you’re using nuts, fold them in now.
- Sprinkle this glorious topping evenly over your apples. Be generous – nobody likes a skimpy crisp.
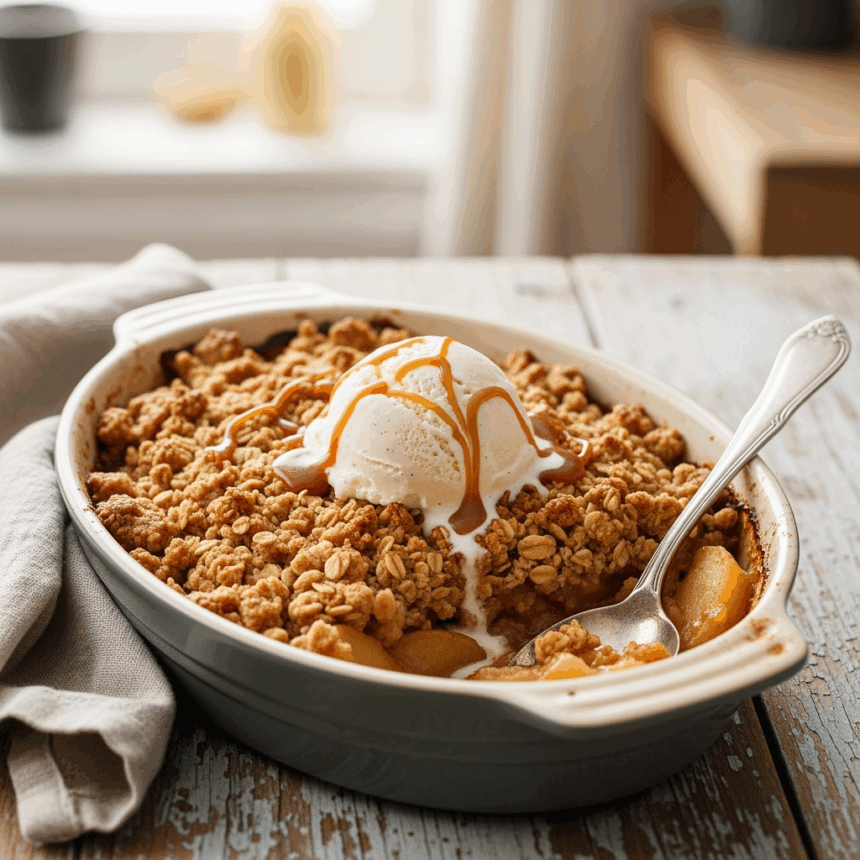
- Bake for 35-40 minutes, or until the topping is golden brown and you can see the apple filling bubbling around the edges like delicious lava.
- Let it cool for at least 15 minutes before serving. I know it’s hard to wait, but your taste buds will thank you for not immediately scorching them.
Common Mistakes to Avoid
Here’s what not to do, from someone who’s definitely never made these mistakes herself (ahem):
- Using warm or room-temperature butter for the topping. Your crisp will turn into one giant cookie on top if you do this. Cold butter = crumbly topping.
- Skipping the lemon juice because “it’s just one tablespoon.” That little bit of acid cuts through the sweetness and makes everything pop. Trust me.
- Over-mixing the topping until it becomes a dough. We want crumbles, not a pie crust. Channel your inner gentle soul here.
- Serving it straight from the oven. Unless you want the nickname “Asbestos Mouth” or enjoy the taste of burned taste buds.
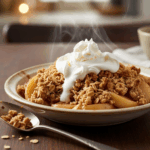
- Forgetting the ice cream. This isn’t technically a cooking mistake, but IMO it’s a life mistake. Vanilla ice cream on warm apple crisp is basically why dessert was invented.
Alternatives & Substitutions
Not all pantries are created equal, so here are some swaps that won’t ruin everything:
- Different pie fillings: Cherry, peach, or blueberry all work great with this same topping. Mix and match for a “what’s happening in my kitchen right now” crisp.
- Gluten-free? Swap the all-purpose flour for a cup-for-cup gluten-free blend and make sure your oats are certified gluten-free.
- No brown sugar? Use white sugar with a tablespoon of molasses mixed in. Or just use white sugar and accept that your crisp will be slightly less awesome.
- Butter alternatives: Coconut oil works surprisingly well, but the flavor will change slightly. Use the same amount, and make sure it’s solid.
- Oat alternatives: If you’re out of oats (the horror!), you can use crushed graham crackers or even crushed cereal like Chex or Cornflakes for the topping.
FAQ (Frequently Asked Questions)
Can I make this ahead of time?
You bet! Assemble everything but don’t bake it. Cover with plastic wrap and refrigerate for up to 24 hours. Add an extra 5-10 minutes to the baking time since it’ll be cold.
How long does this stay good for?
Assuming you don’t devour it all immediately (unlikely), it’ll keep for about 3 days in the fridge. The topping might lose some crispness, but it’ll still taste amazing.
Can I freeze leftovers?
You can, but the texture changes a bit. Freeze in individual portions, then thaw in the fridge overnight and reheat in the microwave or oven. Or just invite more friends over so you don’t have leftovers – problem solved!
Do I really need both cinnamons in this recipe?
Is there such a thing as too much cinnamon? That’s like asking if there’s such a thing as too much happiness. But if you’re a cinnamon minimalist, you can just use it in either the filling or the topping.
Can I add other spices?
Absolutely! A pinch of nutmeg, ginger, or cardamom would make this even more interesting. Go wild, spice explorer!
What if I want to use fresh apples instead?
Then you’re missing the entire point of this recipe and I’m judging you a little. But fine – peel, core and slice about 6-7 medium apples, toss with 1/3 cup sugar, 2 tbsp flour, and proceed with the recipe.
Final Thoughts
There you have it – the easiest apple crisp that still qualifies as “homemade” because you technically assembled it yourself! This is the perfect dessert for when you want people to think you put in more effort than you actually did. Serve it warm with ice cream for maximum “I’m a dessert genius” points.
Now go forth and create apple crisp magic! And remember, if anyone asks for your recipe, you can decide whether to share this shortcut or just smile mysteriously and say, “Oh, I picked the apples myself.” Your secret is safe with me.

