So you’re craving something tasty but too lazy to spend forever in the kitchen, huh? Same.
You’ve had one of those days (or weeks, let’s be real) where the thought of pulling out more than three ingredients feels like running a marathon. But your sweet tooth? Oh, it’s definitely demanding a gold medal. Fear not, my fellow culinary adventurer (who prefers minimal adventures), because I’ve got the ultimate cheat code for dessert: the Apple Cobbler Dump Cake. It’s less of a recipe and more of a “seriously, that’s it?” kind of magic trick.
Why This Recipe is Awesome
Let me count the ways this glorious creation will become your new best friend. First off, it’s practically **idiot-proof**. And trust me, if *I* can make it without setting off the smoke detector, you’re golden. Secondly, the prep time is so short, you might actually spend more time deciding what show to binge-watch while it bakes. Third, minimal dishes! We’re talking one baking dish, maybe a can opener, and a spoon. Your dishwasher (or your hands) will thank you. Finally, it tastes like you slaved away for hours, but really, you just… dumped. **It’s pure genius, IMO.**
Ingredients You’ll Need
Gather ’round, children of ease! Here’s what you’ll need for this dessert revelation:
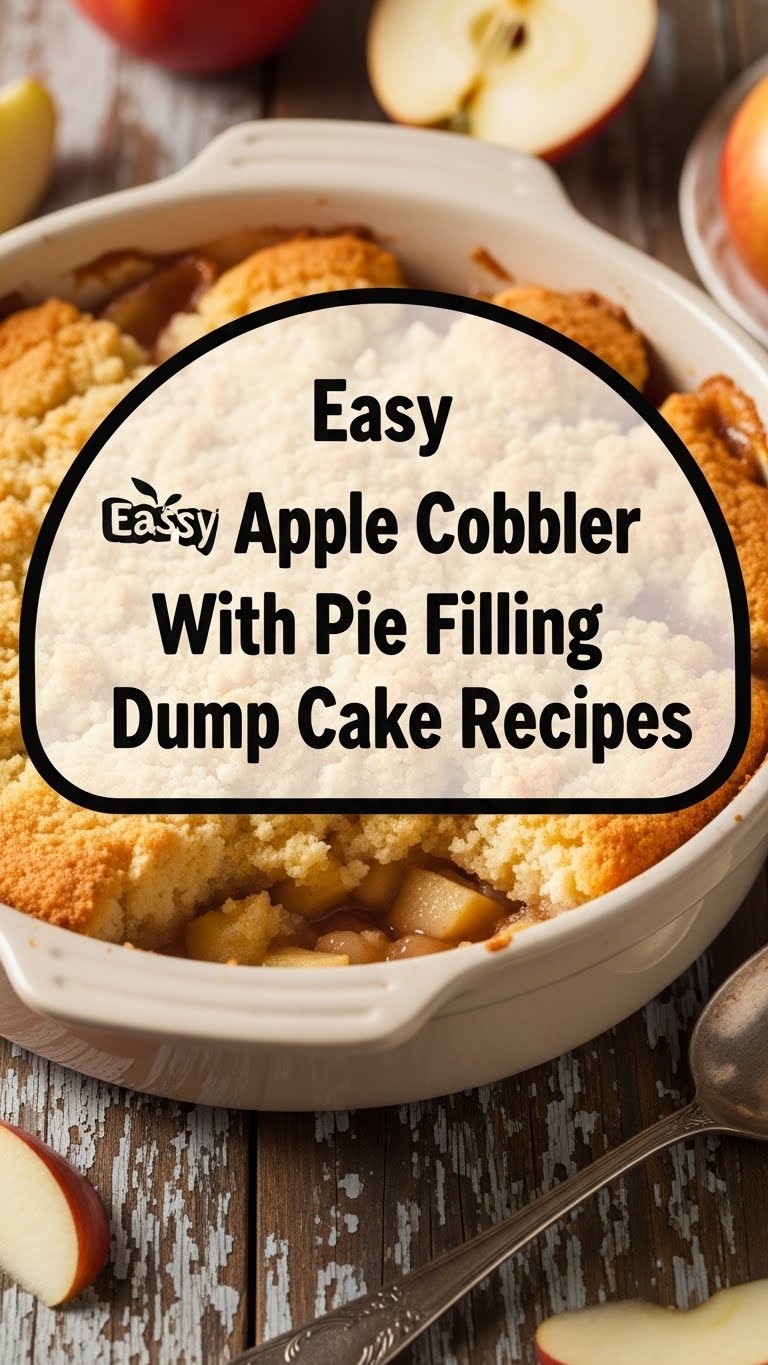
- Two (2) cans (20-21 oz each) of **apple pie filling**. Grab your favorite brand. No need to get fancy here, unless fancy means “extra apples.”
- One (1) box (15.25 oz) of **yellow cake mix**. Don’t be shy. This is where the “cake” part of dump cake comes from. Spice cake mix also works if you’re feeling a little autumnal, but yellow is classic.
- One (1) stick (1/2 cup) of **unsalted butter**, melted. Because everything is better with butter, right?
- Optional: A sprinkle of cinnamon, a handful of chopped pecans, or even a dash of nutmeg if you’re feeling wild.
Step-by-Step Instructions
Alright, buckle up, buttercup, these steps are so easy they practically do themselves.
- **Preheat Power-Up:** Get your oven nice and toasty at **350°F (175°C)**. This is a crucial first step, don’t skip it. Rookie mistake, people.
- **The Great Dump, Part 1:** Grab a 9×13 inch baking dish. Open those cans of apple pie filling and *dump* them evenly into the bottom of the dish. Spread ’em out a bit.
- **The Great Dump, Part 2:** Now, evenly sprinkle the entire box of dry yellow cake mix over the apple pie filling. Don’t stir it! This is important. Just sprinkle it like fairy dust (delicious, buttery fairy dust).
- **Butter Up!:** Drizzle that melted butter all over the top of the cake mix. Try to get it as evenly distributed as possible. This is what helps create that glorious, golden, cobbler-like crust. If you’re adding nuts or extra spices, sprinkle them on top now too.
- **Bake It ‘Til You Make It:** Pop that dish into your preheated oven. Bake for about **45-55 minutes**, or until the top is golden brown and bubbly around the edges. You want it to look invitingly crispy.
- **Serve and Conquer:** Let it cool for a few minutes (if you can wait). Serve warm with a scoop of vanilla ice cream or a dollop of whipped cream. Trust me, it’s a game-changer.
Common Mistakes to Avoid
Even a recipe this easy has its traps! Here’s how to steer clear of disaster:
- **Not Preheating the Oven:** Seriously, it makes a difference. Cold oven = sad, unevenly baked cobbler.
- **Stirring the Cake Mix:** *Do not stir the cake mix into the apples.* The magic happens when the butter melts through the dry mix, creating that crust. Stirring ruins the texture.
- **Uneven Butter Distribution:** If you just pour the melted butter in one spot, you’ll have a soggy patch and a dry patch. Aim for even coverage.
- **Serving Without Ice Cream:** Okay, not a *mistake* per se, but definitely a missed opportunity for peak deliciousness. Don’t deny yourself this joy.
Alternatives & Substitutions
Feeling adventurous (but still lazy)? Here are some fun ways to mix things up:
- **Fruit Swap:** Not feeling apples? Try cherry pie filling, peach, blueberry, or even mixed berry! They all work beautifully with yellow or white cake mix.
- **Cake Mix Mania:** If you don’t have yellow, white cake mix is a perfectly acceptable understudy. Spice cake mix is amazing with apple or pumpkin pie filling for an autumn vibe. Chocolate cake mix with cherry pie filling? Mind. Blown.
- **Nutty Professor:** Add half a cup of chopped pecans or walnuts over the cake mix for extra crunch. It’s always a good idea.
- **Spice It Up:** A teaspoon of cinnamon or apple pie spice sprinkled over the cake mix before the butter really enhances the flavor profile.
FAQ (Frequently Asked Questions)
Got questions? I’ve got (casual) answers!
- **Can I use margarine instead of butter?** Well, technically yes, you *can*. But why hurt your soul (and the flavor) like that? Butter just tastes better, period.
- **Can I make this ahead of time?** Absolutely! It’s fantastic warm, but also holds up well at room temperature for a day or two, or refrigerated for up to 4 days. Reheat gently in the oven or microwave.
- **How do I know when it’s done?** The top should be a beautiful golden brown, and you should see the fruit filling bubbling up around the edges. If the top is browning too quickly, you can loosely tent it with foil.
- **Can I use sugar-free pie filling or cake mix?** You can, but keep in mind the texture and sweetness might be slightly different. It’s a personal preference!
- **What if I only have one can of pie filling?** You could halve the recipe and use a smaller baking dish (like an 8×8 inch square), or just embrace a thinner cobbler layer in your 9×13. More crust, less fruit – still delicious!
- **Is this really a cobbler or a dump cake?** Honestly, it straddles both worlds! It has the fruit bottom and a cakey, biscuit-like topping reminiscent of a cobbler, but the “dump and bake” method is classic dump cake. Let’s just call it delicious.
Final Thoughts
See? Told you it was easy. You just made a ridiculously delicious dessert with minimal effort, and your kitchen is still mostly clean. That, my friend, is a win-win-win. Now go impress someone—or yourself—with your new culinary skills. You’ve earned it! (And maybe save me a slice?)


