So, you’ve got this gorgeous (or maybe slightly intimidating) whole chicken and a trusty Dutch oven staring at you from the counter, huh? And you’re thinking, “How do I turn this into something ridiculously delicious with minimal fuss?” My friend, you’ve come to the right place. Forget those complicated recipes; we’re about to make magic happen, and your kitchen will smell like pure comfort. Get ready to impress everyone (including yourself!) without breaking a sweat.
Why This Recipe is Awesome
Let’s be real, who has time for fussy recipes these days? This Dutch oven whole chicken recipe is your new best friend because it’s practically a set-it-and-forget-it deal. Seriously, it’s so easy, even I, notorious for burning toast, can nail this one. What makes it so awesome? The Dutch oven traps all that glorious moisture, giving you incredibly juicy chicken with crispy skin, and it cooks your veggies right alongside for a perfect one-pot meal. Less dishes? Yes, please! It’s a culinary hug in a pot, and it makes you look like a gourmet chef with minimal effort. Win-win-win, IMO.
Ingredients You’ll Need
Gather your edible treasures! We’re not getting fancy, just delicious.
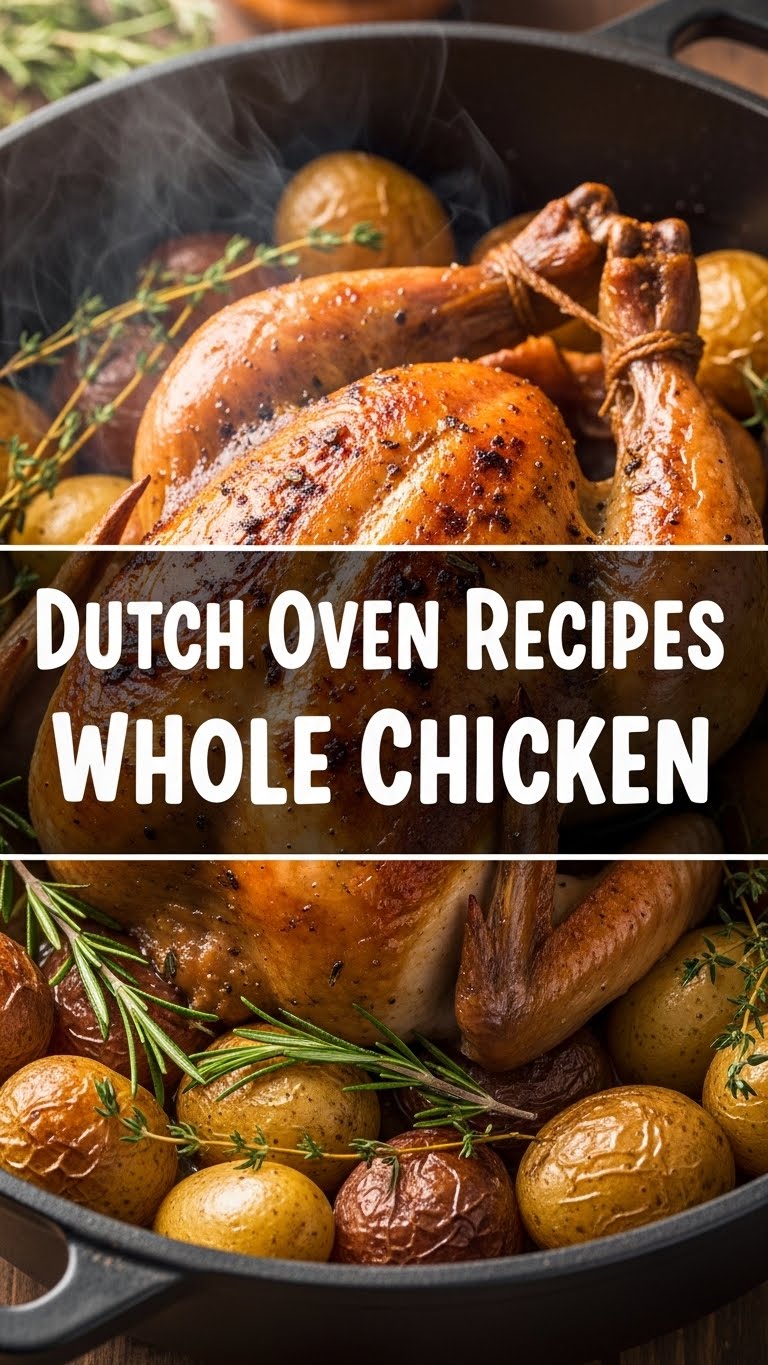
- **1 Whole Chicken (3-4 lbs):** The star of our show! Make sure it’s defrosted and ready to shine.
- **2-3 tbsp Unsalted Butter, softened:** Because butter makes everything better, duh.
- **1-2 tsp Sea Salt & 1/2 tsp Black Pepper:** The classic, can’t-go-wrong seasoning duo.
- **1 Lemon:** Half for stuffing, half for zesting and squeezing.
- **1 Whole Head of Garlic:** Yes, a whole head! Cut in half horizontally, no need to peel.
- **A few sprigs of fresh Rosemary & Thyme:** These woody herbs are chicken’s best friends.
- **1 lb Small Potatoes:** Halved or quartered, depending on size. Red or Yukon Golds are great.
- **3-4 Carrots:** Peeled and chopped into chunky pieces.
- **1 Large Onion:** Roughly chopped.
- **1 tbsp Olive Oil:** For tossing those veggies.
Step-by-Step Instructions
Alright, let’s get cooking! It’s super straightforward, I promise.
- **Prep Your Chicken:** First things first, unwrap your chicken and give it a good pat down with paper towels. You want it as dry as possible for that crispy skin magic. Remove any giblets from the cavity (unless you have a use for them, then go for it!).
- **Seasoning Time!** In a small bowl, mix your softened butter with salt, pepper, and a little lemon zest (from about half the lemon). Now, get in there and rub that buttery goodness all over the chicken, both inside and out. Don’t be shy!
- **Stuff It Up:** Take half your lemon (the one you zested), and one half of the garlic head. Shove ’em into the chicken cavity along with a few sprigs of rosemary and thyme. This adds incredible aroma and flavor from the inside out.
- **Veggie Bed:** Toss your chopped potatoes, carrots, and onion in the bottom of your Dutch oven. Drizzle with olive oil, a pinch of salt, and pepper. Add the remaining half of the garlic head and a few more herb sprigs. Give it a good mix.
- **Chicken Takes the Stage:** Place your seasoned, stuffed chicken right on top of your veggie bed in the Dutch oven. It should sit pretty.
- **Roast Away:** Pop the lid on your Dutch oven and put it into a **preheated 400°F (200°C) oven**. Roast for 30 minutes, then lower the temperature to 375°F (190°C) and continue roasting for another 60-90 minutes, or until a meat thermometer inserted into the thickest part of the thigh (without touching bone) reads 165°F (74°C). For extra crispy skin, remove the lid for the last 15-20 minutes of cooking.
- **The All-Important Rest:** Once cooked, take the Dutch oven out of the oven. Transfer the chicken to a cutting board and tent it loosely with foil. Let it rest for at least 15 minutes. This is crucial for juicy meat, so don’t skip it! While it rests, you can give your veggies a gentle stir in the pot.
- **Carve & Serve:** Carve your perfectly roasted chicken, spoon out those tender, flavorful veggies, and drizzle with any pan juices. Dinner is served, you magnificent chef!
Common Mistakes to Avoid
We all make mistakes, but let’s try to avoid these rookie errors, shall we?
- **Not Patting the Chicken Dry:** If your chicken is wet, it’ll steam instead of roast, and you’ll end up with rubbery skin instead of gloriously crispy skin. Rookie mistake!
- **Skipping the Rest:** Your patience will be rewarded. Cutting into the chicken too soon lets all those precious juices escape, leaving you with dry meat. Don’t be that person.
- **Forgetting to Preheat the Oven:** You wouldn’t jump into a cold shower, would you? The oven needs to be hot from the get-go for proper browning and cooking.
- **Overcrowding the Dutch Oven:** Give your chicken and veggies some breathing room! If you stuff too much in, things will steam rather than roast, and nobody wants soggy veggies.
- **Eyeballing Doneness:** Invest in a meat thermometer. It’s the only sure-fire way to know your chicken is perfectly cooked and safe to eat (165°F/74°C in the thigh).
Alternatives & Substitutions
Feeling creative? Here are some easy swaps:
- **Herbs:** No fresh rosemary or thyme? Dried herbs work too (use about 1/3 the amount), or try sage, oregano, or a “poultry blend.”
- **Veggies:** Swap potatoes for sweet potatoes, parsnips, or even bell peppers. Broccoli florets added for the last 30 minutes are also fantastic. Mix and match to whatever’s in your fridge!
- **Citrus:** Out of lemons? An orange or even lime could offer a different but equally delicious twist.
- **Spices:** Want a different flavor profile? Add smoked paprika, onion powder, or a dash of cayenne for a little kick to your butter rub.
FAQ (Frequently Asked Questions)
Got questions? I’ve got (casual) answers!
- **Do I really need a Dutch oven?** Well, for *this* recipe to truly shine, yes! But if you don’t have one, a heavy, oven-safe pot with a tight-fitting lid will work in a pinch. Just make sure it can handle the oven temps.
- **Can I use margarine instead of butter?** Technically, yes, but why hurt your soul like that? Butter adds so much flavor and helps with that golden-brown crust. Go for the good stuff!
- **My chicken isn’t browning properly, what gives?** Make sure your oven is actually at temperature. Also, try removing the lid for the last 15-20 minutes of cooking, and if it’s still pale, a quick blast under the broiler for 2-3 minutes (watch it like a hawk!) can fix it.
- **Should I truss the chicken?** For this recipe, no need. We’re going for simple and rustic. Trussing helps with even cooking and presentation, but it’s not essential here.
- **What if my chicken is bigger/smaller?** Adjust cooking time accordingly. A smaller chicken (2.5 lbs) might need less time, a larger one (5 lbs+) will need more. Always rely on that thermometer!
- **Can I make this ahead of time?** You can prep the chicken and veggies the night before (keep them separate in the fridge), then assemble and roast on the day. Leftovers are fantastic for sandwiches or salads, FYI.
Final Thoughts
See? Told you it was easy! Now you’ve got a whole, delicious, juicy chicken that basically cooked itself in your trusty Dutch oven, surrounded by perfectly tender veggies. You’re practically a culinary wizard. Go on, pat yourself on the back, and enjoy the fruits (or rather, chicken and veggies) of your minimal labor. Now go impress someone—or yourself—with your new culinary skills. You’ve earned it!


