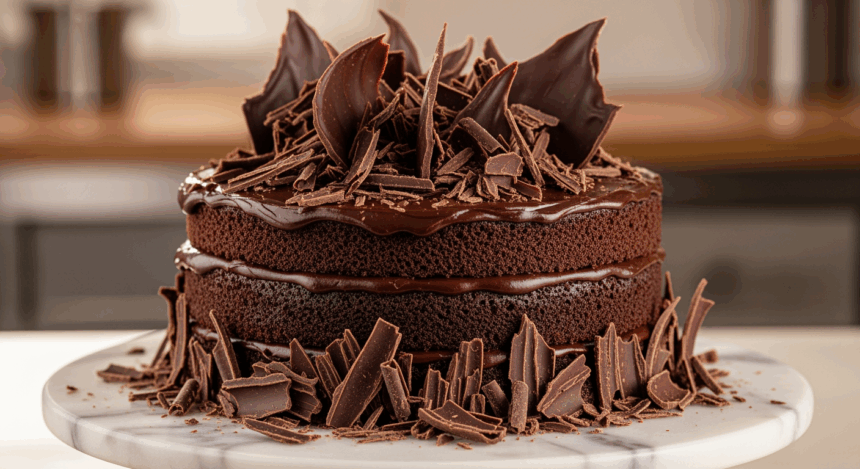
Let’s be honest—nothing says “I might have my life together” quite like a beautifully decorated cake that looks like it came from a fancy bakery. The secret? Those gorgeous chocolate shavings that make everyone think you spent hours perfecting your creation (when really, you were binge-watching your favorite show and occasionally wandering into the kitchen).
Why This Recipe is Awesome
First off, this decorative cake with chocolate shavings is basically the culinary equivalent of that filter that makes everyone look good on social media. Even if your cake underneath is slightly lopsided (we’ve all been there), those chocolate shavings will distract everyone. It’s the ultimate cake glow-up.
Plus, this recipe has that magical sweet spot of looking impressively fancy while being ridiculously simple to make. No pastry degree required—just a decent cake recipe and the ability to use a vegetable peeler without injuring yourself.
Ingredients You’ll Need
For the cake:
- Your favorite cake recipe (or a box mix—I won’t tell anyone)
- Frosting of choice (homemade buttercream if you’re feeling fancy, store-bought if it’s been a day)
- 8 oz of good quality chocolate (not the sad, waxy kind hiding in the back of your pantry)
- A vegetable peeler (the unsung hero of this recipe)
- A spatula (the smoother the better, like your excuses for making cake on a random Tuesday)
- Patience (just a little—this isn’t sourdough bread levels of commitment)
Step-by-Step Instructions
- Bake your cake according to your recipe or the box instructions. Let it cool completely—I mean it! Warm cake + frosting = sliding disaster, and we’re not making an avant-garde melting cake sculpture here.
- Frost your cake with a smooth, even layer. Don’t worry about making it Instagram-perfect; the chocolate shavings will cover a multitude of frosting sins.
- Prepare your workspace by laying down a large piece of parchment paper to catch the chocolate shavings. Trust me on this one—future you will thank present you during cleanup.
- Create your chocolate shavings by running your vegetable peeler firmly along the edge of your chocolate bar. Work over your parchment paper. If the chocolate is too hard, warm it slightly in your hands—but not so much that it melts and you end up with chocolate finger paintings instead.
- Apply the shavings to your cake by gently pressing them into the sides. For the top, you can either sprinkle them or create patterns—get creative! The more random it looks, the more “artistic” it appears.
- Chill the cake for about 30 minutes to set the chocolate before serving. This prevents the dreaded “chocolate shaving avalanche” when cutting.
Common Mistakes to Avoid
Impatience with cooling – Trying to frost a warm cake is like trying to apply makeup in a sauna. Just don’t.
Using low-quality chocolate – That chocolate that’s been in your cupboard since the last presidential administration? Not gonna work. Fresh, good quality chocolate shaves better and actually tastes like, you know, chocolate.
Forgetting the parchment paper – Unless you enjoy finding chocolate shavings in your kitchen for the next three months, use the parchment. Your vacuum cleaner will thank you.
Being too perfectionist – This isn’t brain surgery. The beauty of chocolate shavings is in their natural, slightly chaotic appearance. Embrace the mess!
Alternatives & Substitutions
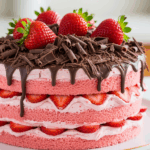
White chocolate lovers – Absolutely use white chocolate instead! Or go wild and mix white and dark chocolate for that zebra effect.
No vegetable peeler? A cheese grater works in a pinch, though you’ll get more of a grated look than elegant curls. Still delicious, just different aesthetic.
Flavor boost: Add a tablespoon of instant coffee to your chocolate before shaving for a subtle mocha vibe. IMO, chocolate + coffee = heaven.
Dietary restrictions: Vegan chocolate works perfectly fine for the shavings. Just make sure it’s not too soft or it’ll mush instead of curl.
FAQ (Frequently Asked Questions)
How far in advance can I decorate the cake?
You can do this up to 24 hours ahead, but keep it refrigerated. Any longer and the shavings might start to look sad and lose their perky freshness—kind of like me before coffee.
Can I use chocolate chips instead of a bar?
Technically yes, but why make your life harder? Chocolate chips are designed to hold their shape, not shave nicely. It’s like trying to get a cat to take a bath—possible but unnecessarily difficult.
My kitchen is hot and my chocolate is melting as I try to shave it. Help?
Pop that chocolate in the fridge for 10 minutes before trying again. And maybe turn on a fan? Or stop baking during heatwaves like a reasonable person?
Do I need to temper the chocolate first?
Nope! That’s the beauty of this method—no tempering required. We’re not making fancy bonbons here, just pretty decorations.
Will the shavings stain my fingers when I’m eating the cake?
Probably. Consider it a badge of honor. Or eat with a fork like the sophisticated person your mama raised you to be.
Final Thoughts
See? That wasn’t so hard! You’ve now mastered the art of making a cake look fancy without breaking a sweat or your spirit. The next time someone asks if that’s a store-bought cake, you can casually say, “Oh, this little thing? Just threw it together,” while neglecting to mention how simple it actually was.
Whether you’re making this for a birthday, anniversary, or just because it’s Wednesday and you deserve cake, those chocolate shavings will elevate your creation from “homemade” to “home-MADE!” Now go forth and dazzle people with your seemingly professional cake decorating skills—your secret is safe with me.
