Okay, so you’ve got a batch of chocolate chip cookies chilling on the counter, looking all plain and humble, huh? And you’re thinking, “These are great, but could they be… *more*?” You’ve come to the right place, my friend. We’re about to take those delicious discs of joy from ‘just cookies’ to ‘OMG, you made these?!’ without turning your kitchen into a disaster zone or your brain into a pretzel.
Why This Recipe is Awesome
Why bother decorating cookies that are already perfect, you ask? Because *art*, darling! And also, because sometimes you just want to feel fancy without actually *being* fancy. This isn’t some super-intricate royal icing saga; this is chocolate chip cookies gone glam with minimal effort. It’s so easy, even your dog could probably supervise (and maybe steal a sprinkle or two). Plus, it makes a killer gift, a fun party activity, or just an excuse to eat more cookies while admiring your handiwork. Win-win-win, IMO.
Ingredients You’ll Need
- Your already-baked chocolate chip cookies: The stars of the show! Hopefully, you didn’t burn them.
- Melting chocolate: White, dark, milk—whatever floats your boat. We’re talking chocolate chips, candy melts, or a good quality bar you chop up. About 1 cup should be good for a dozen cookies.
- Sprinkles, glorious sprinkles! The more variety, the better. Jimmies, nonpareils, edible glitter, shapes… go wild!
- Optional fun stuff: Mini M&M’s, chopped nuts, shredded coconut, mini chocolate chips (because why not more chocolate?), crushed candy canes (seasonal, but always a hit).
- Parchment paper or wax paper: For less mess and easier cleanup. Because who needs sticky counters?
Step-by-Step Instructions
- Prep your stage: Line a baking sheet or a clean counter with parchment or wax paper. This is where your decorated masterpieces will chill out.
- Melt the chocolate: Grab your chosen chocolate. You can use a microwave (zap in 30-second intervals, stirring well each time until smooth) or a double boiler (heat a bowl over simmering water, stirring until melted). Don’t overheat it! Burnt chocolate is a sad, sad thing.
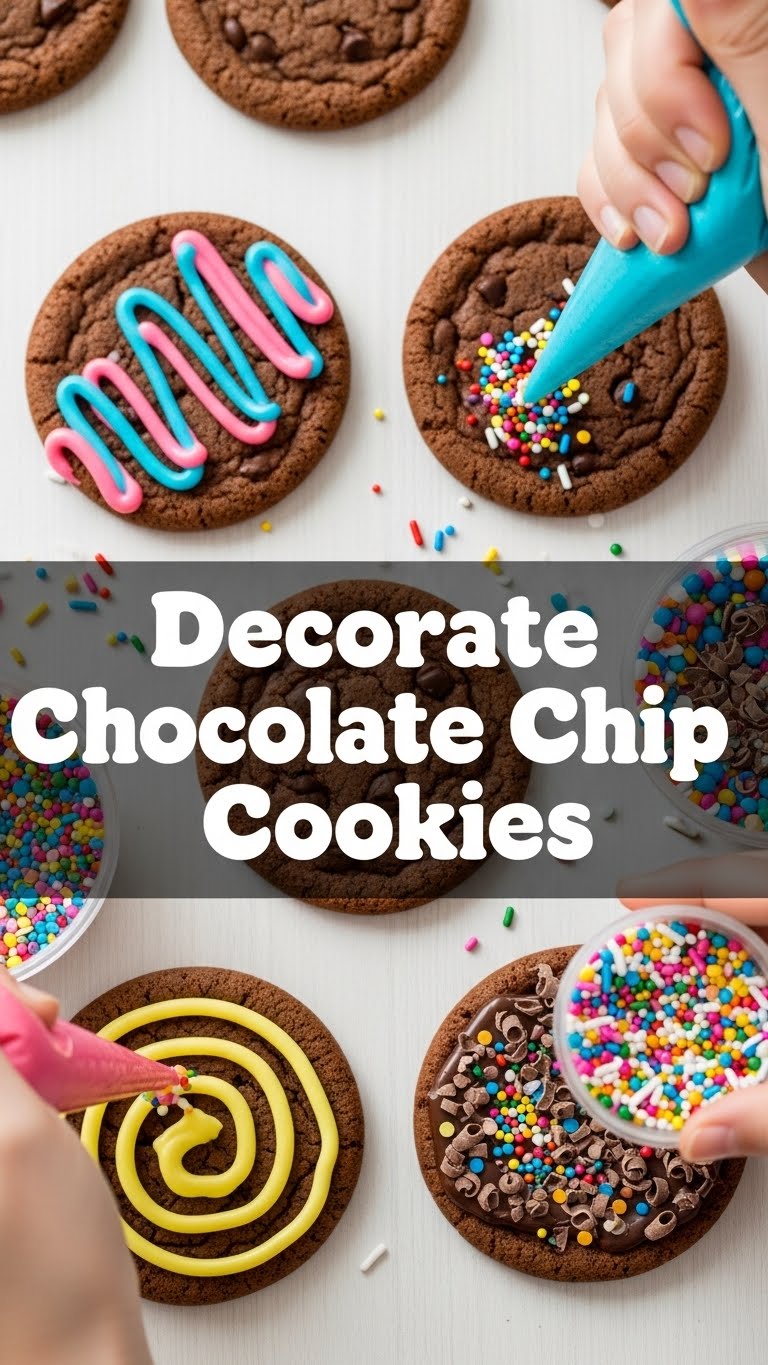
- Dip or drizzle: Now for the fun part! You can either dip half of each cookie into the melted chocolate, or, for a more delicate look, use a spoon or a fork to drizzle the chocolate in zig-zags over the top. Get creative!
- Sprinkle attack! While the chocolate is still wet (this is crucial, folks!), immediately shower your cookies with sprinkles, nuts, or whatever edible bling you’ve got. If the chocolate sets, your sprinkles will just roll off like they’re on vacation.
- Let them set: Carefully transfer your decorated cookies to your prepped parchment paper. Let them sit at room temperature until the chocolate hardens, or if you’re impatient like me, pop them in the fridge for about 10-15 minutes.
- Admire and devour: Once set, gather your friends, family, or just your beautiful self, and enjoy your jazzed-up chocolate chip cookies!
Common Mistakes to Avoid
- Overheating your chocolate: It’ll seize up, get clumpy, and generally throw a tantrum. Low and slow, people!
- Not having your sprinkles ready: You need to be a quick draw with those sprinkles before the chocolate sets. Timing is everything here.
- Dipping a whole cookie: Unless you want a chocolate puddle instead of a cookie, just dip a portion. Trust me.
- Using too much chocolate: A thin, even coat is more elegant (and less messy) than a thick, gloopy one.
- Forgetting the parchment paper: Enjoy scraping hardened chocolate off your counter later, if you skip this step. You’ve been warned.
Alternatives & Substitutions
- No melting chocolate? No problem! You can totally use pre-made frosting (the kind in a tub, no judgment here!), or even make a quick glaze with powdered sugar and a splash of milk or lemon juice. Just mix until spreadable.
- Out of sprinkles? Crushed cereal, crumbled cookies, or even just a dusting of powdered sugar can look super cute and add texture. Get creative with what’s in your pantry!
- Want a different flavor vibe? Add a drop of peppermint extract to white chocolate for a minty twist, or orange zest to dark chocolate. Boom, gourmet in seconds. FYI, extracts go a long way!
- Need a sugar-free option? Use sugar-free chocolate melts and look for sugar-free sprinkles (they exist!).
FAQ (Frequently Asked Questions)
- “Can I decorate warm cookies?” Oh, honey, no. Unless you want a melty, sticky, unholy mess. Always let your cookies cool completely before attempting any decoration. Patience, grasshopper!
- “What if my chocolate gets too thick while I’m working?” Just gently reheat it for a few seconds in the microwave or over the double boiler, stirring constantly. A tiny bit of coconut oil (1/4 teaspoon) can also help thin it out if it’s being stubborn.
- “How long do these decorated cookies last?” As if they’ll last long enough to worry about! Kidding! They’ll keep just as long as plain chocolate chip cookies, usually 3-5 days in an airtight container at room temp. The chocolate might bloom a bit, but they’re still delicious.
- “Can kids help with this?” Absolutely! This is prime kid-activity territory. Just be prepared for sprinkles to end up everywhere (including the dog, probably) and embrace the chaos. It’s part of the fun!
- “Do I need special tools?” Nope! A microwave-safe bowl, a spoon, and maybe a fork for drizzling is all you truly need. No fancy piping bags required unless you *want* to get extra.
- “My chocolate isn’t shiny, what gives?” Could be a few things: overheating, or maybe some water got into it. For super shiny chocolate, look into tempering, but honestly, for home decorating, who cares? It’ll still taste amazing!
Final Thoughts
So there you have it, superstar! You just elevated your already-delicious chocolate chip cookies into something truly spectacular without breaking a sweat (or a single expensive kitchen gadget). See? I told you it was easy! Now go impress someone—or yourself—with your new culinary skills. You’ve earned it!


