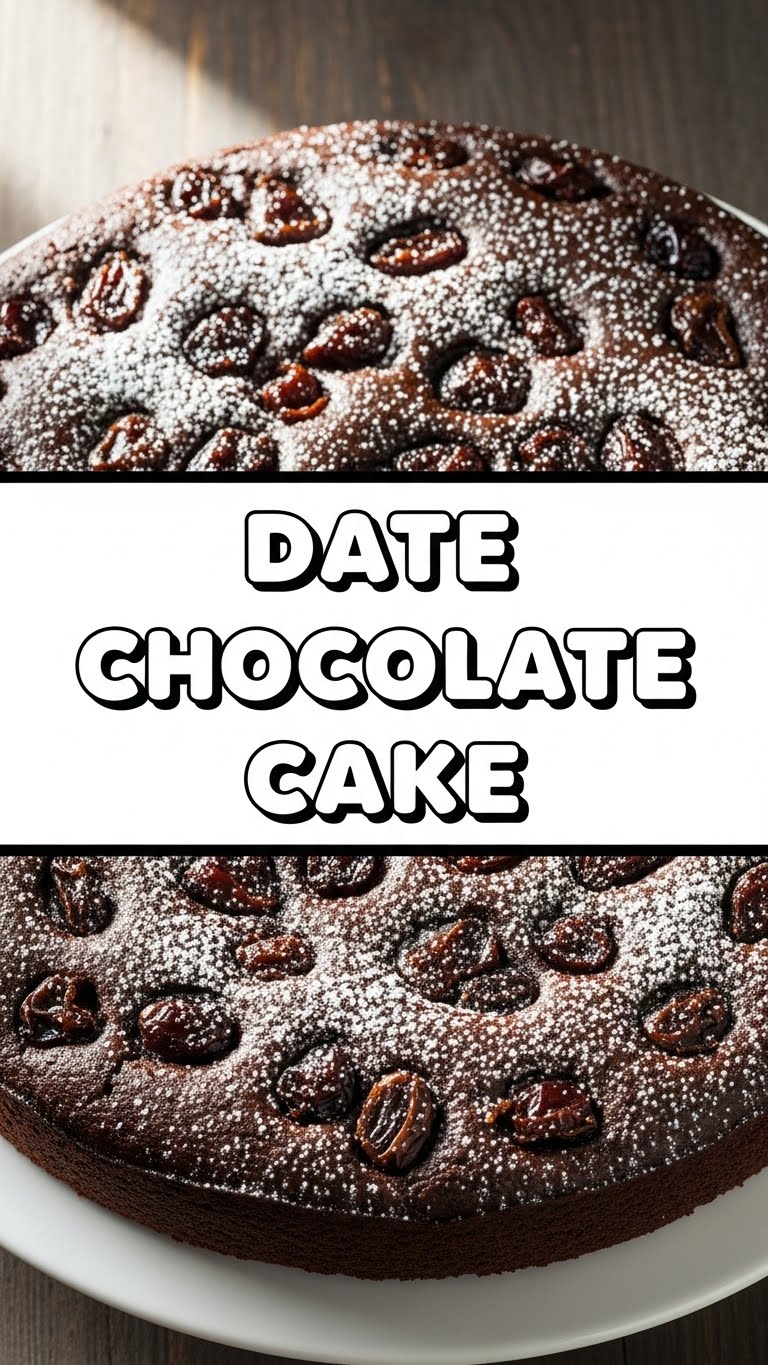
So you’re craving something tasty but too lazy to spend forever in the kitchen, huh? Same. We’ve all been there, staring into the fridge like it holds the answers to the universe, only to find… a sad lemon and some questionable yogurt. But what if I told you there’s a dessert that’s ridiculously easy, utterly decadent, and practically bakes itself while you binge-watch another season of whatever’s trending? Enter the Date Chocolate Cake – your new best friend in the dessert department. Seriously, this isn’t some fussy patisserie dream; it’s a hug in cake form that even *I* can make without setting off the smoke alarm.
Why This Recipe is Awesome
Okay, let’s be real. Most recipes promise the moon and deliver a dusty old rock. Not this one, my friend. This Date Chocolate Cake is the real deal. First off, it’s idiot-proof. No, really. If you can boil water (and maybe not burn toast), you can make this cake. I practically sleepwalked through it last time, and it still turned out phenomenal. Secondly, it’s a flavor explosion: the rich, fudgy sweetness of dates tangoing with the deep, dark notes of chocolate. It’s like a fancy grown-up brownie but in cake form, and way less effort than those Pinterest-perfect multi-tiered monstrosities. Plus, it uses common pantry staples, so you won’t be hunting down dragon’s tears or unicorn sprinkles. Win-win-win!
Ingredients You’ll Need
Gather ’round, fellow culinary adventurers! Here’s what you’ll need to transform into a cake wizard (spoiler: no actual magic required, just these awesome bits):
- Dates: 1 ½ cups, pitted and chopped. Go for Medjool if you want that extra caramel-y chewiness, but any soft date works. Think of them as nature’s candy.
- Boiling Water: 1 cup. For giving those dates a nice, relaxing spa bath before their big moment.
- Baking Soda: 1 teaspoon. Our little leavening fairy, making everything light and fluffy.
- All-Purpose Flour: 1 ¾ cups. The backbone of our cake, providing structural integrity. Don’t eyeball this, please.
- Granulated Sugar: 1 cup. Because life’s short, eat dessert first.
- Unsweetened Cocoa Powder: ½ cup. For that deep, dark chocolatey goodness. The better the quality, the happier your taste buds.
- Baking Powder: 1 teaspoon. More lift! We want majestic, not flat.
- Salt: ½ teaspoon. Just a pinch to balance all that sweetness and make the flavors sing.
- Large Eggs: 2, at room temperature. Give them a minute out of the fridge, they’ll thank you.
- Unsalted Butter: ½ cup (1 stick), melted and slightly cooled. Because everything’s better with butter, IMO.
- Vanilla Extract: 1 teaspoon. The fairy dust that makes everything taste like magic.
- Milk: ½ cup. Any kind works, but whole milk gives it that extra lusciousness.
- Chocolate Chips (Optional, but highly recommended): ½ cup, for an extra chocolatey burst. Because why not?
Step-by-Step Instructions
- Date Spa Time: First things first, get those dates ready. In a medium bowl, combine your chopped dates with the boiling water and baking soda. Stir it up and let it hang out for about 10-15 minutes. This softens the dates and helps them melt into the cake.
- Oven Warm-up & Pan Prep: While your dates are chilling, preheat your oven to a cozy 350°F (175°C). Grab an 8 or 9-inch square baking pan (or a round one, we’re not picky) and grease and flour it, or line it with parchment paper. Don’t skip this step unless you enjoy scraping cake from a pan.
- Dry Mix Magic: In a large bowl, whisk together the flour, sugar, cocoa powder, baking powder, and salt. Make sure there are no lumps of cocoa lurking. We want a smooth, unified dry team.
- Wet Mix Whimsy: In a separate bowl, whisk the eggs, melted butter, and vanilla extract until they’re happily combined.
- Combine & Conquer: Now for the fun part! Pour the wet ingredients into the dry ingredients. Mix gently until *just* combined. Overmixing is the enemy of tender cake, so fight the urge to go crazy.
- Add the Date Goodness: Stir in the date mixture (including any leftover liquid – that’s flavor!). Fold in the optional chocolate chips now too, if you’re using them.
- Bake It Up: Pour the batter into your prepared pan and smooth the top. Pop it into the preheated oven and bake for 30-35 minutes, or until a toothpick inserted into the center comes out with moist crumbs, not wet batter.
- Cool Down: Let the cake cool in the pan on a wire rack for about 10-15 minutes before attempting to invert it. Then, let it cool completely on the rack. Patience is a virtue, especially when cake is involved.
Common Mistakes to Avoid
Listen, we all make mistakes. It’s part of the human (and baking) condition. But some are easily avoidable! Here are a few to steer clear of:
- Thinking you don’t need to preheat the oven: Rookie mistake! Your oven needs to be at the correct temperature from the start for even baking. Cold oven = sad, uneven cake.
- Overmixing the batter: This is a big one. Overmixing develops the gluten in the flour, leading to a tough, rubbery cake instead of a tender, moist one. Mix until just combined, then stop. Walk away from the spoon.
- Not properly preparing your pan: Unless you enjoy chiseling cake out of metal, grease and flour (or parchment paper!) is your best friend. A sticky cake is a tragedy.
- Substituting ingredients willy-nilly without understanding: Baking is chemistry! While some substitutions are fine (see below), randomly swapping major components like flour or leavening agents can lead to disaster.
- Not letting the cake cool: I know, I know. The smell is intoxicating. But cutting into a hot cake often results in it falling apart. Give it time to set and firm up.
Alternatives & Substitutions
Feeling a little adventurous? Here are some ways to tweak this glorious cake without sending it to the culinary graveyard:
- Dates: If you don’t have fresh dates, dried chopped dates can work, but you might want to soak them for a bit longer. Don’t use those crunchy, super-dry ones, though; they’re not a good fit.
- Chocolate: Use milk chocolate chips instead of semi-sweet for a sweeter, milder flavor. Or, if you’re feeling fancy, chop up some dark chocolate bars for pockets of melty goodness. White chocolate chips would be a fun contrast too!
- Dairy-Free: Swap the butter for a good quality plant-based butter (like Miyoko’s or Earth Balance sticks) and use your favorite plant-based milk (almond, oat, soy). The taste will be slightly different, but still delicious.
- Nuts: Feeling nutty? Stir in ½ cup of chopped walnuts or pecans with the chocolate chips for some added crunch and flavor.
- Spices: A pinch of cinnamon or a tiny dash of cardamom (¼ teaspoon) could add a warm, cozy note that complements the dates beautifully.
FAQ (Frequently Asked Questions)
Got questions? I’ve got (casual, possibly humorous) answers!
- Can I use margarine instead of butter? Well, technically yes, but why hurt your soul like that? Butter just tastes better, plain and simple. If you must, use a high-quality stick margarine.
- What kind of dates are best? Medjool dates are the rockstars here – they’re soft, moist, and wonderfully caramel-like. But honestly, any soft, pitted date will do the trick.
- How long does this cake last? If it even *makes* it past day one (unlikely in my house!), it’ll stay fresh in an airtight container at room temperature for about 3-4 days. You can also freeze slices for up to a month.
- Do I have to add the chocolate chips? Have to? No. Should you? Absolutely! They add an extra layer of chocolatey joy. But if you’re a purist, the cake is still fantastic without them.
- My cake sank in the middle! What happened? Oh no! This usually means one of a few things: oven door opened too early, oven temperature was off, or it was underbaked. Invest in an oven thermometer, friend!
- Can I make this in a Bundt pan? You probably could, but you might need to adjust the baking time (likely longer) and make sure to grease and flour that pan *really* well to avoid sticking. A 9×13 inch pan would also work, but the cake will be thinner, and baking time will be shorter (around 20-25 mins).
Final Thoughts
There you have it! A cake so good, so easy, it should probably be illegal. This Date Chocolate Cake is truly a superstar, whether you’re impressing friends, making a special treat for family, or just having a cozy night in with a good book (and maybe a fork directly into the cake). So go on, unleash your inner baking legend! You’ve got this. Now go impress someone—or yourself—with your new culinary skills. You’ve earned it!
