So you’re craving something warm, gooey, and utterly delicious but also need it to be dairy-free because, well, reasons? And you’re hoping it doesn’t involve sacrificing your entire Saturday to a kitchen war zone? Same, friend, same. Get ready to bake some magic!
Why This Recipe is Awesome
Okay, let’s be real. Dairy-free baking can sometimes feel like a high-stakes science experiment, where one wrong move means you end up with a sad, crumbly mess instead of fluffy joy. But fear not, my culinary comrade! This dairy-free cinnamon roll recipe is so forgiving, it practically bakes itself. It’s truly idiot-proof; even I, a notorious kitchen disaster magnet, didn’t mess it up. We’re talking soft, pillowy rolls with that perfect sticky cinnamon swirl, all topped with a dreamy, dairy-free glaze. Plus, no obscure ingredients you have to trek to a specialty store for. Win-win-win!
Ingredients You’ll Need
Gather your weapons, er, ingredients, for this delicious battle!
For the Dough:
- 1 cup warm dairy-free milk: (Like oat, almond, or soy – IMO, oat milk gives the best richness!) Around 105-115°F, please, no scalding or freezing your yeast.
- 2 ¼ teaspoons active dry yeast: One standard packet. The stuff that makes magic happen.
- ¼ cup granulated sugar: Just a little sweetness to get things started.
- ½ cup melted dairy-free butter: (Plus more for greasing.) Make sure it’s fully melted, not just “soft.”
- 1 teaspoon salt: Balances everything out. Don’t skip it!
- 3 ½ – 4 cups all-purpose flour: Start with 3 ½ and add more if needed.
For the Filling:
- ½ cup melted dairy-free butter: Yes, more butter. Don’t look at me like that.
- 1 cup packed light brown sugar: The darker the better for that deep caramel flavor.
- 2 tablespoons ground cinnamon: The star of the show!
For the Icing:
- 2 cups powdered sugar: The white stuff that makes everything better.
- ¼ cup dairy-free milk: Again, oat or almond works great.
- 1 teaspoon vanilla extract: A hug in a bottle.
Step-by-Step Instructions
- Activate Your Yeast: In a large bowl, combine your warm dairy-free milk, yeast, and a tablespoon of that granulated sugar. Give it a gentle stir and let it sit for about 5-10 minutes. It should get frothy and bubbly. If it doesn’t, your yeast is probably dead. RIP. Start over!
- Mix the Wet: Add the remaining granulated sugar, melted dairy-free butter, and salt to your bubbly yeast mixture. Stir until well combined.
- Bring in the Dry: Gradually add the flour, about a cup at a time, mixing with a wooden spoon or a stand mixer with a dough hook. Once it gets too thick to stir, turn it out onto a lightly floured surface.
- Knead It Out: Knead the dough for about 5-7 minutes until it’s smooth and elastic. It should be soft but not super sticky.
- First Rise: Lightly grease a clean bowl with dairy-free butter, place the dough in it, and turn it once to coat. Cover the bowl with plastic wrap or a damp towel and let it rise in a warm place for 1-1.5 hours, or until doubled in size. This is where patience pays off!
- Roll ‘Em Out: Once risen, punch down the dough (satisfying!) and turn it out onto a lightly floured surface. Roll it into a large rectangle, roughly 12×18 inches. Don’t stress too much about perfect edges.
- Fill ‘Er Up: Spread the ½ cup of melted dairy-free butter evenly over the dough rectangle, leaving a small border on one of the long edges. In a separate small bowl, mix the brown sugar and cinnamon, then sprinkle this glorious mixture evenly over the buttered dough.
- Roll and Slice: Starting from the long edge opposite your clean border, tightly roll the dough into a log. Use a sharp knife or even unflavored dental floss (yes, really!) to slice the log into 12 even rolls, about 1 ½ inches thick.
- Second Rise & Bake: Arrange the rolls in a lightly greased 9×13 inch baking dish. Cover them again and let them rise for another 30-45 minutes, or until they look puffy. While they’re puffing, preheat your oven to 375°F (190°C).
- Bake ‘Em Golden: Bake for 20-25 minutes, or until golden brown and cooked through. Keep an eye on them!
- Whip Up the Icing: While the rolls are slightly cooling, whisk together the powdered sugar, dairy-free milk, and vanilla extract until smooth. Adjust the milk until it reaches your desired drizzly consistency.
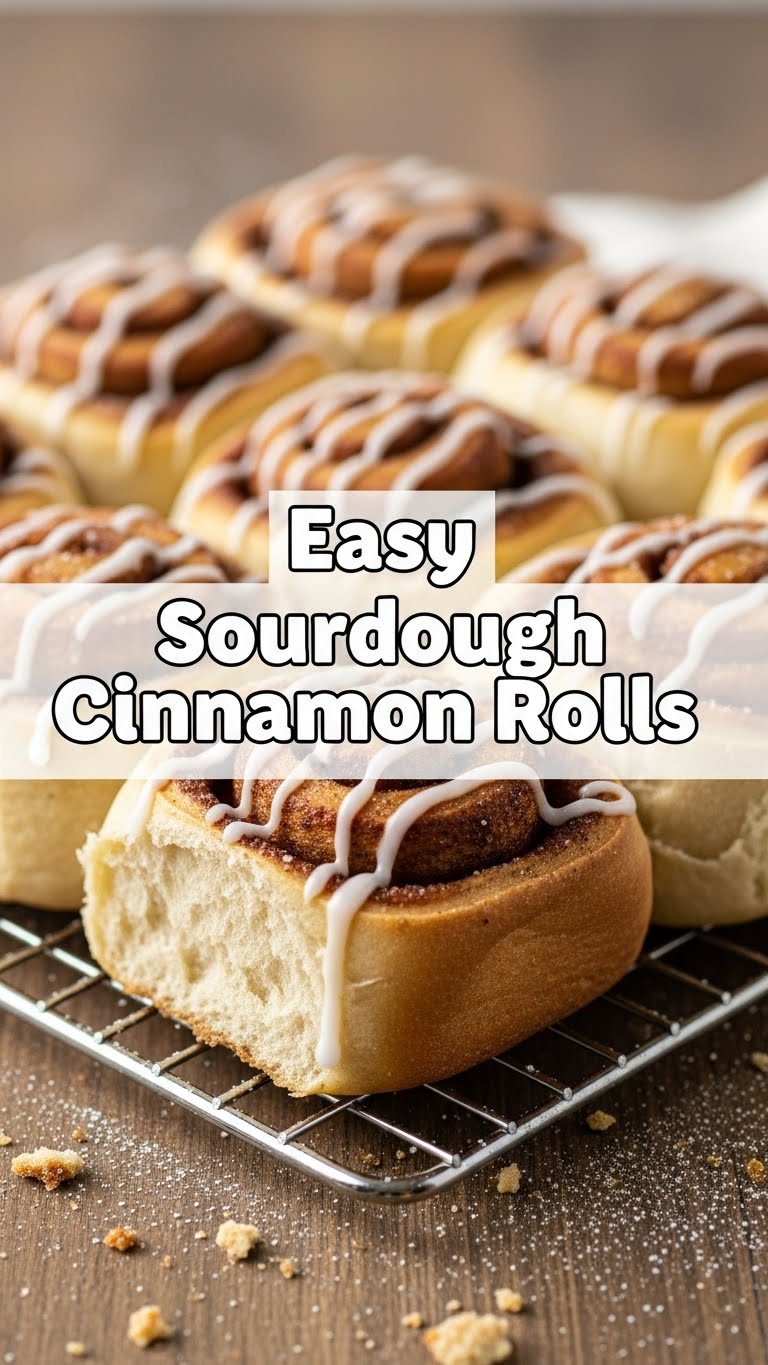
- Glaze and Devour: Drizzle that luscious icing generously over the warm cinnamon rolls. Serve immediately and prepare for pure bliss.
Common Mistakes to Avoid
- Not checking your yeast: If it doesn’t foam in step 1, your rolls will be flat. **Don’t skip the bloom test!**
- Too-hot or too-cold milk: Yeast is Goldilocks; it likes things just right. Too hot kills it, too cold won’t activate it.
- Rushing the rise: I know, you’re hungry. But dough needs its beauty sleep. **Let it rise fully for maximum fluffiness.**
- Over-flouring: Adding too much flour can make your rolls tough and dry. Start with less and add only if necessary.
- Thinking you don’t need to preheat the oven: Rookie mistake! A cold oven means uneven baking and sad rolls. **Always preheat!**
- Overbaking: Dry rolls are the worst. Keep an eye on them, they should be golden, not crispy.
Alternatives & Substitutions
Feel free to get a little wild, within reason!
- Dairy-Free Milk: Oat milk is my absolute favorite here for richness, but almond, soy, or even cashew milk work beautifully. Just avoid anything super thin or flavored.
- Dairy-Free Butter: Most stick dairy-free butters (like Miyoko’s, Earth Balance, Country Crock Plant Butter) work perfectly. For the filling, you could technically use melted coconut oil, but the flavor will be a bit different. Can I use margarine instead of butter? Well, technically yes, but why hurt your soul like that when so many great DF butters exist?
- Flour Power: Want to get a little whole-grain-y? You can substitute up to 1 cup of the all-purpose flour with whole wheat pastry flour for a slightly nuttier flavor and some added fiber. For gluten-free, use a 1:1 gluten-free baking blend that contains xanthan gum, but know that the texture might be a little different.
- Add-ins: Feel free to sprinkle some chopped pecans, walnuts, or even raisins onto the cinnamon-sugar filling before rolling. Because why not?
- Icing Variations: For a “cream cheese” style icing, whisk in 2-3 tablespoons of softened dairy-free cream cheese with your powdered sugar, milk, and vanilla. It adds a lovely tang!
FAQ (Frequently Asked Questions)
- Can I make these ahead of time? Absolutely! After placing the sliced rolls in the baking dish for their second rise, cover them tightly and pop them in the fridge overnight. In the morning, pull them out and let them come to room temperature (about 1-2 hours) before baking as usual. Genius, right?
- What if my yeast doesn’t foam? Uh oh. That means your yeast is likely expired or your milk wasn’t the right temperature. Toss it and start again with fresh yeast and carefully measured warm milk. There’s no coming back from dead yeast, sadly.
- My rolls are dry. What went wrong? Most likely, they were overbaked. Next time, pull them out when they’re just golden brown. Also, make sure you used enough dairy-free butter in the filling and not too much flour in the dough.
- Can I freeze these cinnamon rolls? Yes! You can freeze them unbaked (after the second rise, wrap tightly) and bake later, or freeze them baked and glazed. Just thaw and warm gently.
- Do I really need to knead for that long? Yes, for proper gluten development! It’s what gives your rolls that wonderfully chewy, yet tender, texture. Think of it as therapy for your arms.
Final Thoughts
There you have it, your ticket to dairy-free cinnamon roll heaven! Seriously, these are so good, even your dairy-loving friends won’t know the difference. You’ve conquered the mighty yeast, dodged common baking blunders, and now you have a pan of warm, gooey goodness ready to impress. So go ahead, treat yourself. You deserve every single bite after all that hard work (which, let’s be honest, wasn’t *that* hard). Now go impress someone—or yourself—with your new culinary skills. You’ve earned it!


