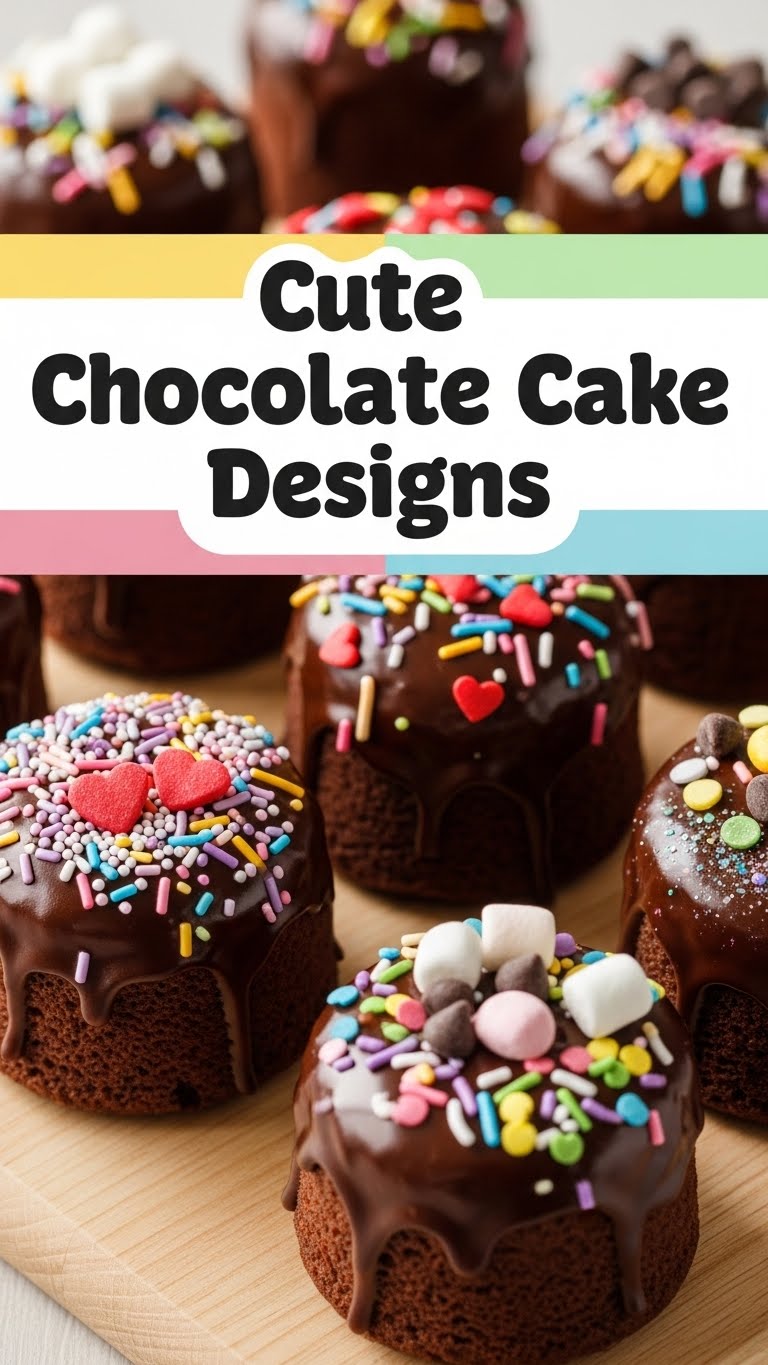
Alright, friend, let’s talk cake. Specifically, *cute* chocolate cake. Because sometimes, a plain ol’ slice just isn’t cutting it, right? We need sprinkles! We need mini marshmallows! We need something that screams “I’m adorable and delicious!” without actually having to scream. Plus, who wants to spend all day slaving away when you could be, well, eating cake?
Why This Recipe is Awesome
First off, it’s chocolate. Duh. But also, this isn’t some super-fussy, “only for professional bakers” kind of cake. This is a “I threw it together on a Tuesday and it still looks amazing” kind of cake. **Seriously, it’s practically idiot-proof.** Even if your baking skills usually result in something resembling a frisbee, you got this. Plus, it’s the perfect canvas for all your cute design ideas. Think of it as your sweet, edible stress-reliever!
And let’s be real, a cute cake just hits different. It makes you smile before you even take a bite. It’s the little burst of joy we all need. Plus, it gives you an excuse to buy all those adorable sprinkles you’ve been eyeing. You’re welcome.
Ingredients You’ll Need
For the Super Moist Chocolate Cake:
- 1 ½ cups All-Purpose Flour: The foundation of all greatness. Don’t swap this for almond flour unless you want a *very* different cake, and not in a cute way.
- 1 ½ cups Granulated Sugar: Sweetness! The more the merrier, IMO. Kidding… mostly.
- ¾ cup Unsweetened Cocoa Powder: Go for the good stuff, your taste buds will thank you. Dark cocoa powder works wonders for a deep color!
- 1 ½ tsp Baking Soda: Our fluffy lift-off agent.
- 1 tsp Baking Powder: Baking soda’s trusty sidekick for extra puff.
- 1 tsp Salt: Just a pinch, because balance makes everything better. Even chocolate cake.
- 2 Large Eggs: The binders! Room temperature, if you’re feeling fancy.
- ¾ cup Milk: Any kind works, but whole milk makes it extra rich and happy.
- ½ cup Vegetable Oil: For maximum moistness. We like moist cakes.
- 1 tsp Vanilla Extract: Adds that “je ne sais quoi.” Don’t skip it!
- ¾ cup Hot Water or Hot Coffee: Secret weapon for intensely chocolatey flavor and an even more tender crumb. Trust me on this.
For the Simple Chocolate Buttercream (The Cute Canvas!):
- ½ cup (1 stick) Unsalted Butter: Room temperature is absolutely key here. Don’t even think about cold butter.
- 2 cups Powdered Sugar: The fluffy cloud maker. Sift it if you want extra smooth frosting.
- ½ cup Unsweetened Cocoa Powder: For chocolatey frosting dreams.
- 2-4 tbsp Heavy Cream or Milk: To get that perfect, spreadable consistency. Add a little at a time!
- 1 tsp Vanilla Extract: More vanilla, why not?
Step-by-Step Instructions
Making the Cake:
- Preheat & Prep: Get your oven ready to go at 350°F (175°C). Grease and flour an 8×8 inch square pan or two 8-inch round cake pans. If you’re using rounds, line the bottoms with parchment paper for extra non-stick insurance.
- Combine Dry Ingredients: In a large bowl, whisk together the flour, sugar, cocoa powder, baking soda, baking powder, and salt. Make sure there are no lumpy bits.
- Mix Wet Ingredients: In a separate, medium bowl, whisk together the eggs, milk, vegetable oil, and vanilla extract until well combined.
- Wet Meets Dry: Pour the wet ingredients into the dry ingredients. Mix on low speed (or with a spoon) until *just* combined. **Do NOT overmix!**
- Add the Magic Liquid: Carefully pour the hot water (or coffee!) into the batter and stir until smooth. The batter will be thin, and that’s totally normal, FYI.
- Bake It Up: Pour the batter evenly into your prepared pan(s). Bake for 30-35 minutes for an 8×8 square, or 25-30 minutes for round pans, or until a toothpick inserted into the center comes out clean.
- Cool Down: Let the cake cool in the pan for about 10-15 minutes before inverting it onto a wire rack to cool completely. **Seriously, totally cool.** If you try to frost a warm cake, you’ll have a frosting disaster on your hands.
Whipping Up the Buttercream:
- Cream the Butter: In a large bowl, beat the softened butter with an electric mixer until light and fluffy. This usually takes about 2-3 minutes.
- Add the Dry Goodies: Gradually add the powdered sugar and cocoa powder, alternating with a tablespoon of heavy cream/milk. Start on low speed to avoid a sugar cloud eruption in your kitchen, then increase to medium-high.
- Vanilla & Consistency: Beat in the vanilla extract. If your frosting is too thick, add a bit more cream/milk, a teaspoon at a time, until you reach your desired fluffy, spreadable consistency. If it’s too thin, add a little more powdered sugar.
Time to Get Cute!
Once your cake is completely cool, frost it generously. Now’s the fun part! Add sprinkles, mini chocolate chips, candy eyes, crushed cookies, edible glitter, or whatever your cute-loving heart desires. The possibilities are endless!
Common Mistakes to Avoid
- Not Preheating the Oven: Thinking you’re a baking rebel and can skip preheating? **Rookie move.** Your cake will thank you for the warm welcome and bake evenly.
- Overmixing the Batter: Stirring until your arm falls off? Stop! Overmixing develops gluten, leading to a tough, dense cake. We want fluffy, not chewy.
- Opening the Oven Door Too Early: Patience, young grasshopper. Peeking before it’s set can make your cake sink in the middle. Nobody wants a sad, sunken cake.
- Frosting a Warm Cake: This is a cardinal sin of baking. Warm cake + frosting = melted, sliding mess. Don’t do it!
- Skipping the Hot Water/Coffee: While not a *mistake* per se, you’re missing out on an intensely moist and flavorful cake by leaving it out. Just sayin’.
Alternatives & Substitutions
- Milk: No cow’s milk? No problem! Almond milk, oat milk, or soy milk work great for a dairy-free option. Oat milk makes it extra creamy, IMO.
- Oil: You can use melted butter for a richer flavor, but vegetable oil often gives a moister crumb. Canola or sunflower oil are also fine.
- Cocoa Powder: If you want an even darker, less bitter chocolate cake, try using Dutch-processed cocoa powder.
- Frosting: Not feeling chocolate buttercream? A simple vanilla buttercream, cream cheese frosting (divine!), or even a quick chocolate ganache can totally elevate your cute cake game.
- Sugar: For a slightly less sweet cake, you *could* reduce the sugar by about ¼ cup, but I wouldn’t go much lower than that for optimal texture.
FAQ (Frequently Asked Questions)
Got questions? I’ve got (casual) answers!
- Can I make this dairy-free? Absolutely! Swap regular milk for your favorite plant-based milk (almond, soy, oat). For the buttercream, use dairy-free butter sticks and plant-based cream/milk. Easy peasy!
- How long does the cake last? Covered tightly at room temperature, it’s usually good for 3-4 days. In the fridge, it’ll last up to a week. If it makes it that long, that is.
- Can I use a different pan size? Yep! For cupcakes, bake for 18-22 minutes. For a 9×13 inch rectangular pan, it might take 35-40 minutes. Just keep an eye on it and use the toothpick test.
- Why is my cake dry? Did I mess up? Probably not! Most common culprits are overbaking (keep an eye on that timer!) or not adding enough liquid. Make sure your measuring cups are accurate.
- Do I really need hot water/coffee? Can I just use cold? While technically you *can* use cold, hot water/coffee helps the cocoa powder bloom, releasing its full flavor, and helps dissolve the sugar, leading to a better texture. Trust the process!
- Can I half the recipe? Sure thing! If you only want a smaller cake for one (or two, if you’re feeling generous), just halve all the ingredients.
- My frosting is too thin/thick! Help! Don’t panic! Too thin? Add a tablespoon of powdered sugar at a time until it’s right. Too thick? Add a teaspoon of cream/milk until it’s perfect. It’s all about finding that happy medium.
Final Thoughts
See? That wasn’t so scary, was it? You just made a ridiculously delicious and perfectly cute chocolate cake that’s ready for its close-up. Now go impress someone—or yourself—with your new culinary skills. Maybe treat yourself to an extra slice, you’ve earned it! Happy baking, my friend!

