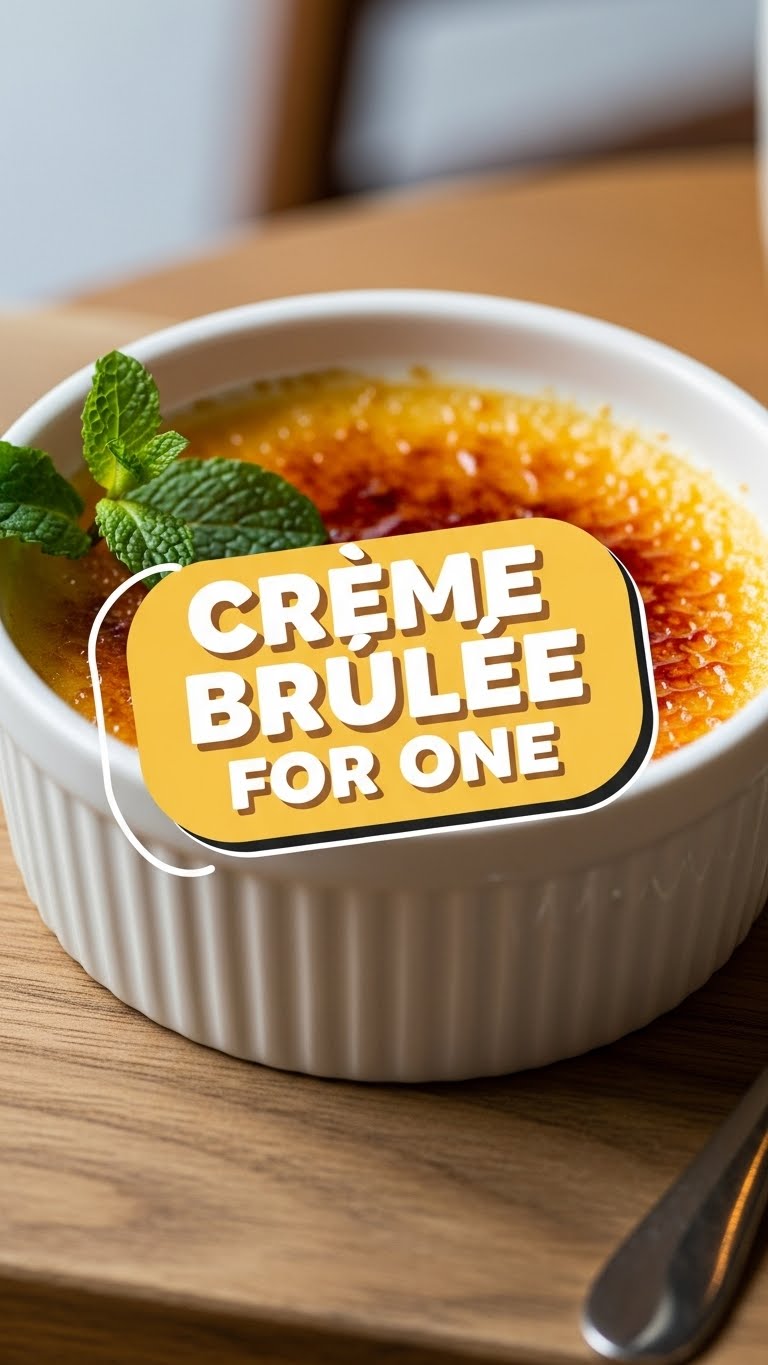
Ever have one of those days where you just *need* a fancy, decadent dessert, but the thought of sharing feels like a personal affront? Or maybe you’re just not in the mood to bake a whole cake for yourself (which, let’s be honest, you totally could). Same. Enter: Crème Brûlée for ONE. Because you deserve nice things, and also, *your* spoon, without any judgment.
Why This Recipe is Awesome
Okay, let’s be real. Crème brûlée sounds super fancy, right? Like something a chef with a tall hat and a tiny blowtorch whips up. But guess what? It’s shockingly simple, especially when you’re making just one perfect little serving. This recipe is your secret weapon for instant gratification and showing off (even if it’s just to your cat). It’s **idiot-proof**, I swear, even I didn’t mess it up! Plus, there’s minimal cleanup, which is a win in my book, any day.
Ingredients You’ll Need
Get ready for a ridiculously short shopping list. You probably have most of this on hand already, you culinary wizard!
- 1/2 cup Heavy Cream: The good stuff. No watery imposters! This is where the magic happens.
- 1 Large Egg Yolk: Just one! No messy whites left over to ponder what to do with.
- 2 Tablespoons Granulated Sugar: One for the creamy custard, and another for that glorious, crispy, torched top.
- 1/4 teaspoon Vanilla Extract: The soul of crème brûlée, IMO. Don’t skip it!
- A tiny pinch of Salt: Because even sweet things need balance to shine.
- A 4-6 oz ramekin: Gotta have somewhere to put your masterpiece.
Step-by-Step Instructions
Ready? Let’s make some deliciousness. It’s so quick, you’ll wonder why you ever hesitated.
- **Preheat your oven** to 325°F (160°C). Grab your ramekin and set it in a larger baking dish – this is for your water bath, which keeps things creamy, not scrambly.
- In a small saucepan, gently heat the heavy cream, 1 tablespoon of sugar, and the pinch of salt over medium-low heat. Stir it occasionally until it’s steamy, but **don’t let it boil!** You’ll see tiny bubbles forming around the edges. Take it off the heat.
- In a separate small bowl, whisk the egg yolk and vanilla extract together until just combined. Now, slowly, *slowly* drizzle about half of the warm cream mixture into the egg yolk, whisking constantly. This is called “tempering” and it prevents your egg from turning into scrambled breakfast in your custard.
- Pour the tempered egg mixture back into the saucepan with the remaining cream. Whisk gently until fully combined. Pour this heavenly liquid into your ramekin.
- Carefully pour hot water into the larger baking dish, surrounding the ramekin, until the water comes about halfway up the sides of the ramekin.
- Bake for 30-35 minutes. You’re looking for the edges to be set, but the center should still have a slight wobble. **Don’t overbake!**
- Once baked, carefully remove the ramekin from the water bath (use tongs, seriously, it’s hot!). Let it cool on a wire rack for about 30 minutes, then transfer it to the fridge to chill for at least 2 hours. Overnight is even better.
- When you’re ready to serve, sprinkle the remaining 1 tablespoon of sugar evenly over the chilled custard. Grab your kitchen torch (or use the broiler, see FAQ below) and torch the sugar until it melts, bubbles, and turns a gorgeous, deep amber color. Move the flame constantly to avoid burning.
- Let it sit for a minute or two for the sugar to harden, then **crack that beautiful top** with your spoon and dive in!
Common Mistakes to Avoid
Nobody’s perfect, but we can avoid these rookie blunders together!
- **Scorching the Cream:** Don’t crank up the heat on the stove. Low and slow is the name of the game here. Burned cream tastes like… well, burned cream. Yuck.
- **Scrambled Eggs (Custard Edition):** Pouring hot cream too fast into the egg yolk is a surefire way to get lumpy custard. Remember: **slow drizzle, constant whisking** for tempering!
- **No Chill, No Thrill:** Trying to torch a warm crème brûlée is like trying to ice skate uphill – it just won’t work. The cold custard helps the sugar harden into that perfect, snappy crust. **Chill time is non-negotiable.**
- **Burning the Sugar:** This happens fast! Keep your torch moving constantly and don’t get distracted. A perfectly caramelized top is amazing; a blackened, bitter top is… not.
Alternatives & Substitutions
Feeling adventurous? Or just missing an ingredient? No worries, we’ve got options!
- Vanilla Extract Swap: Out of vanilla? A tiny bit of almond extract works, or even a few drops of coffee extract for a mocha twist. You could also infuse the cream with a strip of orange or lemon zest while it heats, then remove it before tempering. Delicious!
- Sugar Type: While granulated sugar is best for the torch, you can use superfine sugar for an even quicker caramelization. Brown sugar *can* work, but it tends to burn faster and give a slightly different flavor profile – not bad, just different.
- Cream Options: This recipe truly shines with heavy cream. Half-and-half might work in a pinch but will result in a less rich, thinner custard. Skip anything lighter; it just won’t set up right.
FAQ (Frequently Asked Questions)
- **Do I *really* need a kitchen torch?** I mean, are you asking if you *need* joy in your life? Kidding! (Mostly). You *can* use your oven’s broiler, but keep a hawk’s eye on it. Place the ramekin under a preheated broiler (top rack) for literally 30 seconds to 2 minutes. It goes from perfect to charcoal in a heartbeat, so **do not walk away!**
- **Can I make this ahead of time?** Absolutely! In fact, the custard loves a good chill. Make it a day in advance, keep it covered in the fridge, and just torch it right before serving.
- **What if my custard is too runny?** You probably didn’t bake it long enough. Next time, give it a few more minutes until those edges are set and only the very center jiggles.
- **What if my sugar doesn’t get crispy?** Either your custard wasn’t cold enough, or you didn’t torch it long enough. Make sure the sugar is an even, thin layer and torch until it’s deeply amber, not just melted.
- **Can I double or triple this recipe?** For sure! Just scale up the ingredients accordingly and use more ramekins. The baking time might need a slight adjustment depending on how many ramekins you cram into your water bath, but generally, it stays pretty similar.
Final Thoughts
See? Told you it was easy peasy. Now you’ve got a fancy-pants dessert, all to yourself, without the fuss or the guilt of making a huge batch you might (or might not) finish. Go ahead, **pat yourself on the back!** You just leveled up your dessert game. Now go impress someone—or yourself—with your new culinary skills. You’ve earned it!


