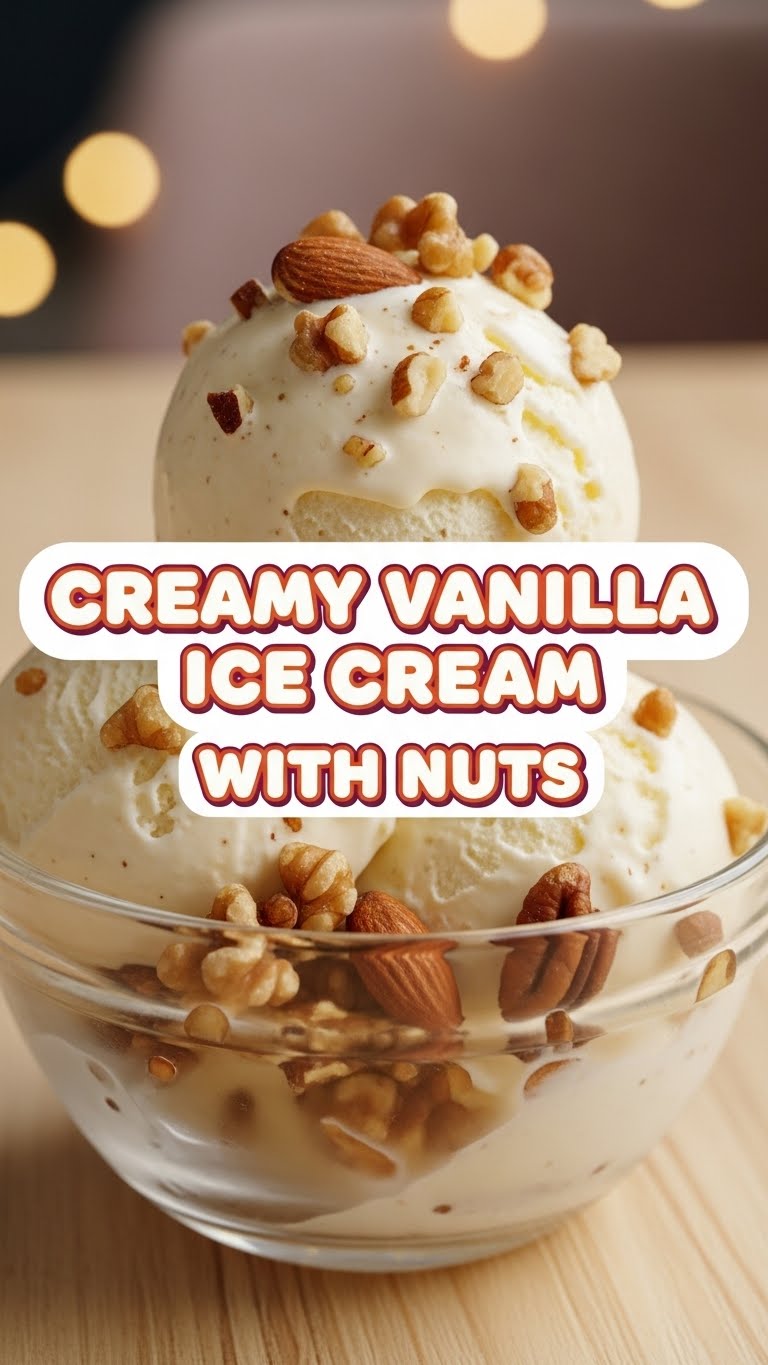
So you’re craving something tasty but too lazy to spend forever in the kitchen, huh? Same. What if I told you we could whip up some seriously creamy, dreamy vanilla ice cream, loaded with nuts, without breaking a sweat? Yeah, I know, mind blown. Get ready to impress your taste buds (and maybe a few lucky friends, if you’re feeling generous).
Why This Recipe is Awesome
Okay, first off, it’s homemade ice cream. That alone makes you a domestic god/goddess in my book. Second, it’s vanilla, which is like the little black dress of desserts – always in style, always delicious, and a perfect canvas for literally anything. And let’s not forget the nuts! That satisfying crunch is just *chef’s kiss*.
But here’s the real kicker: this recipe is practically idiot-proof. Seriously, if I can make it without setting off the smoke alarm or accidentally creating a new life form, you totally can too. No fancy equipment needed (beyond an ice cream maker, obvi), just a bit of patience and a love for all things sweet. Plus, imagine the bragging rights!
Ingredients You’ll Need
- 2 cups Heavy Cream: The MVP, the star of the show. Get the good stuff, none of that light nonsense. We’re making ice cream, not health food, okay?
- 1 cup Whole Milk: Just to balance out the richness. Think of it as heavy cream’s chill best friend.
- ¾ cup Granulated Sugar: Sweetness! Duh. Don’t skimp, unless you like sad, unsweet ice cream.
- 1 ½ teaspoons Vanilla Extract: Real vanilla, please. None of that imitation stuff unless you want your ice cream to taste like a candle. Seriously, spend the extra buck here.
- Pinch of Salt: Trust me on this one. It enhances all the other flavors. Like a secret agent for your taste buds.
- ½ cup Mixed Nuts: Your choice! Walnuts, pecans, almonds, pistachios… whatever floats your boat. Roughly chopped, ’cause who wants huge chunks of nut while trying to enjoy ice cream?
- Optional: 1-2 tablespoons of Vodka or Bourbon: Just a tiny bit, helps keep it from getting too icy. Plus, a little booze never hurt anyone… unless you drink the whole bottle, then maybe.
Step-by-Step Instructions
- Chill your ice cream maker bowl. This is crucial! Don’t skip this unless you enjoy soupy ice cream. Pop it in the freezer at least 24 hours beforehand. Consider it prep-work for future you.
- Whisk the liquids. In a large bowl, whisk together the heavy cream, whole milk, sugar, vanilla extract, and that tiny pinch of salt. Whisk until the sugar is completely dissolved. You’ll feel it – no grainy bits on the bottom.
- Taste test (optional but highly recommended). Take a tiny spoon. Does it taste good? Sweet enough? Need more vanilla? Now’s your chance to adjust. Don’t worry, you won’t spoil it.
- Pour into the chilled bowl. Carefully pour your glorious mixture into your pre-chilled ice cream maker bowl. Make sure it’s securely attached to your machine and ready to rumble.
- Churn, baby, churn! Follow your machine’s instructions, but generally, it’ll churn for about 20-30 minutes until it’s the consistency of soft-serve. Don’t overchurn! You want it soft but not runny.
- Add the nuts. In the last 5 minutes of churning, toss in your chopped nuts. Let them get mixed in nicely. This ensures they’re evenly distributed and don’t all sink to the bottom.
- Transfer and freeze. Scoop the soft ice cream into an airtight container. Press plastic wrap directly onto the surface to prevent ice crystals, then pop on the lid. Freeze for at least 4 hours, or ideally overnight, for a firmer scoop.
- Enjoy! Dig in, you magnificent ice cream wizard! You earned this.
Common Mistakes to Avoid
- Not chilling the ice cream maker bowl enough. Seriously, I can’t stress this enough. If it’s not frozen solid, your ice cream will be a runny disaster. Learn from my past mistakes, folks.
- Using low-fat dairy. Just don’t. We’re going for creamy, not ‘diet-friendly but sad.’ Embrace the fat; it’s what makes it ice cream.
- Adding nuts too early. If you add them at the very beginning, they might get too pulverized or just sit there waiting to be churned into oblivion. Last few minutes is key for good texture.
- Overfilling the ice cream maker. The mixture expands as it churns. Leave some room, or you’ll have an ice cream volcano. A delicious, but messy, volcano.
Alternatives & Substitutions
- Different Nuts: Not a fan of walnuts? No prob! Go for pecans, almonds, cashews, or even candied nuts for an extra sweet crunch. Or omit them entirely if you’re a purist, but really, why would you?
- Vanilla Bean Paste: If you want to feel fancy and get those beautiful vanilla specks, swap the extract for an equal amount of vanilla bean paste. It’s next-level delicious, IMO.
- Flavor Boosts: Want to spice things up? Add a pinch of cinnamon or cardamom to the mixture. Or, swirl in some caramel or chocolate sauce after churning for a marbled effect. The world is your oyster… or, well, your ice cream tub.
- Dairy-Free? Okay, this recipe is very dairy-focused, but you could try substituting with full-fat coconut cream and a dairy-free milk alternative. Just be aware the texture and flavor will be different. It’s a whole other adventure!
FAQ (Frequently Asked Questions)
- “Do I really need an ice cream maker?” Honestly, for the best texture, yes. It churns air into the mixture and prevents big ice crystals. You can try the ‘freeze-and-stir-every-hour’ method, but it’s a labor of love (and sometimes, frustration). Invest in one, it’s worth it!
- “My ice cream is rock hard. What gives?” A common culprit! Usually, it means there wasn’t enough fat (did you use whole milk and heavy cream, seriously?) or sugar. Or, you’re not adding that tiny splash of liquor to help with the texture. Let it sit on the counter for 10-15 minutes before scooping. Patience, young grasshopper.
- “Can I use different extracts?” Absolutely! Almond extract for a nutty twist, peppermint for a minty vibe, or even a citrus zest for a bright kick. Just remember, vanilla is the OG for a reason.
- “How long does homemade ice cream last?” If stored properly in an airtight container, it’s usually good for about 2-3 weeks. Beyond that, it might start to develop ice crystals and lose its creamy charm. But let’s be real, it won’t last that long, will it?
- “What if I don’t like nuts?” Then, my friend, simply omit them! Your ice cream, your rules. You can add chocolate chips, cookie pieces, or just enjoy it as pure, unadulterated vanilla goodness. No judgment here!
- “Is there a way to make it less sweet?” You can try reducing the sugar by a quarter cup, but be warned, it might affect the texture slightly (sugar helps prevent ice crystals). It’s a delicate balance, so adjust at your own risk!
Final Thoughts
See? That wasn’t so scary, was it? You just made yourself some epic, creamy vanilla ice cream with nuts, and you didn’t even break a sweat (unless you were really enthusiastic with the whisking). Now go impress someone – or, more realistically, just yourself – with your new culinary superpowers. You’ve earned every single scoop of this deliciousness. Go on, get scooping!

