So you’re craving something tasty but too lazy to spend forever in the kitchen, huh? Same. High five! Good news: Cream Puffs don’t need to be some complicated, chef-level magic trick. We’re about to make the easiest, fluffiest, “I can’t believe I just did that!” cream puffs, even if your baking experience extends only to microwaving popcorn. Get ready to impress yourself (and maybe your roommate/cat/significant other) with minimal effort and maximum deliciousness.
Why This Recipe is Awesome
Okay, let’s be real. We all want to look like a baking wizard without actually putting in wizard-level effort. This cream puff recipe? It’s your secret weapon.
- It’s practically idiot-proof. Seriously, if I can make these without summoning a kitchen demon, so can you.
- Quick gratification. You’re not going to spend all day on this. From zero to hero (aka, cream puff creator) in a surprisingly short amount of time.
- Impresses literally everyone. A plate of homemade cream puffs screams “I have my life together,” even if you’re wearing sweatpants and haven’t brushed your hair.
- Customizable AF. Want to get wild with fillings? Go for it! This recipe is just the launchpad for your dessert dreams.
Ingredients You’ll Need
Gather ’round, my aspiring bakers! Here’s what you need for those glorious puffs and their dreamy filling. Keep it simple, keep it real.
For the Puffs (Choux Pastry):
- 1/2 cup (1 stick) unsalted butter: The good stuff. Don’t skimp here, your taste buds will thank you.
- 1 cup water: Plain old H2O. No fancy sparkling water, please; we’re making puffs, not a soda fountain.
- 1/4 teaspoon salt: Just a pinch, to make things interesting and balance the sweetness.
- 1 teaspoon granulated sugar: A little helper for a nice golden crust.
- 1 cup all-purpose flour: Because we’re all-purpose people. No need for fancy cake flour here.
- 4 large eggs: The glue that holds our dreams (and puffs) together. Make sure they’re at room temperature for best results!
For the Whipped Cream Filling:
- 1 1/2 cups heavy cream (cold): This is where the magic happens. Make sure it’s super cold, FYI!
- 1/4 cup powdered sugar (or more, to taste): For that sweet, cloud-like filling. Adjust to your desired sweetness level.
- 1 teaspoon vanilla extract: The MVP of flavor. Go for real vanilla, not the imitation stuff, unless you’re feeling rebellious.
Step-by-Step Instructions
Alright, apron on (or not, I won’t judge), let’s get baking! These steps are easy-peasy, I promise.
Part 1: The Puffs (Pâte à Choux)
- Prep Your Stage: Preheat your oven to 400°F (200°C). Line a baking sheet with parchment paper. This is crucial for non-sticking and easy cleanup!
- Butter Up: In a medium saucepan, combine the butter, water, salt, and granulated sugar. Bring this mixture to a rolling boil over medium heat, stirring occasionally until the butter is fully melted.
- Flour Power: Remove the saucepan from the heat. Dump in all the flour at once. Stir vigorously with a wooden spoon until it forms a smooth ball of dough that pulls away from the sides of the pan.
- Cook it Down: Put the saucepan back on medium-low heat. Continue to stir the dough for another 2-3 minutes. This step helps dry out the dough, which is key for puffy puffs! You should see a thin film on the bottom of the pan.
- Egg-cellent Addition: Transfer the dough to a large mixing bowl (or a stand mixer with the paddle attachment). Let it cool for about 5 minutes – you don’t want to scramble your eggs! Add the eggs one at a time, beating well after each addition until fully incorporated. The dough might look curdled at first, but keep mixing; it will come together into a smooth, thick, glossy batter.
- Pipe It Up: Spoon the dough into a piping bag fitted with a large round tip (or just snip off the corner of a Ziploc bag, no judgment!). Pipe 1.5-2 inch mounds onto your prepared baking sheet, leaving some space between them. If you don’t have a piping bag, you can totally use two spoons to drop dollops of dough.
- Bake ‘Em High: Bake for 20 minutes at 400°F (200°C), then reduce the oven temperature to 350°F (175°C) and continue baking for another 20-25 minutes, or until they are deeply golden brown and firm. Do not open the oven door during the first 20 minutes! This is super important; it’s how they puff up!
- Cool Down: Once baked, turn off the oven, crack the door open slightly, and let the puffs cool in the oven for about 15-20 minutes. This helps prevent them from deflating. Then, transfer them to a wire rack to cool completely.
Part 2: The Whipped Cream Filling
- Whip It Good: In a large, very cold bowl (you can chill it in the freezer for a few minutes), combine the cold heavy cream, powdered sugar, and vanilla extract.
- Peak Performance: Using an electric mixer (or some serious arm muscle), beat on medium-high speed until the cream forms stiff peaks. You want it firm enough to hold its shape. Don’t overmix, or you’ll get butter!
Part 3: Assemble & Devour
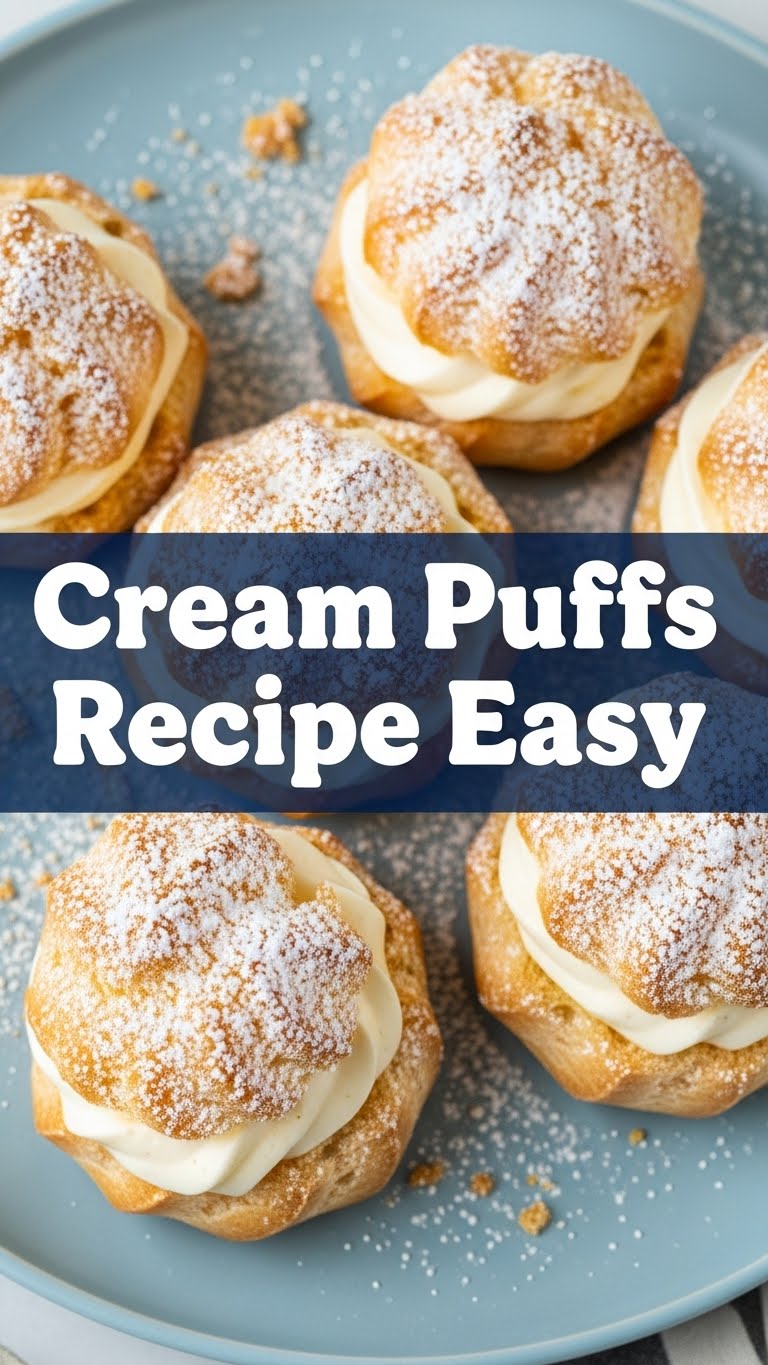
- Slice ’em: Once the cream puffs are completely cool, carefully slice them in half horizontally using a serrated knife.
- Fill ’em: Spoon or pipe the whipped cream into the bottom half of each puff. Top with the other half.
- Optional Drizzle: Dust with a little extra powdered sugar, or drizzle with melted chocolate if you’re feeling extra fancy.
- Eat ’em: Serve immediately and bask in the glory of your homemade deliciousness!
Common Mistakes to Avoid
Nobody’s perfect, especially in the kitchen. Here are a few traps to sidestep to ensure your cream puff glory:
- Opening the Oven Door Too Early: This is literally a puff’s worst nightmare. Resist the urge! Opening the door before the choux pastry is set will cause your beautiful puffs to deflate faster than a politician’s promises.
- Not Drying Out the Dough Enough: When you’re stirring the flour mixture on the stove, make sure to cook it for those extra few minutes until a film forms. If your dough is too wet, your puffs will be sad and soggy.
- Adding Eggs Too Fast: Patience, young grasshopper. Add those eggs one at a time and beat well. If you dump them all in, you risk a scrambled mess instead of a smooth, glossy dough.
- Not Cooling the Dough Before Adding Eggs: Ever heard of scrambled eggs? Yeah, you don’t want that in your choux. Let the dough cool for a few minutes first.
- Underbaking: If your puffs aren’t deeply golden brown and firm, they’ll likely collapse. Don’t pull them out too soon! They need that crisp exterior to hold their shape.
Alternatives & Substitutions
Feeling a little adventurous? Or just missing an ingredient? No worries, we’ve got options!
- Filling Fun: Instead of classic whipped cream, why not try a luscious pastry cream (crème pâtissière)? Or fill them with a scoop of your favorite ice cream for a summery treat. Nutella cream? Yes, please!
- Flavor Boosts: Add a teaspoon of cocoa powder to the flour when making the dough for chocolate puffs. Or, switch up the vanilla extract in the whipped cream for almond, peppermint, or even a splash of liqueur like Grand Marnier for an adult twist.
- Sweetness Control: The amount of powdered sugar in the whipped cream is totally adjustable. Want it less sweet? Dial it back. Got a super sweet tooth? Go wild!
- Butter vs. Margarine: Can you use margarine instead of butter? Well, technically yes, but why hurt your soul like that? Butter truly gives the best flavor and texture. Stick with the good stuff if you can!
FAQ (Frequently Asked Questions)
Got questions? I’ve got (casual) answers!
- Can I make the dough ahead of time? You bet! You can make the choux pastry dough and refrigerate it for up to 2-3 days. Just bring it to room temperature before piping and baking.
- Why are my cream puffs flat and sad? Ah, the deflated puff dilemma! Usually, this means you opened the oven door too soon, didn’t dry out the dough enough, or pulled them out before they were fully baked and set. Be patient!
- Can I freeze cream puffs? Absolutely! You can freeze the baked (but unfilled) cream puffs for up to a month. Just pop them in an airtight container or freezer bag. When ready to eat, thaw and then crisp them up in a 300°F (150°C) oven for about 5-10 minutes before filling.
- What if I don’t have a piping bag? No problem! A sturdy Ziploc bag with a corner snipped off works perfectly. Or, just use two spoons to scoop and drop the dough onto your baking sheet. They might not be perfectly round, but they’ll taste just as amazing!
- My dough is too runny, help! If your dough is too wet after adding the eggs, it means your eggs were probably too large, or you didn’t dry out the dough enough in step 4. Unfortunately, it’s hard to fix once the eggs are in. For next time, try using slightly smaller eggs or adding the last egg a little at a time, checking the consistency.
- Can I use regular granulated sugar in the whipped cream? You can, but powdered sugar (confectioners’ sugar) is better because it dissolves more easily, giving you a smoother, less gritty cream. Plus, it often contains cornstarch, which helps stabilize the whipped cream.
Final Thoughts
You did it! You conquered the mighty (but secretly easy) cream puff. Give yourself a pat on the back, because you’ve just whipped up something truly impressive. These little clouds of joy are proof that you don’t need to be a Michelin-star chef to create something utterly delicious and beautiful. Now go impress someone—or yourself—with your new culinary skills. You’ve earned it! Seriously, go eat one (or five). You deserve it, champ.


