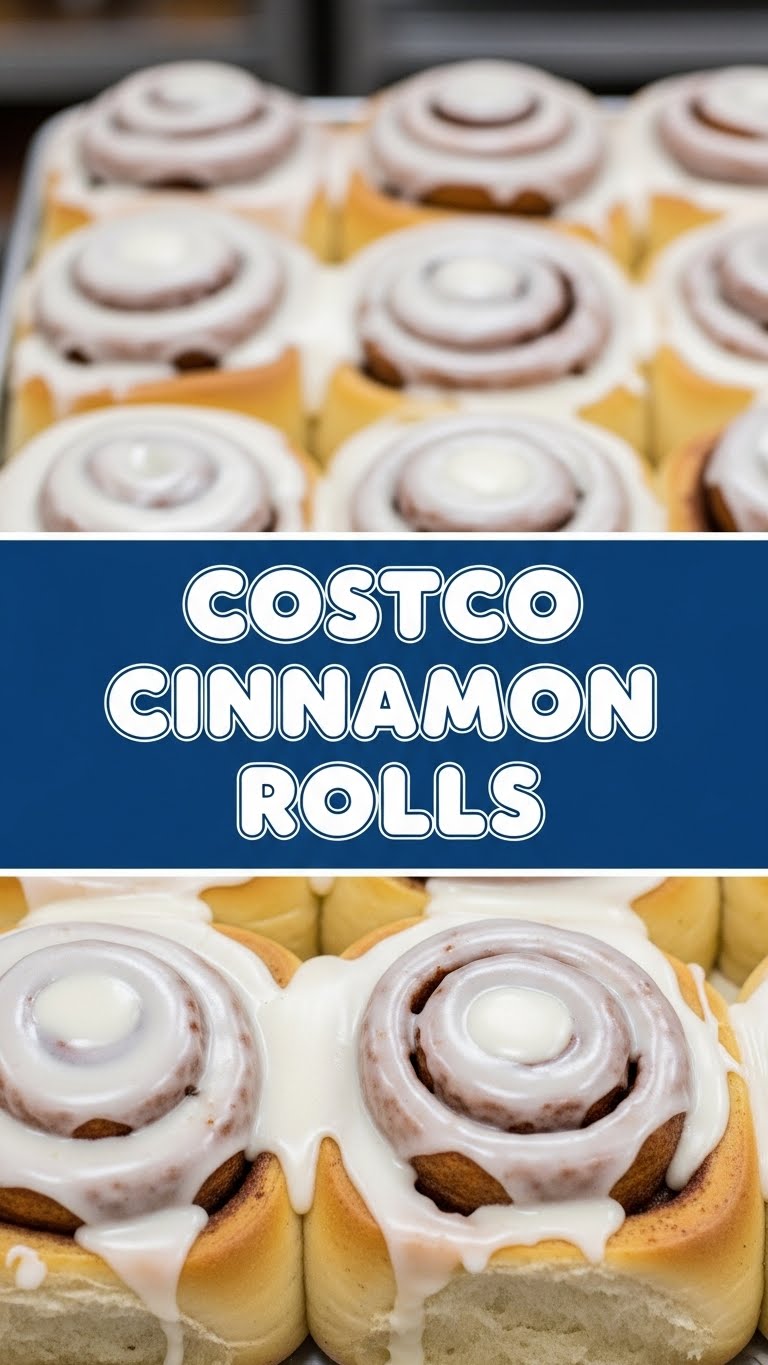
So, you’re craving something warm, gooey, and utterly delicious, but the thought of battling the Costco parking lot *just* for their colossal cinnamon rolls gives you hives? Been there, done that, bought the oversized cart. What if I told you that you could whip up something just as good (dare I say, better?) in your own kitchen without the existential dread of bulk shopping? Yeah, I know, mind blown. Let’s make some magic, friend!
Why This Recipe is Awesome
Okay, let’s get real. This isn’t just *another* cinnamon roll recipe. This is THE cinnamon roll recipe for people who want maximum deliciousness with minimum fuss. Think of it as your secret weapon against bland mornings and sad snack attacks. It’s so straightforward, even my cat could probably supervise it (and she mostly just judges my life choices). Here’s why you’ll love it:
- It’s practically idiot-proof. Seriously, if I didn’t mess it up, you won’t. The dough is forgiving, the filling is simple, and the icing? Well, it’s icing.
- The smell alone is worth the effort. Your house will smell like a warm, sugary hug, and honestly, that’s half the battle won.
- No judgment for eating three. You made them, you eat them. It’s the rule.
- Bragging rights! “Oh, these? Just some little something I whipped up.” (Cue mic drop.)
Ingredients You’ll Need
Gather your troops, folks! These are the heroes of our sticky, sweet saga. Nothing too fancy, just good old-fashioned comfort food staples.
For the Dough:
- 1 cup warm milk (105-115°F/40-46°C): Not too hot, not too cold. Think a cozy bath temperature for your yeast.
- 2 ¼ teaspoons active dry yeast: One packet, basically. The little guys that make the magic happen.
- ¼ cup granulated sugar: A little sweetness for the dough, because why not?
- 1 large egg: Room temp is best, it mixes better. Don’t be a stranger to patience.
- ¼ cup unsalted butter, melted: Liquid gold. Don’t burn it, that’d be tragic.
- 1 teaspoon salt: Enhances all the other flavors. Don’t skip it!
- 3-3 ½ cups all-purpose flour: The backbone of our rolls. Start with 3, add more if needed.
For the Filling:
- ½ cup unsalted butter, softened: Needs to be spreadable, like a dream.
- ½ cup packed light brown sugar: Dark brown works too if you like a deeper molasses flavor.
- 1 tablespoon ground cinnamon: The star of the show! Don’t skimp here.
For the Icing:
- 4 ounces cream cheese, softened: The secret to that tangy, irresistible frosting.
- ¼ cup unsalted butter, softened: Because everything’s better with butter.
- 1 ½ cups powdered sugar: Sift it if you’re feeling fancy (or want to avoid lumps).
- ½ teaspoon vanilla extract: A must for that warm, cozy flavor.
- 1-2 tablespoons milk (or heavy cream): To get that perfect drizzly, spreadable consistency.
Step-by-Step Instructions
Alright, apron on, “pump-up” playlist ready! Let’s do this.
Activate the Yeast: In a large bowl, whisk the warm milk, yeast, and sugar. Let it sit for about 5-10 minutes until it gets nice and frothy. If it doesn’t foam, your yeast might be dead. RIP. Start over.
Mix the Dough: Add the egg, melted butter, and salt to the yeast mixture. Stir it all up. Gradually add 3 cups of flour, mixing until a shaggy dough forms. If it’s too sticky, add the remaining flour a little at a time.
Knead It Out: Turn the dough out onto a lightly floured surface. Knead for 5-7 minutes until it’s smooth and elastic. It should spring back when you poke it. Consider this your arm workout for the day.
First Rise: Place the dough in a lightly greased bowl, turning it once to coat. Cover with plastic wrap or a damp towel and let it rise in a warm place for 1-1 ½ hours, or until doubled in size. This is where patience pays off!
Prep the Filling: While the dough rises, combine the softened butter, brown sugar, and cinnamon in a small bowl. Mix until well combined. Set aside.
Roll It Out: Once risen, punch down the dough to release the air (satisfying, right?). On a lightly floured surface, roll it into a large rectangle, about 12×18 inches. Aim for an even thickness.
Spread the Love: Evenly spread the cinnamon-sugar mixture over the entire surface of the dough, leaving a small border (about ½ inch) on one long edge. You need that edge to seal later.
Roll ‘Em Up: Starting from the long edge *opposite* the bare one, tightly roll the dough into a log. Pinch the seam gently to seal it up. Don’t be afraid to be firm here!
Slice and Dice: Using a sharp knife or, even better, unflavored dental floss (seriously, it gives clean cuts!), slice the log into 12 equal pieces, about 1 ½ inches thick. Place them in a lightly greased 9×13 inch baking dish.
Second Rise: Cover the baking dish and let the rolls rise again in a warm place for another 30-45 minutes, or until they look puffy and have almost doubled in size.
Bake ‘Em: While they’re on their second rise, preheat your oven to 375°F (190°C). Bake the rolls for 20-25 minutes, or until golden brown and cooked through. **Don’t overbake!** A slightly gooey center is the goal.
Whip Up the Icing: While the rolls are baking, combine all the icing ingredients in a bowl. Beat with an electric mixer until smooth and creamy. Add more milk if you want a thinner icing.
Frost and Devour: Once the rolls come out of the oven, let them cool for just 5-10 minutes. Then, slather on that glorious cream cheese icing. Don’t be shy! Serve warm and watch them disappear.
Common Mistakes to Avoid
We’ve all been there, staring at a culinary disaster and wondering “what went wrong?” Here are a few pitfalls to steer clear of:
- Killer Yeast: Using water that’s too hot will kill your yeast, and then nothing will rise. Too cold, and it won’t activate. **Goldilocks temperature is key.**
- Under-Kneading: Your dough won’t develop enough gluten, making your rolls tough instead of tender. Knead until it’s smooth and elastic, **don’t give up too soon!**
- Over-Flouring: Adding too much flour results in dry, dense rolls. Start with the lower amount and only add more if the dough is still super sticky.
- Skimping on Rise Time: If your rolls don’t look puffy and happy, they need more time. **Patience, young grasshopper.**
- Overbaking: Dry cinnamon rolls are a crime. Pull them out when they’re golden brown and slightly jiggly in the middle.
- Cutting with a Dull Knife: This squishes your beautiful spirals. Use a sharp knife or dental floss for **clean, crisp cuts.**
Alternatives & Substitutions
Feeling a little adventurous, or just realized you’re out of one tiny ingredient? No stress, we’ve got options!
- Dairy-Free Dough: Swap out regular milk for almond or oat milk, and use a plant-based butter alternative. Just make sure the plant-based butter is good for baking!
- Spice It Up: Add a pinch of nutmeg, cardamom, or even a tiny bit of cloves to your cinnamon filling for extra warmth and complexity. Don’t go wild, though, we’re not making potpourri.
- No Cream Cheese Icing? No Problem: If cream cheese isn’t your jam, or you just don’t have it, you can make a simple glaze with just powdered sugar, vanilla, and milk. It’s still delicious, just less tangy.
- Add-Ins: Feeling extra? Sprinkle some chopped pecans or walnuts over the cinnamon filling before rolling. Raisins or dried cranberries can also be a nice touch if you’re into that.
FAQ (Frequently Asked Questions)
Got questions? I’ve got (casual, probably sarcastic) answers!
Can I make these ahead of time?
Absolutely! After placing the sliced rolls in the baking dish for their second rise, cover them tightly with plastic wrap and pop ’em in the fridge overnight. In the morning, pull them out an hour or so before baking to let them come to room temp and get a final puff. Genius, right?
What if my yeast doesn’t foam?
Uh oh. Your yeast is probably dead. It happens! Old yeast, too hot/cold water, or expired packets are usually the culprits. **Don’t proceed with dead yeast**, just grab new yeast and try again. It’s not you, it’s the yeast.
Can I use margarine instead of butter?
Well, technically yes, but why hurt your soul like that? Butter just tastes better, IMO. But hey, if margarine is all you have, it’ll work. Just don’t expect the same rich flavor.
How long do these glorious rolls last?
Freshly baked and frosted, they’re best on day one. You *can* store them in an airtight container at room temp for 2-3 days, or in the fridge for up to a week. They might get a little drier, but a quick zap in the microwave fixes everything.
Can I freeze them?
You betcha! You can freeze the baked and frosted rolls (individually wrapped) for up to 1-2 months. Or, you can freeze the unbaked, sliced rolls in the pan. Thaw overnight in the fridge, then let rise at room temp before baking. Future you will thank past you.
What kind of flour should I use?
All-purpose flour is your best friend here. Bread flour can make them a bit chewier, which some people love, but for that classic soft, tender roll, AP is the way to go.
Final Thoughts
See? You just made a batch of ridiculously good cinnamon rolls without a single trip to a crowded warehouse store. Give yourself a pat on the back – you earned it! These rolls aren’t just a treat; they’re a testament to your newfound (or rediscovered) baking prowess. So go ahead, impress your friends, spoil your family, or just hoard them all for yourself (no judgment here). You’ve leveled up your baking game, my friend. Now go forth and conquer those cravings!


