So you’re craving something warm, comforting, and ridiculously easy to make, but your brain is already tired from just *thinking* about cooking, huh? Same, friend, same. That’s where this Corn Pudding Casserole swoops in like a delicious superhero with a buttery cape. It’s the kind of dish that whispers, “Hey, I taste fancy, but I took zero effort.”
Why This Recipe is Awesome
Let’s be real, some recipes demand a level of culinary precision usually reserved for brain surgeons. Not this one! This corn pudding casserole is so utterly foolproof, I’m pretty sure my cat could make it (if she had opposable thumbs and an interest in anything other than naps). It’s basically a dump-and-stir situation that results in a creamy, dreamy, slightly sweet, slightly savory side dish that’ll steal the show at any potluck or dinner table. Plus, it uses canned ingredients, which means less chopping and more chilling. You’re welcome.
Ingredients You’ll Need
Gather ’round, fellow culinary enthusiasts (or just hungry people). Here’s what you’ll need to whip up this magic:
- **1 can (15 oz) whole kernel corn, drained:** Because convenience is our middle name.
- **1 can (15 oz) cream-style corn:** This is where the “pudding” part really shines. Don’t skip it!
- **1 cup sour cream:** For that glorious tang and creamy texture. Full fat, please. We’re not counting calories here, we’re making memories.
- **1/2 cup (1 stick) unsalted butter, melted:** Because everything is better with butter. Seriously, don’t argue.
- **2 large eggs, lightly beaten:** Our trusty binders, holding all that deliciousness together.
- **1/4 cup granulated sugar:** Just enough to bring out the natural sweetness of the corn without making it dessert. Unless you want it to be… no judgment!
- **2 tablespoons all-purpose flour:** Our secret thickening agent.
- **1/2 teaspoon salt:** To wake up all those flavors. Don’t forget it!
- **Pinch of black pepper:** Optional, but I like a little kick.
Step-by-Step Instructions
Alright, apron on (or not, we’re chill). Let’s get this party started!
- **Preheat Your Oven:** Set your oven to a cozy **350°F (175°C)**. While it’s heating up, grab a 2-quart baking dish and give it a quick spray with non-stick cooking spray. Don’t be a hero and skip this; nobody likes scrubbing stuck-on casserole.
- **Combine the Wet Stuff:** In a large mixing bowl, gently whisk together your drained whole kernel corn, cream-style corn, sour cream, melted butter, and lightly beaten eggs. Get it all happy and mixed.
- **Whisk the Dry Bits:** In a separate, smaller bowl (or just sprinkle directly over the wet ingredients if you’re feeling wild), combine the sugar, flour, salt, and pepper. Give ’em a quick stir to banish any lumps.
- **Marry Them Together:** Add the dry ingredient mixture to the wet corn mixture. Stir until just combined. **Don’t overmix!** We’re not making bread, we’re making pudding. A few lumps are totally fine.
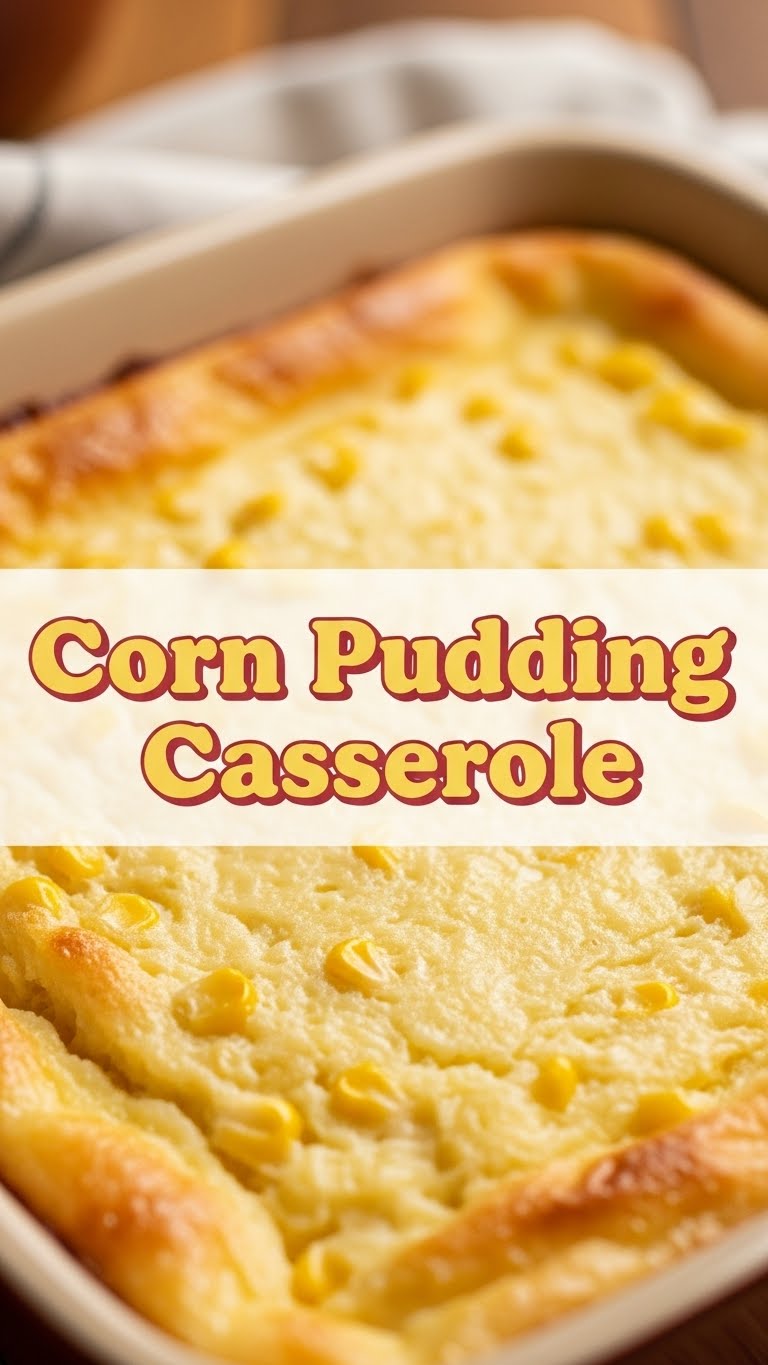
- **Pour & Bake:** Pour that glorious concoction into your prepared baking dish. Pop it into your preheated oven and bake for **45-60 minutes**. You’re looking for a beautiful golden-brown top and a casserole that’s set in the center (no jiggles when you gently shake it).
- **Cool & Devour:** Once it’s baked to perfection, pull it out and let it cool for about 10 minutes before serving. This lets it set up a bit more and prevents you from burning your tongue off in sheer excitement.
Common Mistakes to Avoid
Even though this recipe is basically goof-proof, there are a few rookie errors that can derail your deliciousness. Learn from my past mistakes, folks!
- **Not Preheating the Oven:** Rookie mistake! Cold ovens lead to uneven baking and sad, soggy bottoms. Always preheat, **FYI**.
- **Overmixing:** Remember when I said “just combine”? I meant it. Overmixing develops gluten in the flour, which can lead to a tougher, less “pudding-like” texture.
- **Forgetting the Salt:** It seems small, but salt is a flavor enhancer! Without it, your corn pudding might taste… flat. Don’t let your casserole be a bland hero.
- **Baking Too Long/Not Long Enough:** Keep an eye on it. If it’s still super jiggly after the suggested time, give it a few more minutes. If it looks dry and shrunken, you probably overbaked it.
Alternatives & Substitutions
Feeling creative? This recipe is super flexible! Here are a few ways to tweak it:
- **Spice it Up:** Add a diced jalapeño (seeds removed for less heat, or left in if you’re brave) for a little kick. A pinch of cayenne pepper works wonders too!
- **Cheesy Goodness:** Stir in 1/2 cup of shredded cheddar or Monterey Jack cheese with the wet ingredients. Because cheese makes everything better, IMO.
- **Herbalicious:** A tablespoon of fresh chopped chives or parsley can add a nice, fresh note.
- **Sweet or Savory?** If you prefer it less sweet, reduce the sugar to 2 tablespoons. If you want it sweeter (like a dessert!), bump it up to 1/3 cup and maybe add a touch of vanilla extract.
FAQ (Frequently Asked Questions)
- **Can I use fresh or frozen corn instead of canned?** Absolutely! Just make sure it’s thawed (if frozen) and well-drained. You’ll need about 3 cups total.
- **Can I make this ahead of time?** You bet! Assemble everything, pour it into the dish, cover it, and refrigerate for up to 24 hours. When you’re ready to bake, add an extra 10-15 minutes to the cooking time.
- **My corn pudding is watery, what happened?** Usually, this means the corn wasn’t drained well enough or it wasn’t baked long enough. Make sure that center is set!
- **Can I use margarine instead of butter?** Well, technically yes, but why hurt your soul like that? Butter just tastes better, period. Don’t skimp on flavor here!
- **How do I know when it’s done?** The top should be golden brown, and if you gently jiggle the dish, the center should be mostly set with just a tiny bit of wobble. A knife inserted into the center should come out mostly clean.
- **What size baking dish do I need?** A 2-quart baking dish (like an 8×8 or 9×9 inch square dish) is ideal for this recipe.
Final Thoughts
And there you have it! A Corn Pudding Casserole that’s ridiculously simple, incredibly delicious, and guaranteed to impress. Whether you’re making it for a holiday, a weeknight dinner, or just because you deserve something comforting, this recipe has your back. Now go impress someone—or yourself—with your new culinary skills. You’ve earned it!


