So, you’ve got a couple of sad-looking bananas on your counter, a sweet tooth that won’t quit, and exactly zero motivation to whip up something complicated? My friend, you’ve come to the right place. Because today, we’re making Condensed Milk Banana Bread – and trust me, it’s easier than trying to explain cryptocurrency to your grandma.
Why This Recipe is Awesome
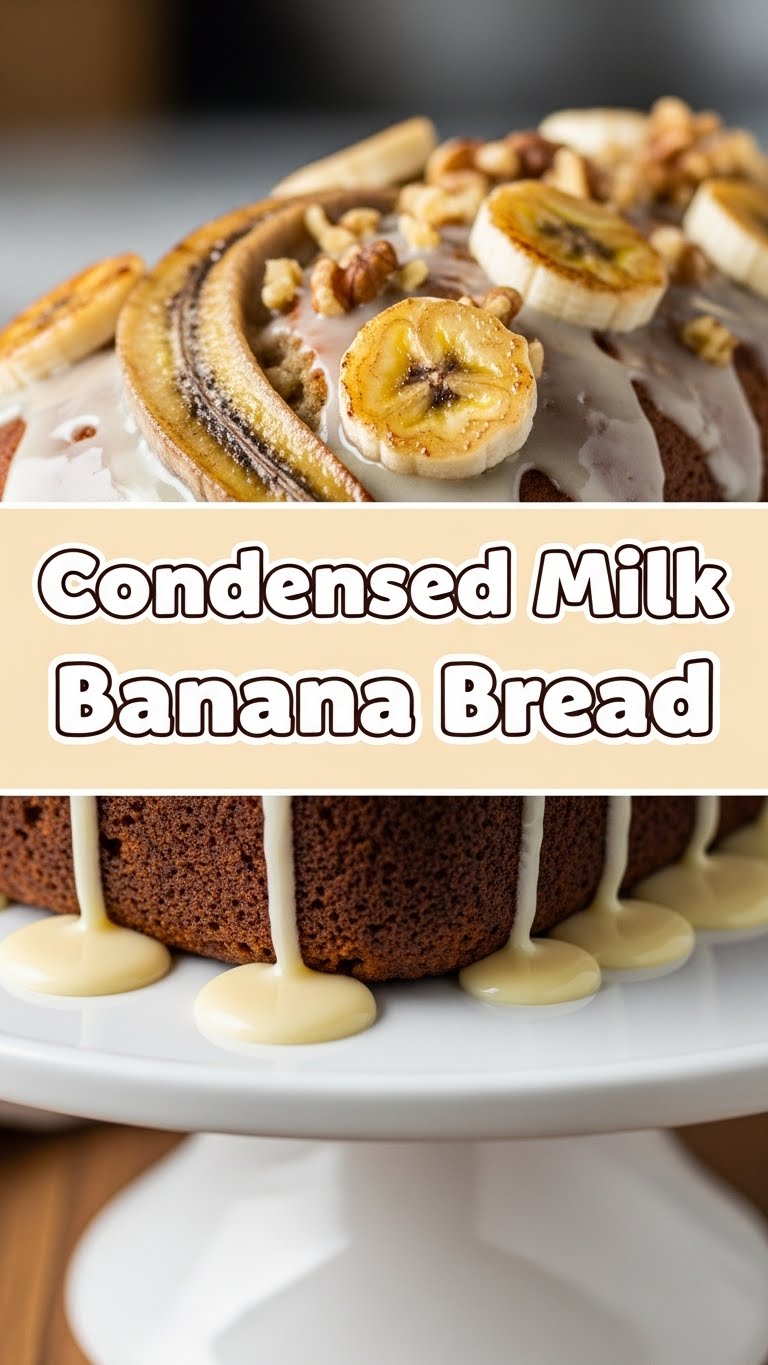
Okay, let’s be real. There are a million banana bread recipes out there. So why this one? Two words: CONDENSED. MILK. This stuff is basically liquid gold, ensuring your banana bread is incredibly moist, sweet, and unbelievably tender. Plus, it’s pretty much fail-proof. Seriously, if I can make this without burning down the kitchen, you definitely can.
It’s the kind of recipe that makes you look like a domestic god/goddess without breaking a sweat. Perfect for impressing guests, or just yourself on a Tuesday afternoon when the craving hits. It’s a hug in bread form, and who doesn’t need more of those?
Ingredients You’ll Need
- 3 ripe bananas: The riper, the better. We’re talking brown spots, folks. Don’t be shy.
- 1 can (14 oz) sweetened condensed milk: The star of the show! Don’t even think about grabbing evaporated milk. They’re not the same, promise.
- 1/2 cup (1 stick) unsalted butter: Melted, because nobody likes solid lumps in their batter.
- 1 large egg: Room temp if you’re feeling fancy, but straight from the fridge works too.
- 1 teaspoon vanilla extract: Because vanilla makes everything better. It’s just science.
- 1 1/2 cups all-purpose flour: No need for anything fancy here.
- 1 teaspoon baking soda: Our trusty leavening agent. Helps it get all fluffy.
- 1/2 teaspoon salt: Balances out all that sweetness. A little goes a long way.
- Optional add-ins: Chocolate chips, chopped nuts (walnuts or pecans are great), a sprinkle of cinnamon. Go wild! Or don’t. Your call.
Step-by-Step Instructions
- Preheat & Prep: Get your oven going to 350°F (175°C). Seriously, preheat it. Grease and flour a 9×5 inch loaf pan. Or line it with parchment paper if you’re feeling extra fancy.
- Mash ‘Em Up: In a medium bowl, mash those ripe bananas with a fork until they’re mostly smooth, with a few small lumps. We like texture!
- Wet Ingredients Party: Add the melted butter, condensed milk, egg, and vanilla extract to the mashed bananas. Whisk it all together until it’s well combined and looks delightfully gooey.
- Dry Mix Fun: In a separate bowl, whisk together the flour, baking soda, and salt. Make sure there are no lumpy bits.
- Combine Forces: Gently fold the dry ingredients into the wet ingredients. Don’t overmix! A few streaks of flour are totally fine. Overmixing makes tough bread, and we don’t want tough bread. If you’re using chocolate chips or nuts, now’s the time to fold them in.
- Into the Pan: Pour the batter into your prepared loaf pan. Give it a gentle tap on the counter to settle it.
- Bake It Up: Pop it into your preheated oven and bake for 50-60 minutes. How do you know it’s done? A toothpick inserted into the center should come out clean, or with just a few moist crumbs.
- Cool Down: Once baked, let it cool in the pan for about 10-15 minutes. Then, carefully transfer it to a wire rack to cool completely. Resist the urge to cut into it immediately! (Though, who are we kidding? A warm slice is pure bliss.)
Common Mistakes to Avoid
- Using under-ripe bananas: Green bananas? Just don’t. Your bread will lack flavor and sweetness. Wait for those brown spots!
- Overmixing the batter: This is probably the number one banana bread killer. Mix just until combined. Lumps of flour are better than a tough loaf.
- Not preheating your oven: Seriously, do it. Your baked goods will thank you. Otherwise, your bread won’t rise properly. Rookie mistake!
- Impatience: Don’t open the oven door every five minutes. Let it bake! And let it cool a bit before slicing, or it might crumble.
- Confusing condensed milk with evaporated milk: I know, they’re both in cans. But they are not interchangeable. Condensed milk is sweet; evaporated milk is not. Get the right one!
Alternatives & Substitutions
- Butter: You could use vegetable oil or margarine, but honestly, butter just gives it that rich, irresistible flavor. Don’t skimp on the good stuff unless you really have to.
- Flour: All-purpose is great, but you can totally do a 50/50 mix with whole wheat flour if you’re trying to feel healthier (it’s still banana bread, FWIW).
- Add-ins: Get creative! Shredded coconut, dried cranberries, a swirl of peanut butter, or even a cream cheese swirl are all fantastic. Chocolate chips are my personal MVP.
- No loaf pan?: A muffin tin works! Just reduce the baking time to about 20-25 minutes. Mini loaves are also super cute.
FAQ (Frequently Asked Questions)
- My bananas aren’t ripe enough! What do I do?: Quick trick: bake them in their peels at 300°F (150°C) for 15-20 minutes until they’re black and soft. Let them cool, then mash. Voila! Instant ripe bananas.
- Can I reduce the sugar since condensed milk is so sweet?: This recipe relies on the sweetness of the condensed milk. Adding extra sugar isn’t typically needed. If you want less sweet, maybe try a different recipe. This one is for sweet lovers!
- How long does it last?: Stored in an airtight container at room temperature, it’s good for 3-4 days. In the fridge, up to a week.
- Can I freeze it?: Absolutely! Wrap slices or the whole loaf tightly in plastic wrap, then foil. It’ll keep for up to 3 months. Thaw at room temperature. Pro tip: heat a slice in the microwave for 15-20 seconds before eating for ultimate coziness.
- What if I don’t have baking soda? Can I use baking powder?: Baking soda and baking powder react differently. While you can sometimes substitute, it’s not ideal for this recipe. Stick to baking soda for the best results.
- My bread turned out dry. What happened?: Likely overbaked or overmixed. Keep an eye on that baking time, and remember to mix just until combined. Did you use green bananas? That can also be a culprit!
Final Thoughts
There you have it, folks! Your new go-to banana bread recipe that’s ridiculously easy and even more ridiculously delicious. Go forth, bake some magic, and bask in the glory of your sweet-smelling kitchen. Now go impress someone—or yourself—with your new culinary skills. You’ve earned it! Don’t forget to grab a cuppa and enjoy your masterpiece. You deserve it.


