So you’re craving something cool, sweet, and ridiculously easy but don’t want to feel like you’ve just run a marathon in the kitchen, huh? Been there, bought the T-shirt. Good news, my friend! I’ve got a recipe that’s about to become your new bestie: Colorful Frozen Yogurt with Gummy Candies. It’s basically a party in a bowl, and the only hard work involved is trying to decide which gummy candy to use. (Spoiler: use all of them!)
Why This Recipe is Awesome
Seriously, if you can open a container and press a button, you’ve got this. It’s practically idiot-proof. Even *I* didn’t mess it up, and my cooking adventures usually involve calling the fire department (kidding… mostly). This recipe is not just easy, it’s also incredibly customizable, vibrant, and packed with that nostalgic joy only gummy candies can bring. Plus, it’s a fantastic way to cool down on a hot day or just satisfy that persistent sweet tooth without turning on your oven. **Minimal effort, maximum reward.** That’s our motto today!
Ingredients You’ll Need
Gather ’round, fellow culinary explorer! Here’s what you’ll need for your delicious, colorful adventure:
- **Plain Full-Fat Greek Yogurt (2 cups):** The unsung hero. Full-fat for maximum creaminess, because we’re not calorie counting today, we’re living life.
- **Honey or Maple Syrup (1/4 to 1/2 cup):** Your sweet talker. Adjust to your sweet tooth’s demands. Start with less, taste, and add more if needed.
- **Vanilla Extract (1 teaspoon):** Just a splash for that ‘mmm, what *is* that delightful flavor?’ vibe.
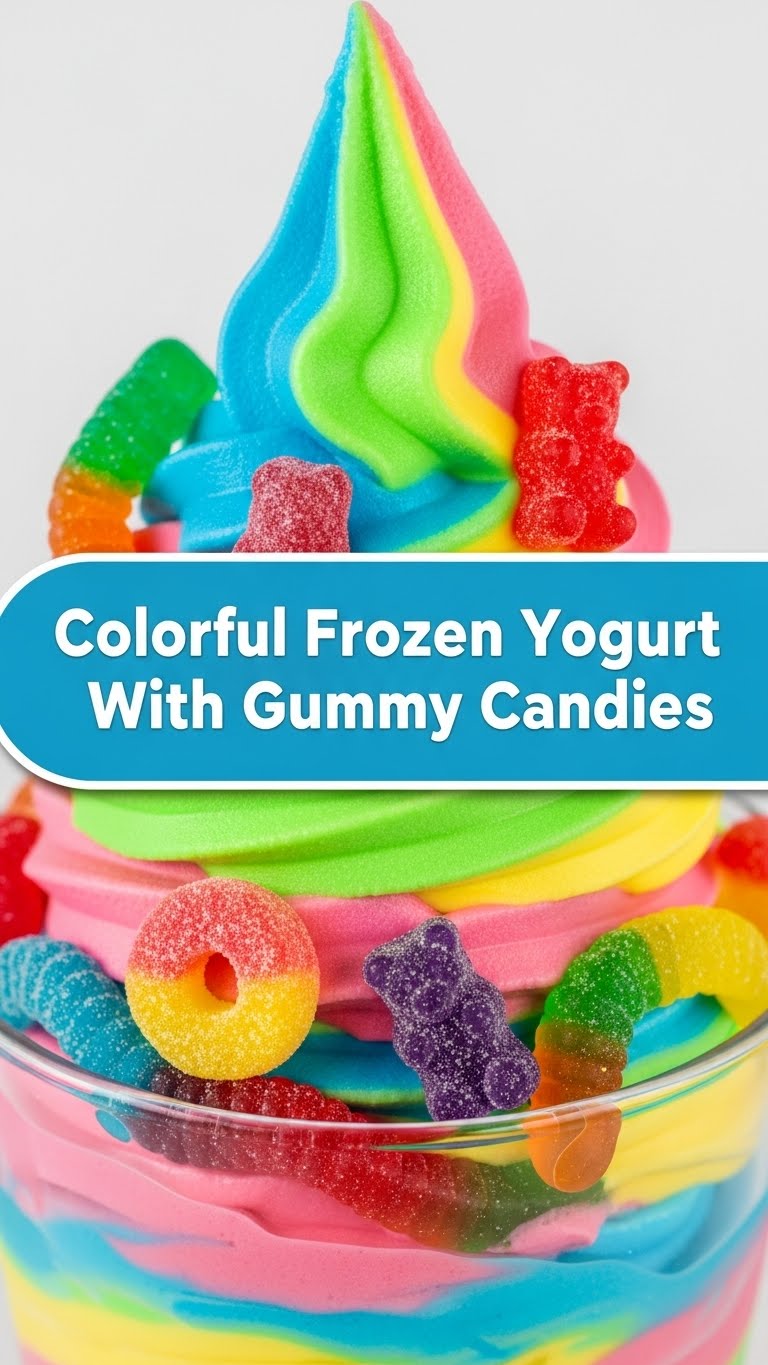
- **Gummy Candies (lots of ’em!):** The *real* stars of the show. Gummy bears, worms, sharks, whatever makes your inner child scream with joy. The more colors, the better, obviously.
- **Food Coloring (optional, but highly recommended for the ‘colorful’ part):** Because who wants boring white froyo when you can have a rainbow explosion? Don’t be shy!
Step-by-Step Instructions
Alright, let’s get down to business. These steps are so easy, you could probably do them blindfolded (but please don’t).
- **Prep Time!** Grab a large mixing bowl. Make sure it’s big enough to handle your culinary genius. No tiny bowls, we’re making magic here!
- **Yogurt Base.** Dump that glorious Greek yogurt into the bowl. Add your honey/maple syrup and vanilla extract.
- **Whisk It Real Good.** Stir everything together until it’s smooth and beautifully combined. Taste it! Need more sweetness? Go for it. You’re the boss of this delicious destiny.
- **Color Me Impressed.** If you’re going for color, divide the yogurt mixture into smaller bowls. Add a drop or two of food coloring to each bowl and mix until you achieve your desired vibrant hue. Think rainbow sherbet, but way easier. **Don’t overmix if you want distinct swirls!**
- **Freeze Frame!** Pour or spoon your colorful yogurt concoctions into a freezer-safe container. If you have multiple colors, gently swirl them together with a knife or spoon for a cool marbled effect. Cover it up!
- **Chill Out.** Pop the container into the freezer for at least 3-4 hours, or until it’s firm but still scoopable. You want it frozen, but not a brick that’ll break your spoon. Check on it occasionally, like a proud parent.
- **Gummy Glory!** Once it’s the right consistency, scoop your frozen yogurt into bowls. Now for the grand finale: generously sprinkle those gummy candies all over the top. Don’t skimp!
- **Devour.** Grab a spoon and dive in. You’ve earned this colorful, gummy-studded masterpiece. Enjoy every glorious bite!
Common Mistakes to Avoid
Even in the easiest recipes, there are pitfalls. Learn from my past (painful) experiences!
- **Using low-fat yogurt:** Bless your heart, but no. It’ll be icier and sad. **Go full-fat for creamy bliss.** Trust me on this one.
- **Forgetting the gummies:** I mean, technically still frozen yogurt, but where’s the fun? It’s like a party without the confetti. The gummies are non-negotiable for this recipe!
- **Over-freezing:** Turning your froyo into a rock-hard block. Unless you enjoy chisel work, check it periodically. **It should be firm, not impenetrable.** If it gets too hard, let it sit on the counter for 10-15 minutes before scooping.
- **Being stingy with color:** Your froyo, your rules, but if you promised ‘colorful,’ deliver the rainbow! **Don’t be shy with the food coloring.**
Alternatives & Substitutions
Feeling a little wild? Here are some ways to shake things up, because variety is the spice of life (and dessert!).
- **Dairy-Free Dream:** Swap out the Greek yogurt for a thick, plain dairy-free yogurt (coconut or almond works great). *I’m personally a fan of coconut yogurt for an extra tropical vibe.*
- **Sweetener Swaps:** Agave nectar, stevia, or even a touch of powdered sugar can stand in for honey/maple syrup. Just adjust to taste.
- **Flavor Boosts:** Instead of just vanilla, try almond extract or a citrus zest (lemon or lime would be *chef’s kiss* with the gummies!). You could even stir in a spoonful of cocoa powder for a chocolatey twist.
- **Topping Tornado:** Not feeling gummies? No judgment! Try chopped fresh fruit (berries, kiwi, mango), sprinkles, chocolate chips, or even crushed cookies. **Your froyo, your rules!**
FAQ (Frequently Asked Questions)
Got questions? I’ve got (casual and humorous) answers!
- **”Can I use regular yogurt instead of Greek?”** Sure, but it might be a bit icier and less creamy. Greek yogurt is thicker, making for a richer texture. So, yes, but **prepare for a slightly different experience.**
- **”How long does it last in the freezer?”** If covered properly, it’ll last about 1-2 weeks. After that, it might start getting a bit icy. But honestly, who has leftovers of this stuff?
- **”Do the gummies get hard when frozen?”** They can get a *little* chewier, but they don’t turn into bricks. That’s part of the fun, a little chewiness with your creamy froyo!
- **”Can I use sugar-free gummies?”** You absolutely can! Just be mindful that the texture might be slightly different.
- **”What if I don’t have an ice cream maker?”** That’s the beauty of this recipe! No ice cream maker needed. Just a bowl, a spoon, and a freezer. **It’s truly low-effort high-reward.**
- **”How can I make it extra smooth?”** If you want it really smooth like soft-serve, let it soften on the counter for about 15-20 minutes, then give it a quick whip with a hand mixer before serving. Fancy!
Final Thoughts
So there you have it, your ticket to dessert heaven without any of the fuss. You’ve just whipped up a masterpiece that’s colorful, delicious, and probably made you smile a few times in the process. Go ahead, pat yourself on the back. You deserve it! Now go impress someone—or yourself—with your new culinary skills. You’ve earned it! (And if you *don’t* share, I totally get it. Some things are too good to give away.) Enjoy!


