So, you’ve scrolled past one too many aesthetically pleasing coffee shop posts, and now your soul is whispering (or yelling, let’s be real) for something rich, coffee-infused, and utterly comforting? But also, you’re not trying to spend your entire weekend battling a complicated recipe, right? My friend, I feel you. And I’ve got just the thing: a Coffee Moist Cake recipe that’s so straightforward, you might just wonder if you accidentally became a pastry chef overnight.
Why This Recipe is Awesome
Okay, let’s be brutally honest: this isn’t just *another* cake recipe. This is THE cake recipe for when you want maximum deliciousness with minimum fuss. Seriously, it’s practically **idiot-proof**. Even if your baking history consists mainly of burning toast, you’ll nail this one. Plus, it’s got coffee, so it’s basically breakfast, right? Don’t argue with me; it’s self-care.
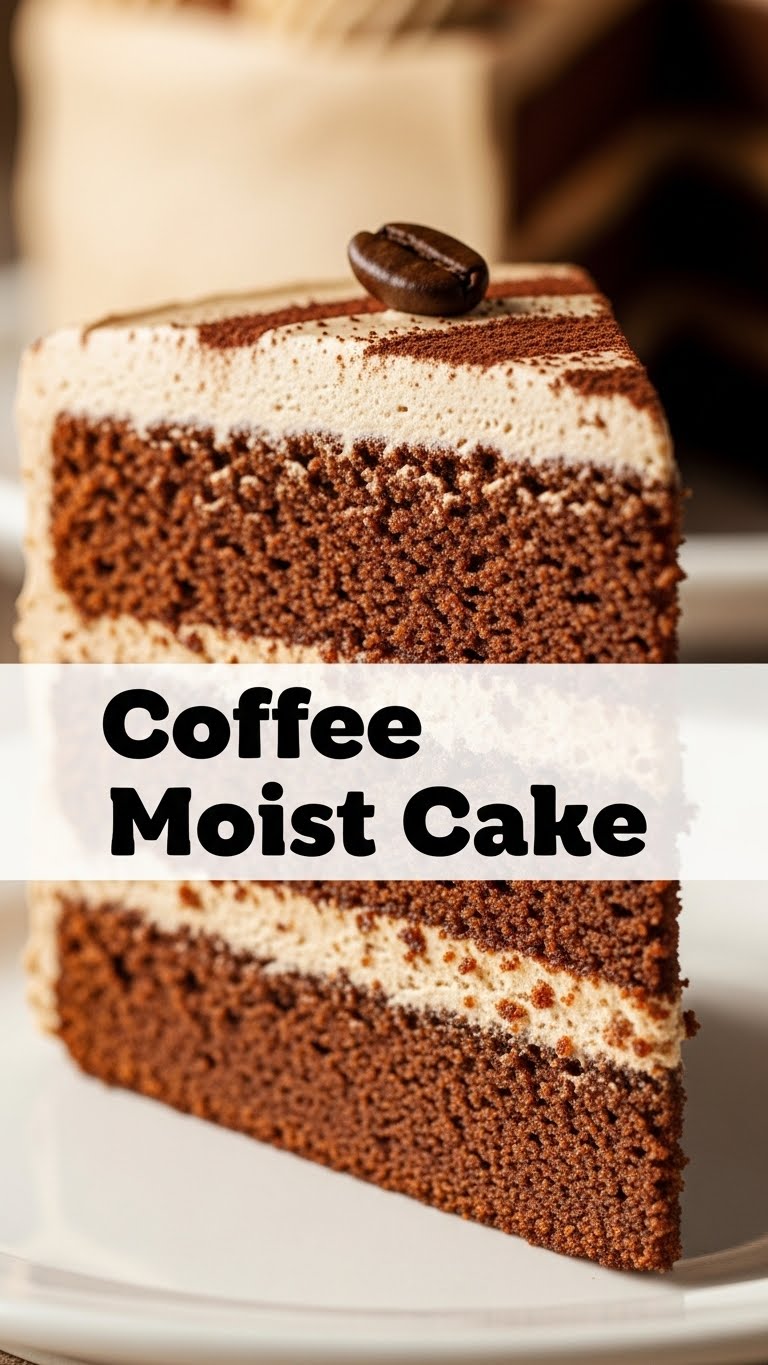
It’s ridiculously moist (the good kind, not the creepy kind), packed with that glorious coffee punch, and trust me, your kitchen will smell like the happiest place on earth. Your neighbors might even try to “accidentally” wander in. Don’t say I didn’t warn you.
Ingredients You’ll Need
- 2 cups (250g) All-Purpose Flour: The backbone of your cakey dreams.
- 1 cup (200g) Granulated Sugar: Sweetness, because life’s too short for bland cake.
- 1/2 cup (100g) Packed Brown Sugar: For that extra caramel-y depth. Don’t skimp!
- 1/2 cup (113g) Unsalted Butter: Melted. Don’t even *think* about substituting with something inferior. Your tastebuds deserve better.
- 2 Large Eggs: Room temp, please. They mix better, trust me.
- 1 cup (240ml) Strong Brewed Coffee: Cooled. This is the star of the show! Use good coffee, or what’s the point?
- 1/2 cup (120ml) Buttermilk: Or milk with 1 tsp lemon juice/vinegar, let it sit for 5 mins. Adds that gorgeous tenderness.
- 1 teaspoon Baking Soda: Our little lift-off agent.
- 1 teaspoon Baking Powder: Its partner in crime, ensuring fluffiness.
- 1/2 teaspoon Salt: Don’t skip! It balances all the sweet goodness.
- 1 teaspoon Vanilla Extract: Because everything’s better with vanilla.
- Optional for Glaze/Frosting: Powdered sugar, a splash of milk/coffee, and maybe a tiny bit more vanilla. We’re going simple, remember?
Step-by-Step Instructions
- Prep Your Battle Station: First things first, preheat your oven to **350°F (175°C)**. Grease and flour a 9×13 inch baking pan or an 8×8 inch square pan if you like a thicker slice. Or line with parchment paper if you’re feeling fancy.
- Dry Mix Magic: In a large bowl, whisk together the flour, both sugars, baking soda, baking powder, and salt. Make sure there are no lumpy bits, unless you like surprise flour bombs in your cake.
- Wet Mix Wonders: In another bowl (or a large measuring cup), whisk together the melted butter, eggs, cooled coffee, buttermilk, and vanilla extract. Give it a good swirl until it’s all happy and combined.
- Combine and Conquer: Pour the wet ingredients into the dry ingredients. Stir gently with a whisk or spatula until just combined. **Don’t overmix!** A few small lumps are totally fine; overmixing leads to tough cake, and nobody wants that.
- Pan It Up: Pour the glorious batter into your prepared pan. Give it a gentle tap on the counter to release any large air bubbles. This ensures an even bake.
- Bake It Till You Make It: Pop it into your preheated oven. Bake for **30-35 minutes** for a 9×13 pan, or 35-45 minutes for an 8×8 pan. The cake is done when a toothpick inserted into the center comes out clean or with a few moist crumbs.
- Cool Down: Let your masterpiece cool in the pan for about 10-15 minutes before attempting to flip it out onto a wire rack to cool completely. Patience, young padawan, patience.
- Glaze if You Dare (or just eat it plain!): If you’re going for a simple glaze, whisk powdered sugar with a tiny bit of milk or coffee and vanilla until it’s drizzly. Drizzle over the cooled cake. Enjoy!
Common Mistakes to Avoid
- Not Preheating the Oven: Rookie mistake! Your cake needs a consistent temperature from the get-go to rise properly. Don’t be that person.
- Overmixing the Batter: I know, I know, it’s tempting to get every lump out. But seriously, **stop mixing once everything is just combined**. Overmixing develops the gluten, leading to a dense, chewy cake instead of light and fluffy.
- Hot Coffee (or other wet ingredients): Make sure your coffee (and butter, if you melted it) is cooled down. Hot liquids can start cooking the eggs or activate the leavening agents too early, messing with your cake’s texture.
- Eyeballing Ingredients: Baking is science, folks! While cooking allows for more improvisation, follow the measurements precisely for baking, especially for the flour, sugar, and leavening. Otherwise, you’re just asking for trouble.
- Opening the Oven Door Too Soon: Curiosity killed the cake! Resist the urge to peek during the first 20-25 minutes, as the sudden temperature drop can cause your cake to sink.
Alternatives & Substitutions
Feeling adventurous or just missing an ingredient? No worries, I got you. Baking is fun, not a strict rulebook (mostly).
- Coffee: A strong instant coffee dissolved in hot water works perfectly fine if you’re out of brewed. You can also play around with espresso for an extra kick! For a milder coffee flavor, use decaf or less strong brew.
- Buttermilk: As mentioned, if you don’t have buttermilk, just add 1 teaspoon of lemon juice or white vinegar to regular milk (any fat percentage) and let it sit for 5 minutes. Voila! Instant buttermilk.
- Butter: While I champion butter for flavor, you *can* use an equal amount of vegetable oil for an even moister cake. But for that rich, buttery taste, stick to butter, IMO.
- Sugar: You can adjust the ratio of granulated to brown sugar slightly based on preference, but keeping some brown sugar adds a lovely depth.
- Add-ins: Feel free to fold in a handful of chocolate chips, chopped nuts (walnuts or pecans would be amazing!), or even a dash of cinnamon or cardamom for extra spice. Your cake, your rules!
FAQ (Frequently Asked Questions)
- “Can I use decaf coffee?” Yes, absolutely! If you’re making this for an evening treat or just prefer less caffeine, decaf coffee will work just as well for flavor. Why deny yourself deliciousness just because of sleep?
- “My cake sunk in the middle! What went wrong?” Oh, the dreaded sinkhole! This usually happens if you opened the oven door too early, overmixed the batter, or your leavening agents (baking soda/powder) were expired. Check those dates, folks!
- “How do I store this cake?” Covered tightly at room temperature, it’s good for 3-4 days. In the fridge, it’ll last up to a week. If you’re feeling ambitious, you can even freeze individual slices for a quick fix later! Future you will thank you.
- “Can I make this into cupcakes?” You betcha! Reduce the baking time to about 18-22 minutes. Keep an eye on them, though, because tiny cakes bake faster.
- “Why room temperature eggs?” Great question! Room temperature eggs incorporate better into the batter, creating a smoother, more emulsified mixture. This leads to a finer crumb and a more even texture. It’s a small step that makes a big difference, trust me.
- “Can I skip the glaze?” Of course! This cake is incredibly moist and flavorful on its own. The glaze is just a little extra something if you’re feeling fancy or want some added sweetness. Don’t let it stand between you and cake happiness.
Final Thoughts
And there you have it, my friend! A Coffee Moist Cake that’s not only incredibly delicious but also surprisingly simple to whip up. You just made something amazing, and you didn’t even break a sweat (well, maybe a little from the oven heat, but that’s it). Whether you’re impressing friends, bringing it to a potluck, or just hoarding it all for yourself (no judgment here!), this cake is a winner.
Now go forth and enjoy the fruits of your labor! Or, you know, just eat a slice while binge-watching your favorite show. You’ve earned it, culinary rockstar!


