Hey there, my fellow culinary explorer (or, let’s be real, snack enthusiast)! Ever have those moments where your sweet tooth screams for apple pie, but your brain screams, “Too much effort! So many steps! My couch is calling!”? Yeah, me too. That’s why we’re making friends with this magical, low-fuss recipe for Cinnamon with Apple Pie Filling. It’s basically all the good stuff without the commitment issues of baking an entire pie. You’re welcome.
Why This Recipe is Awesome
Listen, this isn’t rocket science; it’s more like… microwave popcorn science, but way tastier and makes your kitchen smell like a professional bakery without the actual need to, you know, be a professional baker. Seriously, this recipe is so straightforward, even my cat could probably supervise it (and she usually just supervises my napping schedule). It’s **quick, uses super simple ingredients**, and tastes like a warm hug from your grandma, assuming your grandma’s hugs taste like sweet, cinnamon-spiced apples. Plus, it’s incredibly versatile – good on its own, with ice cream, pancakes, toast… the possibilities are endless! Think of it as your secret weapon for instant dessert gratification.
Ingredients You’ll Need
Gather ’round, my little kitchen comrades. Here’s what you’ll need for this delicious escapade:
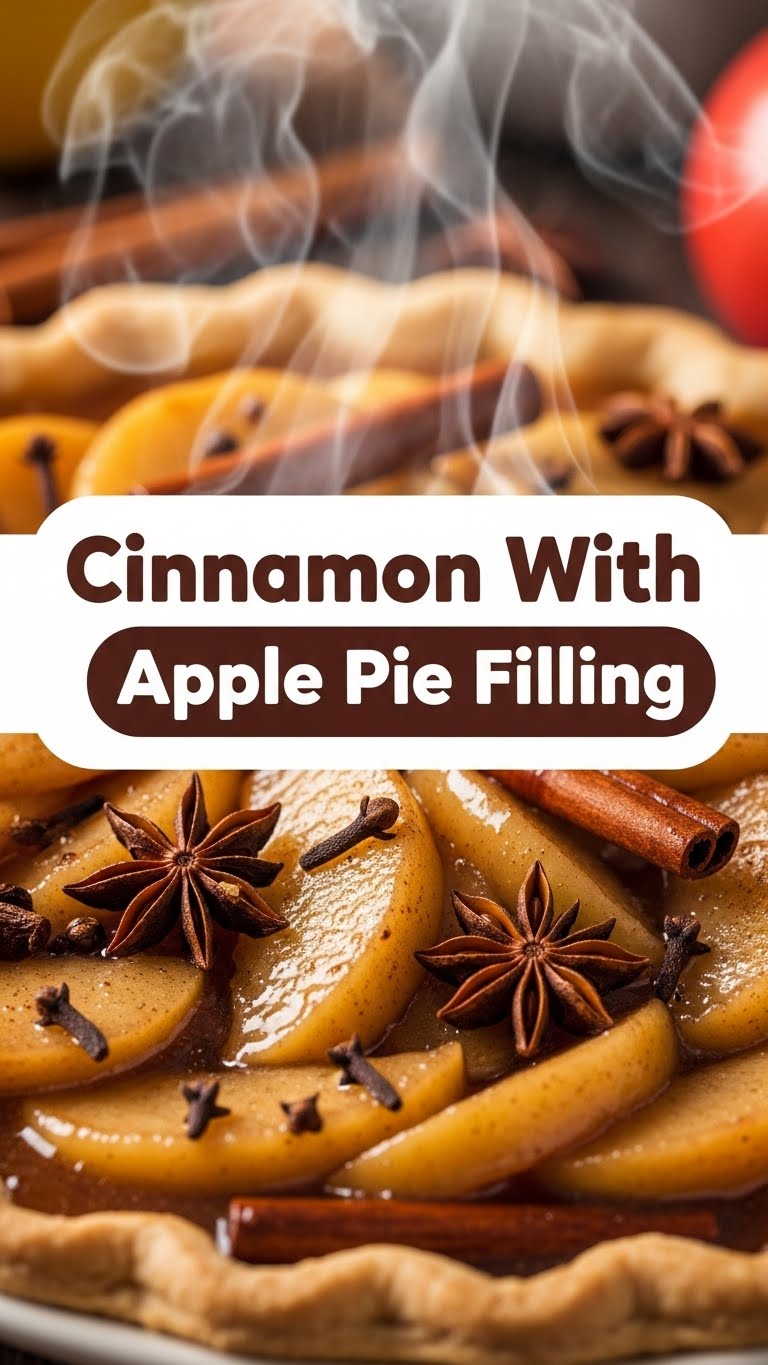
- 6-7 Medium Apples: The stars of our show! Go for firm, slightly tart ones like Granny Smith, Honeycrisp, or Fuji. Avoid the mushy, sad apples that look like they’ve seen better days.
- 1/2 Cup Granulated Sugar: For that sweet, sweet goodness.
- 1/4 Cup Brown Sugar (packed): Adds a lovely depth of flavor and a touch of molasses-y warmth. Don’t skimp, it’s pie filling, not a diet plan.
- 2 Teaspoons Ground Cinnamon: Duh, it’s in the title! The soul of this operation.
- 1/4 Teaspoon Ground Nutmeg: Cinnamon’s best friend. They just get each other, you know? (Optional, but highly recommended.)
- 1 Tablespoon Lemon Juice: A little zing to balance the sweetness and keep your apples from browning. Don’t skip it!
- 2 Tablespoons Unsalted Butter: Because everything is better with butter. Fight me.
- 2 Tablespoons Cornstarch: Our secret weapon for that perfect, gooey thickness. No one likes watery pie filling.
- 1/4 Cup Water: Just a splash to help things along.
Step-by-Step Instructions
Alright, let’s get cooking! Even if you usually burn toast, you got this.
- Prep Your Apples: First things first, peel, core, and slice your apples into about 1/2-inch thick pieces. Aim for relatively uniform slices so they cook evenly. This is the hardest part, IMO.
- Mix the Dry Stuff: In a medium bowl, combine your granulated sugar, brown sugar, cinnamon, nutmeg (if using), and cornstarch. Give it a good whisk until everything is buddy-buddy.
- Coat the Apples: Add your sliced apples to the bowl with the sugar mixture. Toss them gently until all the apple pieces are nicely coated. Think of it as giving them a cozy, sweet spice blanket.
- Melt the Butter: Grab a large skillet or pot and melt the butter over medium heat. Let it get nice and bubbly, but don’t burn it, alright?
- Cook the Apples: Pour the apple mixture into the skillet. Add the lemon juice and water. Stir everything together.
- Simmer to Perfection: Bring the mixture to a gentle simmer, stirring occasionally. Cook for about 8-12 minutes, or until the apples are tender but still hold their shape, and the sauce has thickened nicely. **Keep an eye on it!** We want tender, not mushy.
- Taste and Adjust: Give it a taste (careful, it’s hot!). Need more cinnamon? A pinch more sugar? This is your moment to shine, my friend.
- Serve It Up: Remove from heat and let it cool slightly. It thickens even more as it cools. Now, try not to eat it all straight from the pan. (No judgment if you do, though.)
Common Mistakes to Avoid
To ensure your apple filling is a masterpiece and not a “what happened here?” moment, steer clear of these rookie errors:
- Skipping the Lemon Juice: Congrats, you’ve just signed up for sad, brown apples. Don’t be that person. The lemon juice is crucial for both flavor balance and preventing oxidation.
- Using Mushy Apples: Your filling will turn into applesauce, which isn’t bad, but it’s not what we’re going for. Stick to firm apples!
- Overcooking the Apples: We want tender-crisp, not apple soup. Watch them carefully and pull them off the heat once they’re soft enough to easily pierce with a fork, but not falling apart.
- Not Stirring Enough: The cornstarch can clump if not mixed well initially, and the sugars can stick to the bottom of the pan. Stir, stir, stir, especially in the beginning.
- Forgetting the Cornstarch: Unless you like really watery apple “soup,” don’t forget this magical thickener. It’s the unsung hero!
Alternatives & Substitutions
Feeling adventurous? Here are some ways to shake things up:
- Apples: Mix and match! A combo of Granny Smith for tartness and Honeycrisp for sweetness is divine.
- Spices: Add a pinch of ground ginger, allspice, or even a tiny bit of clove for extra warmth. Just don’t go overboard, we’re not making potpourri.
- Sweetener: You can try swapping some of the sugar for maple syrup or honey, but be aware it might slightly change the consistency and flavor profile. You might need to adjust the water or cornstarch.
- Butter Alternative: For a vegan version, use a plant-based butter alternative or coconut oil.
- A Little Something Extra: Feeling fancy? A splash of **bourbon or dark rum** added at the very end is like a warm hug for your taste buds. Just sayin’.
- Vanilla Extract: A teaspoon of vanilla extract added with the lemon juice can round out the flavors beautifully.
FAQ (Frequently Asked Questions)
Got questions? I’ve got answers (and probably a joke or two).
- What are the best apples to use? For that perfect balance of sweet and tart, and a texture that holds up, Granny Smith, Honeycrisp, Fuji, or Braeburn are your go-to pals. Can you use Red Delicious? Technically yes, but why hurt your soul like that?
- Can I reduce the sugar? You can! Start by reducing it by a quarter, taste, and adjust. Just remember, sugar isn’t just for sweetness; it also helps with the sauce’s texture and preserving the apples.
- How do I store this deliciousness? Let it cool completely, then pop it into an airtight container in the fridge. It’s usually good for up to a week. If it lasts that long, you have more willpower than me.
- Can I freeze the apple pie filling? Absolutely! Once cooled, transfer it to a freezer-safe bag or container. It’ll keep for about 3 months. Thaw it in the fridge overnight before reheating gently on the stove or in the microwave.
- What can I put this on, besides a pie? Oh, the possibilities! It’s amazing on vanilla ice cream, yogurt, oatmeal, pancakes, waffles, toast, or just eaten with a spoon directly from the container. FYI, it’s also excellent as a topping for cheesecake or stirred into plain Greek yogurt.
- Why is my filling too watery/too thick? If it’s too watery, you might not have cooked it long enough for the cornstarch to activate, or your apples were extra juicy. Simmer a bit longer! If it’s too thick, you can stir in a tablespoon or two of water until it reaches your desired consistency.
- Can I make this ahead of time for Thanksgiving/Christmas? Heck yeah! It’s a lifesaver for holiday prep. Make it a day or two in advance, store it in the fridge, and then gently reheat when needed.
Final Thoughts
So there you have it, folks! Your new go-to for instant dessert gratification, a warm kitchen aroma, and a happy tummy. This Cinnamon Apple Pie Filling is proof that you don’t need a culinary degree to whip up something truly delicious. Now go impress someone—or yourself—with your new culinary skills. You’ve earned it! (And if you end up just eating it all with a spoon, I promise not to tell anyone.) Enjoy!


