So you’re craving something warm, gooey, and covered in frosting, but the thought of hauling out that giant stand mixer feels like a personal affront to your chill Sunday vibes, huh? Yeah, me too. And honestly, who needs all that fuss when you can get equally (if not more!) amazing cinnamon rolls with just your two hands and a little bit of love? Let’s ditch the heavy machinery and get our hands dirty in the best way possible.
Why This Recipe is Awesome
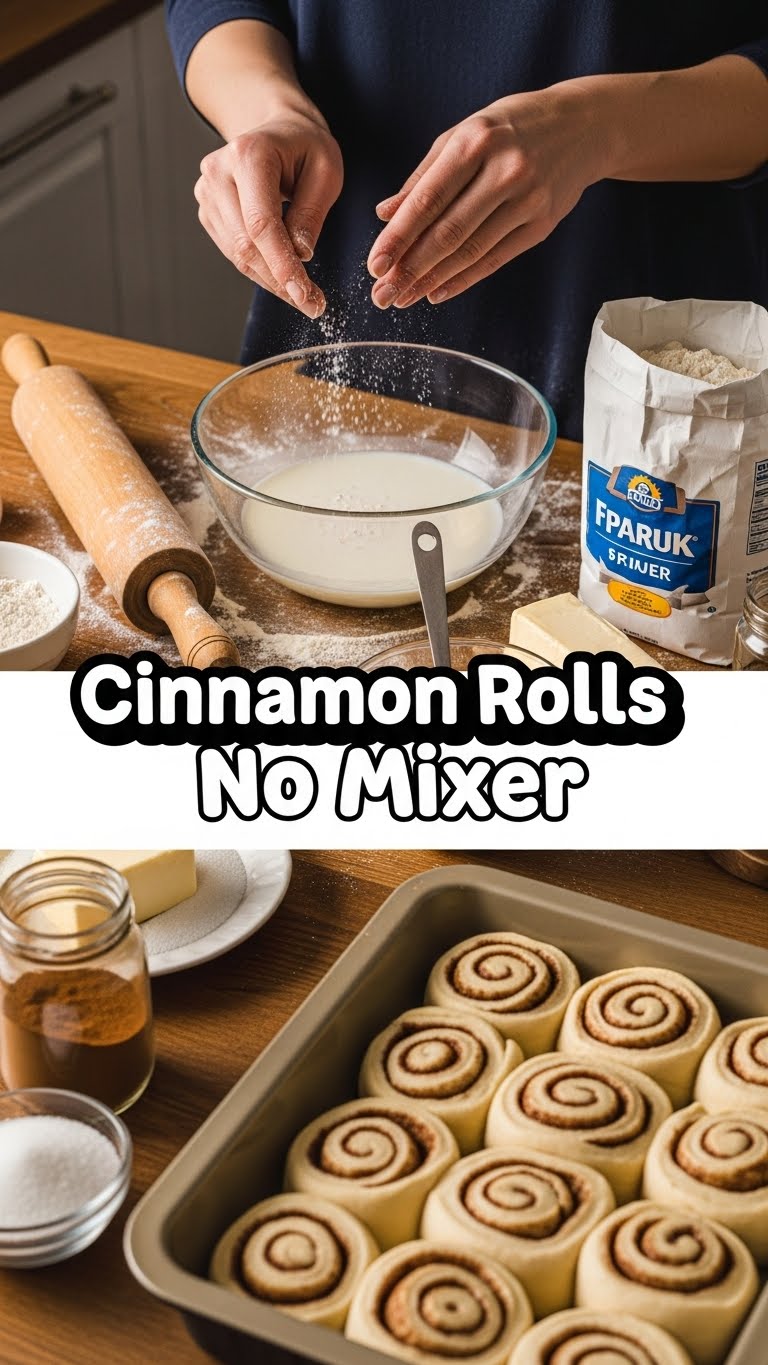
Okay, buckle up, buttercup, because this isn’t your grandma’s “knead for an hour until your arms fall off” recipe. This is the no-mixer, no-fuss, maximum-deliciousness version of cinnamon rolls. It’s so simple, it almost feels like cheating. Seriously, if I can do it without setting off the smoke alarm, you absolutely can too! Think fluffy dough, a rich cinnamon swirl, and that dreamy cream cheese frosting, all achieved with minimal effort. It’s basically magic for lazy bakers (read: me).
Ingredients You’ll Need
For the Dough:
- Warm Milk: About 1 cup (240ml). Not hot enough to kill the yeast, not cold enough to make it grumpy. Think a warm bath, not a sauna.
- Granulated Sugar: 1/4 cup (50g) for the dough. Give that yeast something sweet to munch on.
- Active Dry Yeast: 2 1/4 teaspoons (one packet). The little miracle workers!
- Large Egg: 1, at room temp. Helps with richness and color.
- Melted Butter: 1/4 cup (57g), unsalted. Because butter makes everything better. Seriously, don’t skimp.
- All-Purpose Flour: About 3 1/2 to 4 cups (420-480g). Start with less, add more if needed. You know, like life.
- Salt: 1/2 teaspoon. Just a pinch to balance the sweetness.
For the Filling:
- Softened Butter: 1/2 cup (113g), unsalted. Gotta spread the love (and the cinnamon).
- Light Brown Sugar: 1 cup (200g), packed. The gooey secret sauce.
- Ground Cinnamon: 2 tablespoons. Don’t be shy! This is “cinnamon” rolls, after all.
For the Cream Cheese Frosting:
- Cream Cheese: 4 oz (113g), softened. The tangy counterpoint.
- Softened Butter: 1/4 cup (57g), unsalted. Again, butter. We’re not health fanatics today.
- Powdered Sugar: 1 1/2 cups (180g). Sift it if you’re feeling fancy, or don’t, I won’t tell.
- Vanilla Extract: 1 teaspoon. Makes it smell like heaven.
- Milk or Cream: 1-2 tablespoons (optional, for thinning). Because sometimes you need to loosen up.
Step-by-Step Instructions
- Wake Up the Yeast: In a large bowl, whisk together your warm milk, 1/4 cup sugar, and the yeast. Let it hang out for 5-10 minutes. It should get bubbly and foamy—that’s how you know it’s alive and ready to party! If it doesn’t foam, your yeast is probably dead, and you need to start over. #sadface
- Mix the Wet Stuff: Add the egg and melted butter to your yeasty mixture. Give it a good whisk until everything is combined.
- Add the Dry: Gradually add the flour, about a cup at a time, mixing with a wooden spoon or a sturdy spatula. Once it gets too thick to stir, ditch the spoon and get your hands in there. Add the salt with the last bit of flour.
- Knead (Lightly!): Turn the shaggy dough out onto a lightly floured surface. Knead it gently for about 5-8 minutes. You’re not trying to win a wrestling match; you just want it to be smooth and elastic. It should be soft and a little sticky, but not sticking to your hands. Resist the urge to add too much flour!
- First Rise: Lightly grease your mixing bowl, place the dough back in, and turn it once to coat. Cover the bowl with plastic wrap or a clean kitchen towel. Let it rise in a warm spot for 1 to 1.5 hours, or until it’s doubled in size. This is where patience is a virtue, my friend.
- Prep the Filling & Roll Out: While the dough is rising, mix your softened butter, brown sugar, and cinnamon for the filling in a small bowl. Once the dough has doubled, gently punch it down. Turn it out onto a lightly floured surface and roll it into a large rectangle, roughly 12×18 inches (30×45 cm).
- Spread the Love: Evenly spread the cinnamon-sugar filling over the entire surface of the dough, leaving a small border (about 1/2 inch) on one of the longer edges.
- Roll ‘Em Up: Starting from the longer edge opposite the clean border, tightly roll the dough into a log. The tighter you roll, the prettier your spirals will be. Pinch the seam closed.
- Slice and Dice: Using a sharp, un-serrated knife or, even better, unflavored dental floss, slice the log into 12 equal rolls. For floss, slide it under the log, cross the ends over the top, and pull to slice cleanly. Mind. Blown.
- Second Rise: Arrange the rolls in a lightly greased 9×13 inch (23×33 cm) baking dish, leaving a little space between them. Cover again and let them rise for another 30-45 minutes, or until puffy.
- Bake Away: Preheat your oven to 375°F (190°C). Bake the rolls for 20-25 minutes, or until golden brown and cooked through. If they’re browning too fast, you can lightly tent them with foil.
- Make the Frosting: While the rolls are baking, beat together the softened cream cheese and butter until smooth. Gradually add the powdered sugar, mixing until well combined. Stir in the vanilla extract. Add a tablespoon or two of milk/cream if you want a thinner, pourable consistency.
- Frost and Devour: As soon as the rolls come out of the oven, slather them with that glorious cream cheese frosting. Seriously, do it while they’re warm; it melts slightly and gets into all the nooks and crannies. Serve immediately and prepare for compliments!
Common Mistakes to Avoid
- Killing the Yeast: Water too hot? Yeast gone. Your dough won’t rise. Always check your water temperature—it should feel warm, not hot. (Think baby bathwater).
- Adding Too Much Flour: Your dough will be tough, dense, and sad. A slightly sticky dough is a happy dough. Resist the urge to keep adding flour during kneading.
- Not Letting Them Rise Enough: Underrisen rolls will be dense and won’t have that airy texture. Patience, young padawan! Let them double in size.
- Overbaking: Dry cinnamon rolls are a travesty. Keep an eye on them; they should be golden brown, not dark brown. A digital thermometer inserted into the center of a roll should read around 190-200°F (88-93°C).
- Skimping on the Frosting: This is non-negotiable. More frosting equals more happiness. Don’t even think about it.
Alternatives & Substitutions
- Glaze It Up: Not a cream cheese frosting fan? (Who are you? Just kidding… mostly!) You can whip up a simple powdered sugar glaze with just powdered sugar and a splash of milk or lemon juice. Drizzle it on!
- Extra Spices: Feel free to add a pinch of nutmeg or cardamom to your cinnamon filling for an extra layer of warmth. Mmm, cozy vibes.
- Dairy-Free: You can totally use a non-dairy milk (almond, soy, oat) and dairy-free butter for the dough and filling. For the frosting, look for dairy-free cream cheese alternatives. They’ve come a long way!
- No Brown Sugar? No Problem: While brown sugar gives that classic gooey texture, you can use granulated sugar in the filling in a pinch. It just won’t be quite as rich.
FAQ (Frequently Asked Questions)
- My dough isn’t rising! What gives? Did you check your yeast? If it didn’t foam up in step one, it was probably dead. Also, is your rising spot warm enough? A cold kitchen means slow, or no, rise. Try turning on your oven for a minute, then turning it off and letting the dough rise inside (oven light on works too!).
- Can I make these ahead of time? Absolutely! After the second rise, cover the baking dish tightly with plastic wrap and pop it in the fridge overnight (up to 12 hours). In the morning, pull them out, let them sit at room temp for about 30-60 minutes while your oven preheats, then bake as usual. Fresh-baked goodness with minimal morning effort? Yes, please!
- Can I use instant yeast instead of active dry? Yep! You can usually just add it directly to the flour with the salt, skipping the “waking up” step. But for this recipe, activating it still ensures it’s good to go!
- What’s the best way to store leftovers? Hah! Leftovers? Good one! But seriously, store them in an airtight container at room temperature for a day or two, or in the fridge for up to 4 days. Pop them in the microwave for 10-15 seconds for that fresh-baked warmth.
- Can I use margarine instead of butter? Well, technically yes, but why hurt your soul like that? Butter just tastes better, period. It brings a richness and flavor margarine simply can’t replicate. Treat yourself!
- My rolls are dense/dry. Help! This usually means too much flour was added during kneading, or they were overbaked. Next time, be gentle with the flour and keep an eye on your baking time.
Final Thoughts
And there you have it, folks! Your very own batch of glorious, homemade cinnamon rolls, achieved with zero heavy machinery and maximum bragging rights. You just whipped up something truly amazing with your own two hands. Now go impress someone—or yourself—with your new culinary skills. You’ve earned it! Grab a warm roll (or three), a cup of coffee, and revel in your domestic goddess/god status. You’re basically a wizard.


