So you’re craving something tasty but too lazy to spend forever in the kitchen, huh? Same. We’ve all been there: that deep, primal urge for something warm, sweet, and utterly comforting, but the thought of kneading dough or waiting for yeast to proof makes you want to curl up and hibernate. Well, my friend, have I got a secret weapon for you! Get ready to unlock the cheat code to cinnamon roll bliss, because we’re about to make the easiest, most ridiculously delicious cinnamon rolls using, wait for it… Kings Hawaiian Rolls!
Why This Recipe is Awesome
Let’s be real, this recipe is less of a “recipe” and more of a “culinary hack.” It’s the kind of genius shortcut that makes you feel like a five-star chef without breaking a sweat. **No yeast, no kneading, no rising time.** Just pure, unadulterated sweet roll glory in what feels like mere minutes. It’s practically idiot-proof; even I didn’t mess it up, and my kitchen has seen some things, trust me. Plus, those Hawaiian rolls bring a next-level sweetness and pillowy texture that traditional cinnamon rolls can only dream of. You’re not just making cinnamon rolls; you’re elevating them to an art form, with minimal effort. It’s the ultimate “look what I whipped up!” moment.
Ingredients You’ll Need
Gather ’round, butter-lovers! Here’s your simple shopping list. You probably have half of this stuff already, you culinary wizard, you.
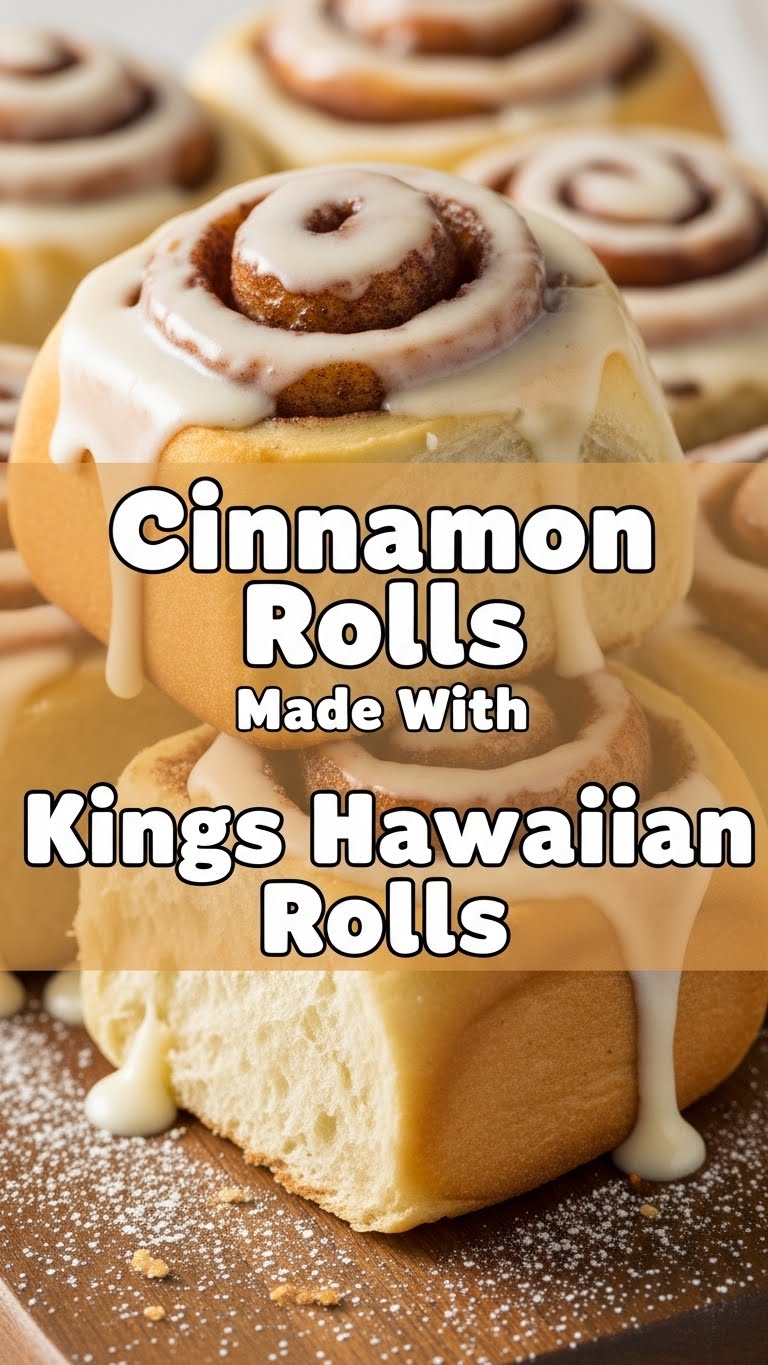
- **1 pack (12 count) Kings Hawaiian Sweet Rolls:** The absolute MVP of this operation. Don’t even *think* about substituting these.
- **1/2 cup unsalted butter**, softened: The golden glue that holds our lives (and these rolls) together.
- **1/2 cup packed light brown sugar:** For that deep, molasses-y goodness.
- **1 tablespoon ground cinnamon:** The warm hug of flavor we all crave.
- **1 1/2 cups powdered sugar** (aka confectioners’ sugar): For that dreamy, messy frosting.
- **2-3 tablespoons milk or heavy cream:** Just a splash, to get that frosting perfectly drizzly.
- **1/2 teaspoon vanilla extract:** Because everything’s better with a little vanilla hug.
Step-by-Step Instructions
Alright, apron on, game face ready! Let’s get this party started. Seriously, this is so simple, you’ll wonder why you ever tried making them from scratch.
- **Preheat Your Oven & Prep Your Pan:** First things first, get that oven to 350°F (175°C). Grab a baking dish (a 9×13-inch works perfectly, or something similar that fits the rolls snugly). No need to grease it, those rolls are pretty chill.
- **Slice ‘Em Up:** Take your Hawaiian rolls and, keeping them connected, carefully slice them in half horizontally. You want two big slabs of roll, like a giant sweet bun sandwich. **Pro Tip: Don’t cut all the way through!** We want them to stay together as one glorious block.
- **Whip Up the Filling:** In a small bowl, combine your softened butter, brown sugar, and cinnamon. Mix ’em together until it’s a smooth, fragrant paste. This is where the magic really starts to happen.
- **Spread the Love:** Generously spread that incredible cinnamon-sugar filling over the bottom half of your sliced rolls. Don’t be shy! Then, gently place the top half of the rolls back on, forming your giant sweet sandwich again.
- **Bake to Golden Perfection:** Pop your baking dish into the preheated oven. Bake for about 10-15 minutes, or until the rolls are wonderfully golden brown and the filling is bubbly and fragrant. Your kitchen is about to smell AMAZING.
- **Mix the Frosting Magic:** While your rolls are basking in oven glory, whisk together the powdered sugar, milk/cream, and vanilla extract in a bowl until smooth. If it’s too thick, add a tiny bit more milk; too thin, add a little more powdered sugar. You’re aiming for a glorious, pourable glaze.
- **Drizzle & Devour:** As soon as the rolls come out of the oven, drizzle that heavenly frosting all over the warm rolls. Don’t wait for them to cool down—the warmth helps the frosting melt slightly and seep into all those delicious crevices. Serve immediately and watch them disappear!
Common Mistakes to Avoid
Even though this is super easy, there are a few rookie blunders that could dampen your cinnamon roll dreams. Heed these warnings, young padawan!
- **Cutting the Rolls Completely Apart:** This is probably the biggest one. If you slice them through, you’ll just have sticky bread squares, not a connected pull-apart masterpiece. **Always keep them hinged!**
- **Using Cold Butter:** Trying to mix cold, hard butter with sugar and cinnamon is a recipe for lumpy frustration. Soften that butter, people!
- **Overbaking:** Hawaiian rolls are delicate. If you bake them too long, they can dry out and lose their signature fluffiness. Keep an eye on them—golden is good, rock-hard is bad.
- **Skimping on the Filling:** This isn’t the time to be conservative. The more filling, the more gooey, cinnamon-y goodness. Go for it!
- **Eating the Frosting with a Spoon Before It Hits the Rolls:** Okay, not a “mistake” per se, but you risk not having enough for the rolls. Exercise some self-control, if you can!
Alternatives & Substitutions
Feeling adventurous? Or maybe you’re just out of one tiny ingredient? Here are some simple tweaks:
- **Cream Cheese Frosting:** Honestly, a no-brainer upgrade. Just swap out some of the milk for softened cream cheese (2-3 oz) and beat it with the butter and powdered sugar for an extra tangy kick. **Highly recommend, IMO.**
- **Nutty or Fruity Additions:** Feel free to sprinkle some chopped pecans, walnuts, or even a few rehydrated raisins (if you’re into that sort of thing) over the filling before you put the top layer of rolls back on.
- **Different Sugars:** If you’re out of brown sugar, you can use granulated sugar with a tiny splash of molasses to get that depth, or just use white sugar if that’s all you have. The flavor will be slightly different, but still delicious.
- **Dairy-Free Version:** Use a plant-based butter alternative and your favorite non-dairy milk (almond, oat, soy) for a totally delicious dairy-free treat.
FAQ (Frequently Asked Questions)
Got questions? I’ve got answers. Probably. 😉
Can I make these ahead of time?
Absolutely! You can assemble the rolls with the filling, cover them tightly, and refrigerate overnight. When you’re ready, just pop them in the oven and bake as usual. Make the frosting fresh, though!
How do I store leftovers?
If there are any leftovers (a big “if”), cover them tightly with plastic wrap or foil and store at room temperature for a day or two, or in the fridge for up to 3-4 days. Gently warm them up in the microwave or oven before serving again for maximum deliciousness.
My frosting is too thin/thick! What do I do?
Easy fix! Too thin? Add a tablespoon or two more powdered sugar. Too thick? Add a teaspoon or two more milk until you hit that perfect drizzly consistency. You’re the boss of that frosting!
Can I use margarine instead of butter?
Well, technically yes, but why hurt your soul like that? Butter just tastes better, period. It brings a richness that margarine can’t quite replicate. For best results, stick with butter!
Can I use other types of rolls?
You *can*, but it won’t be the same magic. The sweetness and unique texture of Kings Hawaiian Rolls are what make this recipe truly sing. Other dinner rolls might work but might be less sweet or have a different texture. **FYI, this recipe truly shines with the Hawaiian rolls!**
Why are my rolls dry?
Most likely, they were overbaked. Keep an eye on them, as oven temperatures can vary. They should be just golden and bubbly, not hard or crispy.
Final Thoughts
See? I told you it was easy! You just unlocked a whole new level of dessert-making with minimal effort and maximum deliciousness. These Hawaiian roll cinnamon rolls are perfect for a lazy Sunday brunch, an unexpected treat for friends, or just because you deserve something sweet (which, let’s be honest, is always). Now go impress someone—or yourself—with your new culinary skills. You’ve earned it!


