So you’re craving something warm, gooey, and utterly decadent but the thought of battling traffic for a Cinnabon is just… too much? Been there, friend. And honestly, *who* wants to put on real pants for a cinnamon roll? Not me, that’s who! Lucky for us, I’ve cracked the code (or, you know, borrowed from someone who did) to bring that glorious, melt-in-your-mouth Cinnabon experience right into your PJs-clad kitchen. Get ready to impress yourself!
Why This Recipe is Awesome
Listen, this isn’t just a recipe; it’s a life hack. We’re talking **Cinnabon-level bliss** in your own kitchen, without the questionable mall food court vibes or the guilt of buying yet *another* giant pastry. This recipe is surprisingly straightforward – I mean, it’s pretty much idiot-proof, even I didn’t mess it up! Your house will smell like a dream, which is a bonus, right? Plus, imagine the bragging rights: “Oh, these? Just some Cinnabon copycats I whipped up this morning. NBD.” Go on, you deserve this deliciousness.
Ingredients You’ll Need
Time to gather your culinary arsenal! Don’t skimp on the good stuff; your taste buds will thank you.
- For the Dough:
- 1 cup warm milk (around 105-115°F/40-46°C – don’t shock the yeast, it’s delicate!)
- 2 teaspoons active dry yeast (your new best friend)
- 1/2 cup granulated sugar (for sweetness and to feed that yeast)
- 1/2 cup unsalted butter, melted (the real stuff, please)
- 1 large egg, room temperature (gives it richness)
- 1 teaspoon salt (balances everything out)
- 4-5 cups all-purpose flour (start with 4, add more if needed)
- For the Filling:
- 1/2 cup unsalted butter, softened (soft is key here, not melted!)
- 1 cup packed light brown sugar (that rich, caramelly goodness)
- 2 tablespoons ground cinnamon (fresh is best!)
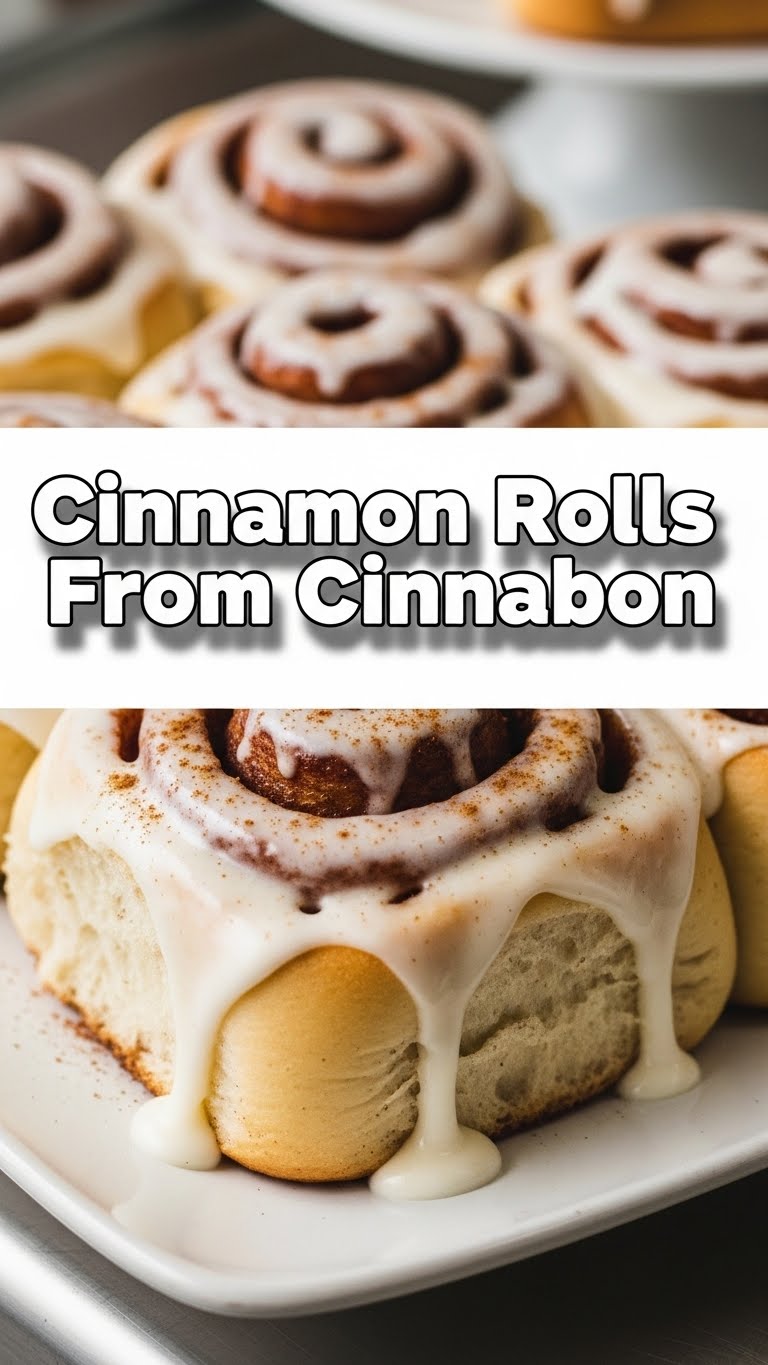
- For the Cream Cheese Frosting (the best part!):
- 4 oz cream cheese, softened (full-fat, because why are we even questioning this?)
- 1/4 cup unsalted butter, softened (more butter, yay!)
- 1 teaspoon vanilla extract (pure vanilla, if you have it)
- 1 1/2 cups powdered sugar (the fluffy cloud)
- 1-2 tablespoons milk or heavy cream (to reach peak drizzlability)
Step-by-Step Instructions
Alright, let’s get our hands (and probably our kitchen) a little floury!
- Wake Up the Yeast: In a large bowl, combine the warm milk, 1 teaspoon of the sugar, and the yeast. Give it a gentle stir, then let it sit for about 5-10 minutes until it gets nice and frothy. This means your yeast is alive and ready to party!
- Make the Dough: Add the melted butter, remaining sugar, egg, salt, and 2 cups of flour to the yeast mixture. Mix until combined. Gradually add the remaining flour, about 1/2 cup at a time, until the dough comes together and is no longer super sticky.
- Knead It Out: Turn the dough out onto a lightly floured surface. Knead for 5-8 minutes until it’s smooth and elastic. You want it springy, like a tiny dough trampoline.
- First Rise: Lightly grease a clean bowl, place the dough in it, and turn it once to coat. Cover the bowl with plastic wrap or a clean kitchen towel. Let it rise in a warm place for 1-1.5 hours, or until it has doubled in size. **Patience is a virtue here!**
- Prep the Filling: While the dough rises, combine the softened butter, brown sugar, and cinnamon in a small bowl. Mash it together until it forms a uniform paste.
- Roll ‘Em Out: Once risen, gently punch down the dough to release the air. On a lightly floured surface, roll the dough into a large rectangle, about 18×12 inches. Don’t go too thin!
- Spread the Love: Evenly spread the cinnamon-sugar filling over the entire surface of the dough, making sure to go all the way to the edges.
- Roll ‘Em Up: Starting from one of the long sides, carefully roll the dough tightly into a log. Once rolled, pinch the seam closed to seal it.
- Slice and Dice: Using a sharp, un-serrated knife or (my secret weapon) unflavored dental floss, cut the log into 12 equal rolls, about 1.5 inches thick.
- Second Rise: Arrange the rolls in a lightly greased 9×13-inch baking dish. Cover again and let them rise for another 30-45 minutes, or until they look puffy and cozy. Meanwhile, preheat your oven to 375°F (190°C).
- Bake ‘Em Good: Bake for 20-25 minutes, or until golden brown and the centers are cooked through. Don’t overbake, or they’ll be dry!
- Whip Up the Frosting: While the rolls are baking, combine all frosting ingredients in a bowl. Beat with an electric mixer until smooth and fluffy. Add more milk/cream if you want a thinner consistency.
- Frost and Devour: As soon as the rolls come out of the oven, generously slather that glorious cream cheese frosting all over them. The warmth of the rolls will make the frosting melt slightly, creating pure heaven. Serve immediately!
Common Mistakes to Avoid
Nobody’s perfect, but we can avoid some common culinary blunders, right?
- Cold Milk, Dead Yeast: Using milk that’s too cold means your yeast won’t activate, and you’ll end up with dense, sad rolls. Too hot, and you’ll kill it. Aim for bathwater warm!
- Skimping on the Rise: Rushing the rising process means your rolls won’t be as light and fluffy. **Patience, my friend, patience!**
- Overworking the Dough: Kneading too much or adding too much flour can lead to tough, chewy rolls. We want tender, cloud-like perfection.
- Forgetting to Preheat: Thinking you don’t need to preheat the oven? Rookie mistake. It impacts baking time and evenness.
- Under-Frosting: The frosting is non-negotiable! Don’t be shy. This is where the magic truly happens.
Alternatives & Substitutions
Life happens, sometimes you gotta improvise! Here are a few swaps that won’t totally ruin your day.
- Milk: Non-dairy milk like almond, oat, or soy milk work great if you’re avoiding dairy.
- Butter: For a dairy-free version, use a good quality plant-based butter (like Miyoko’s or Earth Balance sticks).
- No Cream Cheese?: If you’re out of cream cheese, a simple powdered sugar glaze (powdered sugar + milk/cream + vanilla) is still delicious, though not quite Cinnabon-level.
- Add-ins: Feel free to sprinkle some chopped pecans or walnuts over the filling for a textural crunch. A little orange zest in the filling or frosting can also brighten things up!
- Vanilla Extract: If you’re in a pinch, a tiny splash of almond extract can substitute, but **don’t tell anyone I told you that.** The flavor is different, but not bad!
FAQ (Frequently Asked Questions)
Got questions? I’ve got (casual) answers!
Can I make these ahead of time? Absolutely! You have a couple of options: after the first rise, wrap the dough tightly and refrigerate overnight. Or, after slicing and placing rolls in the pan for the second rise, cover tightly and refrigerate overnight. Take them out of the fridge an hour before baking to come to room temp and finish rising.
Why are my rolls tough? Ugh, the worst! Usually, this means you either overworked the dough (too much kneading) or added too much flour. Also, not letting them rise enough can result in a denser texture.
What if my yeast doesn’t foam? Uh oh. That means your yeast is likely dead (it happens!) or your milk wasn’t the right temperature. You’ll need to start fresh with new yeast and correctly warmed milk. Don’t proceed with dead yeast, or your rolls won’t rise.
Can I use margarine instead of butter? Well, technically yes, but why hurt your soul like that? Butter provides a richer flavor and better texture. If you’re going for Cinnabon, go for butter!
How do I store leftovers? If there *are* any leftovers (a big if!), store them in an airtight container at room temperature for up to 2 days, or in the fridge for up to 5 days. Reheat gently in the microwave or oven for that fresh-baked feel.
Can I freeze these? Yes! You can freeze unbaked rolls (after the second rise, before baking) or fully baked and frosted rolls. Just make sure they’re in a freezer-safe container. Thaw overnight and reheat.
Final Thoughts
You just made Cinnabon-worthy rolls, you magnificent baker, you! Seriously, give yourself a round of applause. The smell, the warmth, the sheer gooey deliciousness—it’s all worth it. Now go impress someone (or just yourself) with your new culinary skills. You’ve earned that buttery, cinnamon-sugar hug. And remember, calories don’t count when they’re homemade. Enjoy every single glorious bite!


