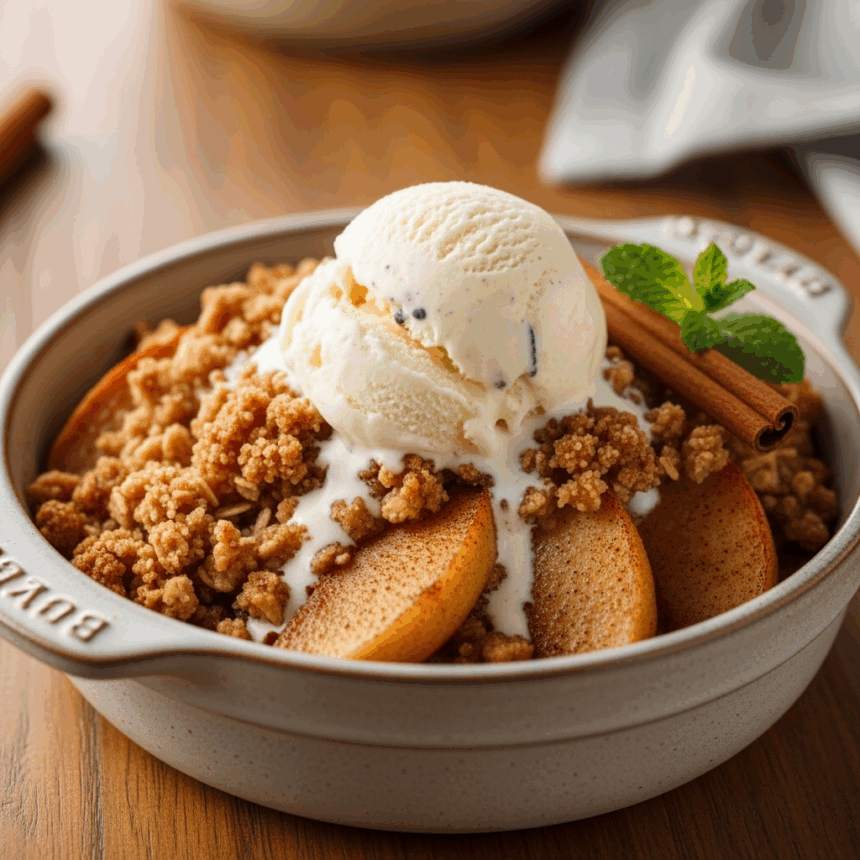
You know that moment when you’re standing in front of your fridge wondering why you bought so many apples? Or maybe you just went apple picking and now have enough fruit to feed a small village? Well, I have the perfect solution that’ll make your kitchen smell like a fall-scented candle store exploded in the best possible way. Let’s make some cinnamon apple crisp, top it with ice cream, and pretend we’re sophisticated adults who have their lives together!
Why This Recipe is Awesome
Listen, I don’t throw around the word “awesome” for just any dessert, but this cinnamon apple crisp deserves it. First, it’s basically impossible to mess up. Seriously, if you can operate a knife and an oven, you’re already 90% there. Second, the contrast between warm, spiced apples, crunchy oat topping, and cold ice cream is basically what dessert dreams are made of. And finally, people will think you spent hours on this when it really takes about 15 minutes of actual work. The rest is just waiting while your house fills with an aroma that’ll make your neighbors jealous.
Bonus point: You can totally claim this as a breakfast food. I mean, it has fruit and oats. That’s practically a health food, right?
Ingredients You’ll Need
For the apple filling:
- 6-7 medium apples (Granny Smith, Honeycrisp, or whatever looked pretty at the store)
- ¾ cup granulated sugar (because we’re not here to count calories)
- 2 tablespoons all-purpose flour (to thicken things up)
- 2 teaspoons ground cinnamon (more if you’re a cinnamon fanatic like me)
- ¼ teaspoon ground nutmeg (the secret weapon)
- 2 tablespoons lemon juice (to keep those apples from turning brown and sad)
- 1 teaspoon vanilla extract (the good stuff, not that imitation nonsense)
For the crisp topping:
- 1 cup old-fashioned oats (not the instant kind—they’ll turn to mush)
- 1 cup all-purpose flour (more gluten, more love)
- 1 cup packed brown sugar (light or dark, I don’t judge)
- ½ teaspoon ground cinnamon (because we need more cinnamon, obviously)
- ½ cup cold butter, cubed (cold is key—don’t let it get all melty and weird)
- Pinch of salt (to make the sweet taste sweeter—it’s science)
For serving:
- Vanilla ice cream (the good stuff—this is not the time to cheap out)
- Optional: caramel sauce (because why stop at just ice cream?)
Step-by-Step Instructions
- Preheat your oven to 350°F (175°C). This isn’t optional, people. Don’t be that person who puts food in a cold oven and wonders why everything’s taking forever.
- Peel, core, and slice your apples into roughly ¼-inch pieces. They don’t need to be perfect—we’re going for rustic charm here, not surgical precision.
- In a large bowl, toss your apple slices with sugar, flour, cinnamon, nutmeg, lemon juice, and vanilla. Make sure every slice gets coated in that sugary goodness. It should smell amazing already.
- Dump your apple mixture into a 9×13-inch baking dish. Spread it out evenly and resist eating it raw (though I won’t judge if you sneak a piece).
- In another bowl, mix together the oats, flour, brown sugar, cinnamon, and salt for the topping.
- Add the cold butter cubes to your dry topping ingredients. Use your fingers to pinch and squish everything together until you have a crumbly mixture. This is your stress-relief moment—enjoy it.
- Sprinkle (or let’s be honest, dump) the topping evenly over your apples. Cover every inch of those apples—no naked fruit allowed.
- Bake for 40-45 minutes until the topping is golden brown and the apple filling is bubbling around the edges with attitude.
- Let it cool for about 10 minutes (I know, it’s torture, but you don’t want to burn your mouth).
- Scoop a generous portion into bowls, top with vanilla ice cream that starts melting immediately, and experience pure bliss.
Common Mistakes to Avoid
Even though this recipe is pretty forgiving, there are still ways to mess it up (trust me, I’ve tried them all):
- Slicing apples too thin or too thick – Paper-thin slices will disintegrate into applesauce, while chunks the size of your fist will still be raw when the topping burns. Aim for that Goldilocks zone of ¼-inch slices.
- Using warm butter in the topping – You’ll end up with a paste instead of a crumble. Keep that butter COLD, folks.
- Skipping the lemon juice – Unless you enjoy brown, oxidized apples that look like they’ve been sitting in your lunch bag all day, use the lemon juice.
- Not letting it cool – I get it, the smell is intoxicating. But molten apple filling is basically culinary napalm. Give it those 10 minutes.
- Forgetting the ice cream – The warm/cold contrast is what makes this dessert extraordinary. Don’t rob yourself of this joy.
Alternatives & Substitutions
Not everyone has the same pantry or dietary needs, so here are some tweaks:
- Apples: Not picky here. Granny Smith gives you that nice tartness, but Honeycrisp, Braeburn, or Jonagold work great too. Avoid Red Delicious though—they’re the disappointment of the apple world, IMO.
- Gluten-free? Swap the flour for a gluten-free blend and make sure your oats are certified gluten-free (oats are naturally GF but often processed with wheat products).
- Vegan version: Use plant-based butter. The rest is already animal-product-free. For serving, grab your favorite non-dairy ice cream (the coconut-based ones work particularly well here).
- Spice it up: Add a pinch of cardamom, ginger, or allspice if you’re feeling fancy. Or throw in a splash of bourbon to the apple mixture if you’re having that kind of day.
- Nuts about nuts? Add ½ cup of chopped pecans or walnuts to the topping for extra crunch.
FAQ (Frequently Asked Questions)
Can I prep this ahead of time?
Absolutely! Assemble everything but hold off on baking. Cover it up, refrigerate for up to 24 hours, then bake when you’re ready. You might need to add 5-10 minutes to the baking time if it’s coming straight from the fridge.
Will this keep in the fridge?
Leftovers? What leftovers? But yes, it’ll keep for about 3-4 days. The topping might lose some crispness, but a quick trip to the oven (or even microwave if you’re desperate) will revive it.
Can I freeze this?
You can freeze the unbaked crisp for up to 3 months. Thaw in the fridge overnight before baking. Already baked? It’ll freeze for about a month, but the texture might change a bit.
Do I really need to peel the apples?
Technically no. If you’re feeling lazy or enjoy extra fiber, leave those peels on. They’ll add texture and nobody’s going to revoke your cooking license.
Can I use quick oats instead of old-fashioned?
Can you? Yes. Should you? Well, the topping won’t be as crunchy and defined. It’s like substituting a potato chip with a soggy french fry—still potato, but not the same experience.
Help! My topping isn’t getting crispy!
Two likely culprits: your oven temperature is off (get an oven thermometer, they’re cheap), or you used melted butter in the topping. If it’s already in the oven, try cranking the heat to 375°F for the last 10 minutes.
Final Thoughts
There you have it—a cinnamon apple crisp that’s about to become your new go-to dessert for everything from Tuesday night blues to impressing your in-laws. The beauty of this recipe is its simplicity and how the humble apple transforms into something worthy of worship when paired with cinnamon, butter, and ice cream.
Remember, cooking should be fun, not stressful. If your crisp doesn’t look Instagram-perfect, who cares? It’ll still taste amazing, and you’ll have created something delicious with your own hands, which is pretty darn cool.
Now go gather those apples that have been giving you the side-eye from your fruit bowl, crank up your favorite tunes, and get baking. Your future self (and anyone lucky enough to be in your kitchen) will thank you!
