So, you’re eyeing that holiday party or just a cozy night in, and your inner dessert diva is whispering, “Chocolate! Decadence! But also… easy?” Yeah, same here. You want something that screams “I put effort into this!” but actually took less time than deciding what to watch on Netflix. Well, my friend, you’re in the right place because these Chocolate Truffles with a festive twist are about to become your new secret weapon. Get ready to impress yourself (and everyone else) with minimal fuss and maximum yum!
Why This Recipe is Awesome
Let’s be real, who wants to spend hours in the kitchen when there’s holiday cheer (or just your couch) calling? This recipe is basically the culinary equivalent of putting on sweatpants—comfortable, satisfying, and nobody needs to know how little effort it took. It’s truly **idiot-proof**; if I can make these without summoning kitchen demons, you absolutely can too. They’re rich, they’re chocolatey, they’re surprisingly easy, and with a little holiday sparkle, they look like they came straight from a fancy patisserie. Plus, you get to play with chocolate, which is basically therapy, right?
Ingredients You’ll Need
Gather ’round, my sweet-toothed companions! Here’s what you’ll need for your truffle adventure:
- 10 oz (about 1 ¾ cups) Good Quality Chocolate Chips or a Chopped Bar: Seriously, this is not the time for mediocre chocolate. Go for dark, semi-sweet, or even milk chocolate, whatever makes your heart sing.
- ¾ cup Heavy Cream: The stuff that makes everything creamy and luxurious. Don’t even think about light cream, we’re going all in!
- 2 tbsp Unsalted Butter: Just a little pat to make things extra smooth and shiny.
- 1 tsp Vanilla Extract: Because vanilla makes chocolate even more chocolatey. It’s science, probably.
- Pinch of Salt: A tiny bit to really make that chocolate flavor pop!
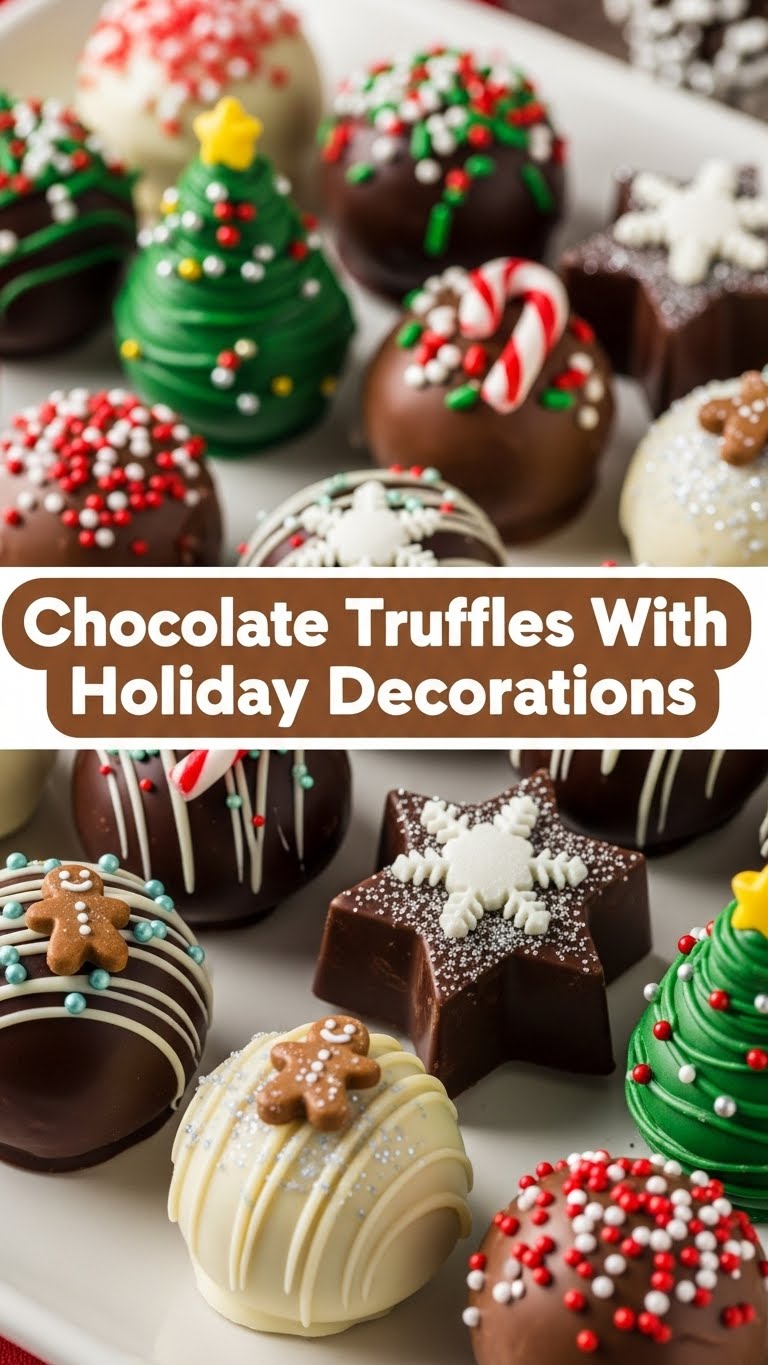
- Optional Holiday Decorations:
- Cocoa powder (for a classic look)
- Powdered sugar (for a snowy vibe)
- Finely chopped nuts (pistachios, pecans, almonds—whatever floats your boat)
- Crushed candy canes (hello, peppermint!)
- Holiday sprinkles (the more glitter, the better, IMO)
- Melted white chocolate (for drizzling!)
- Flaked coconut (snowball status unlocked)
Step-by-Step Instructions
- First things first, grab a medium heat-proof bowl and toss in your chocolate chips (or chopped bar), butter, and that tiny pinch of salt. Set it aside for a sec.
- In a small saucepan, gently heat the heavy cream over medium heat until it just begins to simmer around the edges. **Do not boil it!** We’re not making soup here.
- Pour that hot cream directly over your chocolate mixture. Let it sit for about 5 minutes without touching it. This gives the chocolate time to get all melty and gooey.
- After its little spa treatment, whisk the chocolate and cream until it’s super smooth, glossy, and completely combined. Stir in the vanilla extract. This magical mixture is called ganache, and it’s basically liquid gold.
- Cover the bowl with plastic wrap and pop it in the fridge. Now, this is the hard part: you need to chill it for at least 2-3 hours, or until it’s firm enough to scoop. If you’re impatient (like me), you can try the freezer for about 45 minutes, but keep an eye on it!
- Once firm, prepare your decoration stations! Put your cocoa powder, sprinkles, crushed candy canes, etc., into separate shallow bowls.
- Time to get rolling! Using a small cookie scoop or a spoon, scoop out about 1 tablespoon of the ganache. Roll it between your palms to form a sphere. Don’t overwork it, or it’ll get too warm.
- Immediately roll each truffle in your chosen holiday decoration. Get creative! Mix and match. Place the finished truffles on a parchment-lined baking sheet.
- Once all your truffles are rolled and decorated, give them another quick chill in the fridge for about 15-20 minutes to firm them up one last time.
Common Mistakes to Avoid
Nobody’s perfect, but we can at least try to avoid these rookie blunders:
- Boiling the Cream: You’re just heating it, not trying to make a volcano. Too hot, and your chocolate might seize or become oily. Gentle is the name of the game.
- Impatience is Not a Virtue (Here): Seriously, don’t skimp on the chilling time. If your ganache isn’t firm enough, you’ll end up with a sticky, shapeless mess and a very frustrated chef. **Chill time is crucial!**
- Using Low-Quality Chocolate: Remember what I said earlier? Life’s too short. Bad chocolate means bad truffles. Don’t do it to yourself.
- Overworking the Truffles: When rolling, be quick and gentle. The warmth of your hands can melt the chocolate, making them sticky and hard to handle.
Alternatives & Substitutions
Feeling adventurous? Or just working with what you’ve got? Here are some ideas:
- Chocolate Varieties: While semi-sweet or dark chocolate is classic, you can totally use milk chocolate for a sweeter truffle. Or, for a sophisticated twist, try a good quality white chocolate (though you might need to adjust cream slightly as white chocolate can be trickier).
- Boozy Bliss: For an adult-only treat, add a tablespoon or two of your favorite liqueur to the ganache with the vanilla. Think Kahlúa, Grand Marnier, Bailey’s, or even a good quality rum. Talk about festive!
- Flavor Boosters: Instead of (or in addition to!) vanilla, try almond extract, peppermint extract (amazing with crushed candy canes!), or a dash of orange zest.
- Dairy-Free Option: You can absolutely swap the heavy cream for full-fat coconut cream (the thick part from a can of chilled coconut milk) and the butter for a plant-based butter alternative. They’ll be slightly different but still delicious!
FAQ (Frequently Asked Questions)
- “Can I make these ahead of time?” Heck yes! Truffles are fabulous make-ahead treats. Just store them properly (see next question!).
- “How should I store them?” Keep them in an airtight container in the fridge for up to 2 weeks. Let them come to room temperature for 10-15 minutes before serving for the best texture.
- “Can I freeze truffles?” You bet! Pop them in an airtight container and freeze for up to 3 months. Thaw them in the fridge overnight, then let them sit at room temp briefly before devouring.
- “My ganache is too runny after chilling, what gives?” Probably needed more chill time, or perhaps your cream was too hot initially. Pop it back in the fridge! If it’s really bad, you might need to gently reheat, add a tiny bit more chocolate, and re-chill.
- “Any tips for rolling them perfectly round?” Cold hands help! You can run your hands under cold water for a few seconds and dry them thoroughly before rolling batches. Work quickly!
- “Can I skip the butter?” You can, but that little bit of butter really helps with the silky smooth texture and the lovely sheen. For the best truffles, don’t skip it!
Final Thoughts
So there you have it, folks! Delicious, festive, and surprisingly simple chocolate truffles that will make you feel like a culinary wizard. These aren’t just desserts; they’re tiny balls of joy, perfect for gifting, sharing, or just hiding in your pajama drawer for a personal treat (no judgment here!). Now go forth, conquer that kitchen, and enjoy the sweet rewards of your (minimal) labor. You’ve earned it!


