So, you’ve got that chocolate craving hitting harder than a Monday morning, but the thought of baking something complex makes you want to crawl back under the covers? Been there, done that, bought the T-shirt. Good news, my friend: I’ve got a recipe that’s about to become your new best buddy.
Why This Recipe is Awesome
Okay, let’s be real. We all want to look like culinary geniuses without, you know, actually *being* one. This Chocolate Trifle Cake is your secret weapon. It’s practically impossible to mess up, even if your oven tries to stage a rebellion. Plus, it looks fancy AF, meaning everyone will think you spent hours slaving away when really, you were probably binging Netflix and assembling this beauty during commercial breaks.
It’s layers of moist cake, creamy pudding, and rich chocolate – a dessert hero for the lazy gourmand. And the best part? No baking required for the “cake” part if you go the shortcut route. You heard me right. This is gourmet-level deliciousness with minimal effort. You’re welcome.
Ingredients You’ll Need
- A good-quality chocolate cake (store-bought brownies, leftover cake, or even Oreos if you’re feeling wild!) – About 8-10 oz. This is your foundation, so make it count, even if you didn’t bake it.
- Instant chocolate pudding mix (the big box, usually 5.9 oz) – We’re not making rocket science here, folks.
- Milk (the amount specified on your pudding box) – Whole milk gives the best creamy texture, just saying.
- Heavy cream (2 cups) – Because life’s too short for skimmed dreams.
- Powdered sugar (1/2 cup, or to taste) – For that sweet cloud of whipped cream.
- Vanilla extract (1 tsp) – A little *je ne sais quoi*.
- Chocolate chips or shavings (1/2 cup, or more if you’re a true chocoholic) – For sprinkling, because bling.
- Optional fun stuff: Raspberries, sliced strawberries, a splash of Kahlua or rum for the grown-ups.
Step-by-Step Instructions
- Prep Your Cake: If using store-bought cake or brownies, cut them into 1-inch cubes. If you’re a true rebel and using Oreos, crush them slightly. Set aside.
- Pudding Time: In a large bowl, whisk together the instant chocolate pudding mix and milk according to package directions. Whisk for a solid 2 minutes until it starts to thicken. Let it chill in the fridge for 5 minutes to get extra firm.
- Whip It Good: In a separate, very clean bowl (fat is the enemy of whipped cream!), combine the heavy cream, powdered sugar, and vanilla extract. Beat with an electric mixer on medium-high speed until stiff peaks form. Don’t overmix, or you’ll have butter, not whipped cream!
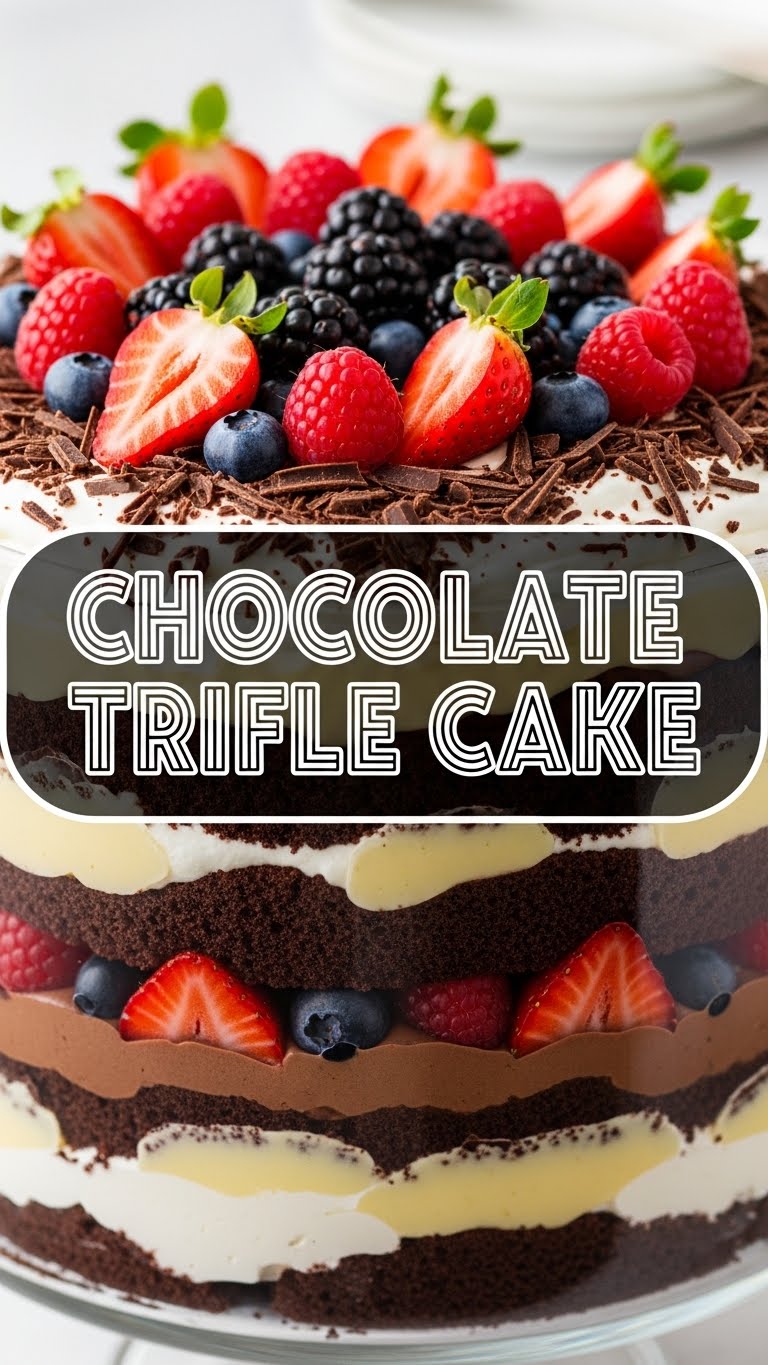
- Assemble the Masterpiece (Layer 1): Grab your fancy trifle bowl (or any clear glass bowl that screams “I tried”). Start with a layer of your chocolate cake cubes at the bottom. Don’t press them down too hard. We want airiness!
- Layer 2: Spoon half of your chocolate pudding mixture over the cake layer. Spread it gently to cover everything.
- Layer 3: Dollop half of your freshly whipped cream over the pudding. Again, spread it out carefully.
- Repeat the Magic: Do it all over again! Another layer of cake, then the remaining pudding, and finally, the rest of the whipped cream on top.
- The Grand Finale: Sprinkle generously with chocolate chips or shavings. If you’re feeling fancy, add some fresh berries.
- Chill Out: Cover your trifle loosely with plastic wrap and refrigerate for at least 4 hours (or overnight, if you have that kind of patience). This lets the flavors meld and the cake get nice and moist.
Common Mistakes to Avoid
- Not chilling the pudding enough: Impatience is a virtue, but not here. Give it time to set, or your layers will be a sad, runny mess.
- Over-whipping your cream: Unless you’re aiming for a batch of homemade butter (which, hey, good for you, but not for this trifle), stop when those peaks are stiff, not grainy.
- Skimping on the cake layer: No one wants a trifle that’s mostly pudding and cream. Even layers are key for that perfect bite.
- Eating it immediately: Seriously, resist the urge! That chilling time is crucial for the cake to absorb all those yummy flavors and moisture. Otherwise, it’s just a stack of stuff, not a symphony.
Alternatives & Substitutions
- Cake Choice: No chocolate cake? No problem! Yellow cake, red velvet, or even chocolate chip cookies (crushed!) can totally work. I’m personally a huge fan of using fudgy brownies for an extra rich experience.
- Pudding Power: Vanilla pudding, white chocolate pudding, or even a mix of chocolate and peanut butter pudding can switch things up. Feel free to get creative!
- Cream Dream: Don’t have heavy cream? Cool Whip is a valid, no-fuss alternative if you’re truly in a pinch. Just don’t tell the food snobs.
- Boozy Bliss: For an adult version, drizzle a tablespoon or two of Kahlua, rum, or Grand Marnier over the cake layers before adding the pudding. It adds a lovely kick!
- Fruit Frenzy: Berries are classic, but sliced bananas or even a layer of cherry pie filling can take this trifle in a whole new direction.
FAQ (Frequently Asked Questions)
- “Do I *have* to use a trifle bowl?” Nah, not really. Any clear glass bowl will show off those gorgeous layers. A punch bowl, a big mixing bowl, whatever you got that lets people ooh and aah.
- “Can I make this ahead of time?” Oh my goodness, yes! This dessert actually tastes better the next day once everything has had a chance to mingle. Just cover it well in the fridge.
- “My whipped cream isn’t getting stiff, help!” Is your cream super cold? Is your bowl super cold? Are you sure there’s no fat residue? Temperature is key. If all else fails, a teaspoon of cream of tartar can help stabilize it. Or, again, resort to Cool Whip – no judgment here!
- “Can I use sugar-free pudding?” You certainly can! Just be aware that the texture might be slightly different, and adjust sweetness with the powdered sugar in the whipped cream as needed.
- “How long does it last in the fridge?” Usually 3-4 days, covered. After that, the cake might get a bit too soggy, and the whipped cream can start to weep.
- “Is this *really* easy, or are you just saying that?” Friend, if I can make it without setting off the smoke detector, you can make it. It’s truly a beginner-friendly showstopper.
Final Thoughts
See? I told you it was easy! Now you’ve got this stunning, decadent Chocolate Trifle Cake that looks like it took you all day but actually gave you plenty of time for, well, whatever it is you do with your spare time (probably scrolling TikTok, let’s be real). Go on, dig in. You’ve earned every single glorious bite. And don’t forget to casually mention how “challenging” it was when someone compliments it. A little white lie never hurt anyone. Happy triflin’!


