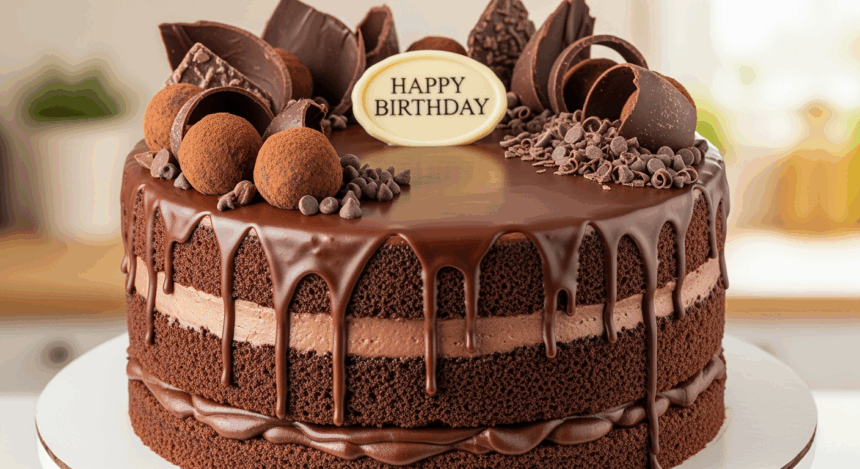
So you want to level up your cake game without spending three days at pastry school? I got you. This chocolate drip cake looks like it belongs in some fancy bakery window, but between us, it’s basically foolproof. Even that friend who burns water can handle this one. Trust me, people will think you’ve been hiding professional baking skills all along.
Why This Recipe is Awesome
Let’s be real for a second. Most showstopper cakes require engineering degrees and the patience of a saint. Not this one! This chocolate drip cake is the ultimate cheat code for looking like you know what you’re doing in the kitchen. It’s basically the cake equivalent of putting on red lipstick when you’ve got exactly zero other makeup skills – instant glamour with minimal effort.
The beauty of this recipe is that the drip technique actually works better when it’s slightly imperfect. Those little inconsistencies? They’re not mistakes—they’re “artisanal touches.” You’re welcome.
Ingredients You’ll Need
For the cake:
- 2 cups all-purpose flour (the regular boring kind, nothing fancy)
- 2 cups granulated sugar (because we’re not pretending this is health food)
- 3/4 cup unsweetened cocoa powder (the good stuff, not the weird chalky kind)
- 2 teaspoons baking powder (it’s what makes the magic happen)
- 1 1/2 teaspoons baking soda (yes, it’s different from baking powder)
- 1 teaspoon salt (to make the sweet stuff taste sweeter, science!)
- 1 cup buttermilk (regular milk with a splash of lemon juice works if you’re not a buttermilk hoarder)
- 1/2 cup vegetable oil (keeps it moist, sorry if you hate that word)
- 2 large eggs (room temperature, because cold eggs are party poopers)
- 2 teaspoons vanilla extract (the real deal, not that imitation nonsense)
- 1 cup hot coffee (don’t worry, it won’t taste like coffee, it just enhances the chocolate)
For the frosting:
- 1 cup unsalted butter, softened (like, actually soft, not still cold in the middle)
- 4 cups powdered sugar (yes, that much, don’t question it)
- 1/2 cup cocoa powder (same as above, the good stuff)
- 1/4 cup heavy cream (the stuff that makes everything better)
- 1 teaspoon vanilla extract (again, real vanilla, respect yourself)
- Pinch of salt (to cut the sweetness, trust me on this)
For the chocolate drip:
- 1 cup chocolate chips (semi-sweet or dark, depending on how sophisticated you’re feeling)
- 1/2 cup heavy cream (your arteries are already committed at this point)
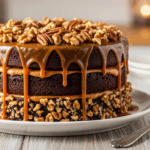
- Optional decorations: chocolate curls, sprinkles, or whatever makes your heart happy
Step-by-Step Instructions
- Prep your battlestation. Preheat oven to 350°F (175°C). Grease and line two 8-inch cake pans. If you use 9-inch pans, I won’t tell anyone, but your cake will be shorter.
- Mix the dry ingredients. In a large bowl, whisk together flour, sugar, cocoa powder, baking powder, baking soda, and salt. Try not to create a dust storm in your kitchen.
- Get wet. In another bowl, combine buttermilk, oil, eggs, and vanilla. Mix until they’re friends.
- Bring it all together. Slowly add the wet ingredients to the dry ingredients while mixing. Pour in the hot coffee last and mix until just combined. The batter will be thin – that’s normal, don’t panic.
- Bake it up. Divide the batter between your prepared pans and bake for 30-35 minutes, or until a toothpick comes out clean. If you forget the toothpick test and have to poke multiple holes, just cover them with frosting later.
- Cool your jets. Let the cakes cool in the pans for 10 minutes, then flip them onto a wire rack to cool completely. Patience is a virtue, but I won’t judge if you speed things up in the freezer.
- Frosting time! Beat the softened butter until creamy. Gradually add the powdered sugar and cocoa powder, alternating with heavy cream. Add vanilla and salt. Beat until fluffy and spreadable.
- Stack ’em up. Once cakes are completely cool, place one layer on your cake stand. Spread a thick layer of frosting on top, then place the second layer. Frost the entire cake with a thin “crumb coat” first, chill for 15 minutes, then add the final layer of frosting.
- Make that gorgeous drip. Heat the heavy cream until just simmering (not boiling), then pour over chocolate chips. Let sit for 2 minutes, then stir until smooth. Cool until slightly thickened but still pourable – about 10 minutes.
- The dramatic finale. Pour the chocolate drip around the edges of the cake, using a spoon to encourage drips down the sides. Then fill in the top. Add your decorations before the drip sets.
Common Mistakes to Avoid
Let’s be honest, there are about 47 ways to mess up a cake, but here are the greatest hits:
- Using hot chocolate drip. If your ganache is too warm, you’ll have a chocolate waterfall, not elegant drips. Nobody wants Niagara Falls on their cake stand.
- Frosting warm cake. This creates the infamous “cake avalanche” where layers slide off each other. Not a good look unless you’re going for “modern art dessert.”
- Forgetting to level your cakes. Unless you want the Leaning Tower of Chocolate, take two minutes to even out those dome tops.
- Overbeating the cake batter. This isn’t a workout session. Mix just until combined unless you’re aiming for a cake with the texture of a rubber bouncy ball.
- Rushing the process. I know you want to eat cake NOW, but cooling and chilling steps are non-negotiable. Otherwise, you’ll be serving Chocolate Soup Surprise.
Alternatives & Substitutions
Because we’re all unique snowflakes with different pantry situations:
- No buttermilk? Mix 1 cup milk with 1 tablespoon lemon juice or vinegar. Let stand for 5 minutes before using. Magic!
- Coffee-phobic? Hot water works too, but you’re missing out on depth of flavor. The cake won’t taste like coffee, I pinky promise.
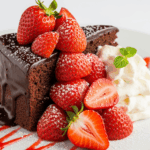
- Want to fancy it up? Add a layer of raspberry jam between cake layers. It’s like putting a bowtie on an already handsome cake.
- Milk chocolate lover? Swap semi-sweet for milk chocolate in the drip. It’ll be sweeter but who am I to judge your sugar tolerance?
- Gluten concerns? A good quality 1:1 gluten-free flour blend works shockingly well here. Your gluten-free friends will weep with joy.
FAQ (Frequently Asked Questions)
Can I make this cake ahead of time?
Absolutely! The cake layers can be made up to 2 days ahead and wrapped tightly in plastic wrap. You can even freeze them for up to a month. The frosted cake (without the drip) can be made a day ahead. Add the drip about 2-3 hours before serving for maximum wow factor.
Why is my drip setting before it drips down the cake?
Your ganache is too cool, my friend. If it’s starting to thicken up too much, give it 5-10 seconds in the microwave and stir well before trying again. It’s like giving it a little pep talk.
Can I use box cake mix instead?
I mean, technically yes, in the same way you can technically wear socks with sandals. Will it work? Yes. Is it the best choice? Debatable. But hey, I’m not the cake police.
How do I get perfect drips?
Use a squeeze bottle or spoon to control the drip. Start with a few test drips on the back of the cake to check the consistency. Too runny? Let it cool a bit more. Too thick? Warm it slightly. It’s like the Goldilocks of cake techniques.
Do I really need two cake pans?
Unless you want to bake one layer, wait, wash the pan, and bake again (which is cake torture), yes. But if you’re a minimalist with only one pan, you can do the relay method. Just reduce the baking powder and soda by 1/4 tsp each so the second batch doesn’t fall flat while waiting its turn.
Why did my cake sink in the middle?
Either you’re at high altitude (in which case, special baking rules apply), your leavening agents are old, you overmixed, or—most likely—you opened the oven door too early. Ovens are like cats; they hate when you disturb them while they’re working.
Final Thoughts
Look at you with your fancy chocolate drip cake! This is the kind of dessert that makes people think you have your life together, even if your laundry has been sitting in the dryer for three days. The best part? It’s actually delicious, not just pretty.
Don’t stress if your drips aren’t perfect or if your frosting isn’t as smooth as those impossibly perfect Instagram cakes. Those are probably made of fondant and disappointment anyway.
Now go forth and collect compliments! Take a dramatic cake-cutting photo for social media. Make weird noises while eating it that make others slightly uncomfortable. You’ve earned the right with all that whisking. And remember—even if it somehow goes catastrophically wrong, you still have chocolate. And that’s never really a failure, is it?
