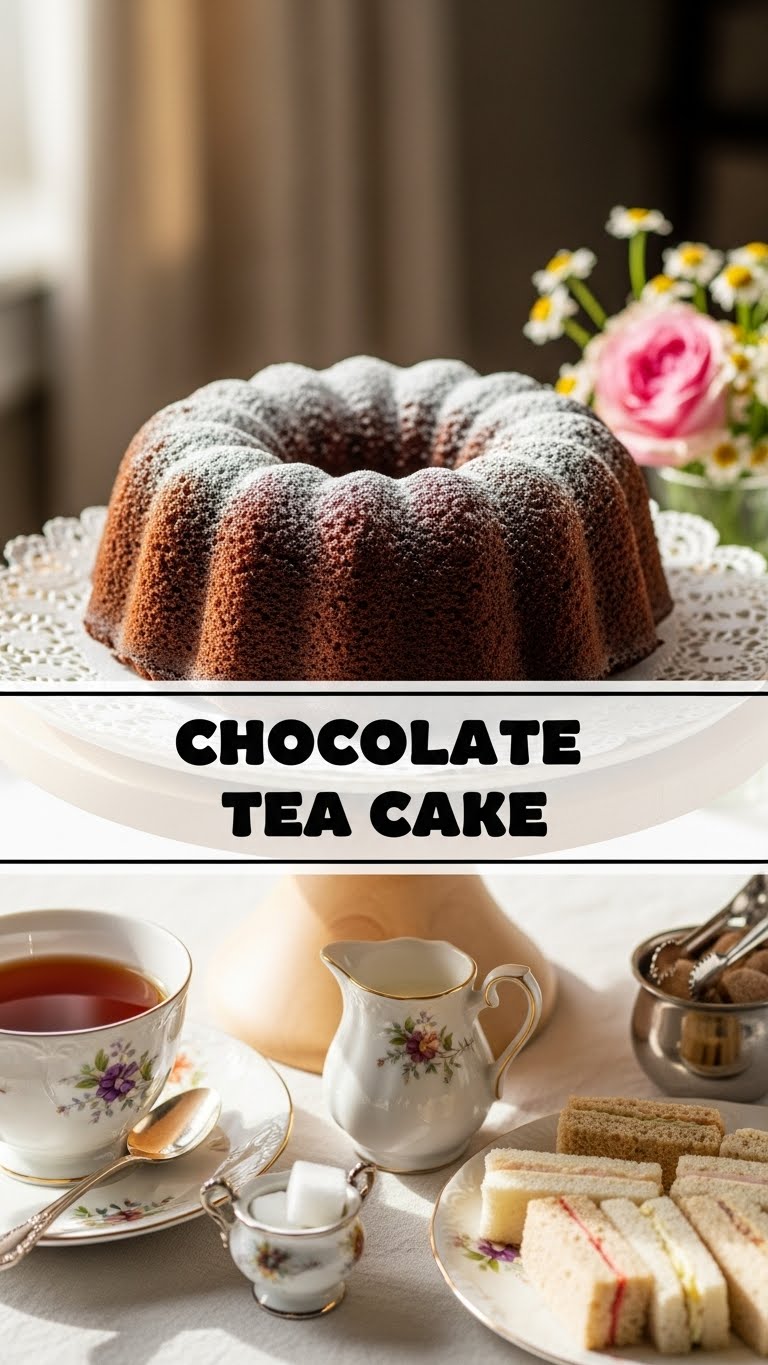
So, your sweet tooth is doing a tap dance, but your motivation to bake something epic is currently on vacation, huh? Same, friend, same. We’ve all been there: that deep, primal craving for chocolate, but the thought of a multi-step, dish-heavy baking project just makes you want to crawl back under the covers. Well, guess what? I’ve got your back with a recipe so easy, it practically bakes itself. Say hello to your new best friend: the Chocolate Tea Cake.
Why This Recipe is Awesome
Let’s be real: this isn’t some fancy patisserie masterpiece that requires a culinary degree and three hours of your life. Nope. This is your “I need chocolate, like, five minutes ago” cake. It’s ridiculously simple, uses ingredients you probably already have lurking in your pantry, and comes together faster than you can say “where did all the chocolate go?” Seriously, it’s idiot-proof. Even I didn’t mess it up, and my track record with anything more complex than toast can be… questionable.
Plus, it’s called a “tea cake” because it’s the perfect size for a snack, a breakfast treat (don’t judge!), or a modest dessert. It’s not overly sweet, so you can totally justify a second slice. And the best part? The aroma filling your kitchen will make you feel like a baking superstar, with minimal effort involved. Win-win-win!
Ingredients You’ll Need
Gather ’round, my fellow lazy-but-craving-dessert enthusiasts! Here’s what you’ll need to whip up this chocolatey dream:
- All-Purpose Flour: 1 ½ cups. Because we’re not fancy bakers here, just efficient ones.
- Unsweetened Cocoa Powder: ½ cup. The darker, the better for that rich chocolatey punch!
- Granulated Sugar: 1 cup. For that perfect sweet hug.
- Baking Powder: 1 teaspoon. Our little lift-off specialist for a fluffy crumb.
- Baking Soda: 1 teaspoon. Another secret weapon for lightness.
- Salt: ½ teaspoon. Just a pinch, to make all the other flavors sing.
- Milk: 1 cup. Any kind you prefer – dairy, almond, oat. No judgment here, just deliciousness.
- Vegetable Oil: ½ cup. For ultimate moistness, because melted butter is extra work, sometimes.
- Large Egg: 1. Our binding hero!
- Vanilla Extract: 1 teaspoon. Because everything’s better with a little va-va-voom vanilla.
- Optional (but highly recommended) Chocolate Chips/Chunks: ½ cup. Because more chocolate is always the answer. Period.
Step-by-Step Instructions
- Get Your Oven Ready: Preheat your oven to 350°F (175°C). Then, lightly grease and flour an 8×8-inch baking pan, or line it with parchment paper. Don’t skip this, your cake needs a good foundation!
- Whisk the Dry Crew: In a large bowl, whisk together the flour, cocoa powder, sugar, baking powder, baking soda, and salt. Make sure there are no lumps; nobody likes a lumpy cake, right?
- Mix the Wet Wonders: In a separate, medium-sized bowl, whisk together the milk, vegetable oil, egg, and vanilla extract until well combined. This is where all the liquids come to party.
- Combine Forces (Gently!): Pour the wet ingredients into the dry ingredients. Stir them together with a spatula or a wooden spoon just until *just* combined. Seriously, don’t overmix! Overmixing is the enemy of moist cake and will give you a tough, sad dessert. A few small lumps are totally fine.
- Chocolate Chip Boost (Optional): If you’re feeling extra indulgent (and why wouldn’t you be?), fold in those glorious chocolate chips now.
- Bake That Beauty: Pour the batter evenly into your prepared baking pan. Pop it into the preheated oven and bake for 30-35 minutes, or until a toothpick inserted into the center comes out clean.
- Cool Down: Once baked, let the cake cool in the pan for about 10-15 minutes before transferring it to a wire rack to cool completely. Patience, young padawan, it’s worth the wait!
Common Mistakes to Avoid
Even the simplest recipes have their pitfalls. Here’s how to steer clear of disaster and ensure your cake is a triumph:
- Thinking you don’t need to preheat the oven: Rookie mistake! Your oven’s not a magician; it needs time to get to the proper temperature for even baking.
- Overmixing the batter: I’m going to say it again because it’s THAT important. Too much mixing develops the gluten in the flour, leading to a dense, tough, and dry cake. Nobody wants that cardboard consistency.
- Opening the oven door constantly: Let the cake bake in peace! Peeking too often can cause the temperature to drop and your cake to sink in the middle. Be strong!
- Not greasing your pan properly: A cake stuck to the pan is the worst kind of heartbreak. Take the extra minute to grease and flour (or parchment line) it properly.
- Cutting it while it’s still hot: Hot cake crumbles and is a sticky mess. Cold cake slices beautifully. Pick your battles.
Alternatives & Substitutions
Feeling a little adventurous or just missing an ingredient? No stress, we can totally get creative here:
- Milk Swap: Almond milk, oat milk, soy milk – whatever you usually have on hand will work just fine. Just make sure it’s unsweetened if you want to keep control of the sugar level.
- Oil Alternatives: If you’re out of vegetable oil, melted coconut oil (neutral tasting ones, please!) or even unsweetened applesauce (for a lighter version) can work. Just be aware applesauce might change the texture a smidge.
- Cocoa Power-Up: For an extra-intense chocolate hit, try using Dutch-processed cocoa powder. It gives a darker color and a smoother chocolate flavor. YOLO!
- Mix-ins Mania: Don’t limit yourself to just chocolate chips! Throw in some chopped nuts (walnuts or pecans are fab), a sprinkle of shredded coconut, or even a teaspoon of instant espresso powder to really make that chocolate flavor pop (IMO, this is a game-changer).
- Frosting (or lack thereof): This cake is amazing plain. But if you want a little extra, a simple dusting of powdered sugar, a quick chocolate ganache drizzle, or a dollop of whipped cream elevates it beautifully.
FAQ (Frequently Asked Questions)
Got questions? I’ve got (casual) answers!
- “Can I make this in a round pan?” Absolutely! An 8 or 9-inch round pan will work. Just keep an eye on the baking time, as it might be a few minutes shorter.
- “Is it really a ‘tea cake’?” Well, it’s perfect *with* tea, and it’s not a giant layer cake that needs a special occasion, so yeah, it fits the bill! Don’t overthink it, just enjoy the vibe.
- “My cake came out dry, what happened?” Did you overmix? Or overbake? Probably one of those. **Get yourself an oven thermometer!** They’re super cheap and tell you if your oven’s actual temperature matches what you set it to.
- “Can I add coffee to this recipe?” OMG, YES! A teaspoon of instant espresso powder or strong brewed coffee (reducing the milk by the same amount) mixed with the dry ingredients will make the chocolate flavor *sing*. Highly recommend this trick.
- “How long does this cake last?” Wrapped tightly at room temperature, it’s usually good for 2-3 days. But honestly, it rarely lasts that long, does it?
- “Can I use self-rising flour?” You can, but then skip the baking powder and baking soda. I usually stick to all-purpose for more control over the leavening.
- “Can I freeze this cake?” Yep! Once completely cooled, wrap slices individually or the whole cake tightly in plastic wrap and then foil. It’ll keep in the freezer for up to a month. Thaw at room temp. Easy peasy!
Final Thoughts
So there you have it, my friend: your new go-to, stress-free, deeply satisfying chocolate fix. This Chocolate Tea Cake is proof that you don’t need to spend hours in the kitchen or dirty every single bowl to create something truly delicious. It’s simple, it’s quick, and it delivers on that chocolate craving every single time.
Now go forth and bake, you magnificent human! Impress your friends, delight your family, or just hoard it all for yourself (FYI, I fully support this option). You’ve earned this chocolatey goodness. Enjoy every single crumb!

