So you’re craving something tasty but too lazy to spend forever in the kitchen, huh? Same. We’ve all been there, staring into the abyss of our fridge, dreaming of chocolate, but recoiling at the thought of a complicated recipe involving multiple bowls and a fancy whisk. Good news, my friend! I’ve got just the thing that’s gonna hug your soul with chocolatey goodness without demanding your entire afternoon. Get ready for the easiest, most ridiculously moist Chocolate Syrup Cake you’ve ever met. It’s so good, it might just become your new secret weapon. (Don’t worry, your secret’s safe with me… mostly.)
Why This Recipe is Awesome
Let’s be real, life’s too short for bad cake or complicated baking. This Chocolate Syrup Cake? It’s basically your culinary best friend. It’s idiot-proof, even I didn’t mess it up, and that’s saying something! Here’s the lowdown on why you’re about to fall head over heels:
- Super Moist & Rich: Thanks to a secret ingredient (shhh, it’s chocolate syrup!), this cake stays incredibly tender and chocolatey for days.
- Minimal Effort, Maximum Impact: No need for a stand mixer or a culinary degree. Seriously, if you can stir, you can make this cake.
- Quick to Bake: From “I want cake” to “I’m eating cake” in under an hour (including cooling time, if you have the patience).
- Pantry Staples: You probably have most of these ingredients hiding in your kitchen right now. No special trips to the artisanal-whatever store required.
Ingredients You’ll Need
Alright, gather your supplies, future cake wizard! Here’s your shopping list. Don’t stress, it’s all super basic stuff.
- 1 ½ cups All-Purpose Flour: Because specificity is overrated sometimes.
- 1 ½ cups Granulated Sugar: The stuff that makes everything better (and dentists richer).
- ½ cup Unsweetened Cocoa Powder: The dark magic that gives us that chocolatey depth.
- 1 teaspoon Baking Soda: Our little lift-off agent. Don’t skip it!
- ½ teaspoon Salt: Balances everything out. Trust me, it makes a difference.
- 2 Large Eggs: The glue that holds our dreams together.
- 1 cup Milk: Any kind works, but whole milk gives it that extra luscious feel.
- ½ cup Vegetable Oil: Or canola, or any neutral oil. This is our moisture secret #2.
- 1 teaspoon Vanilla Extract: Because everything’s better with a splash of vanilla.
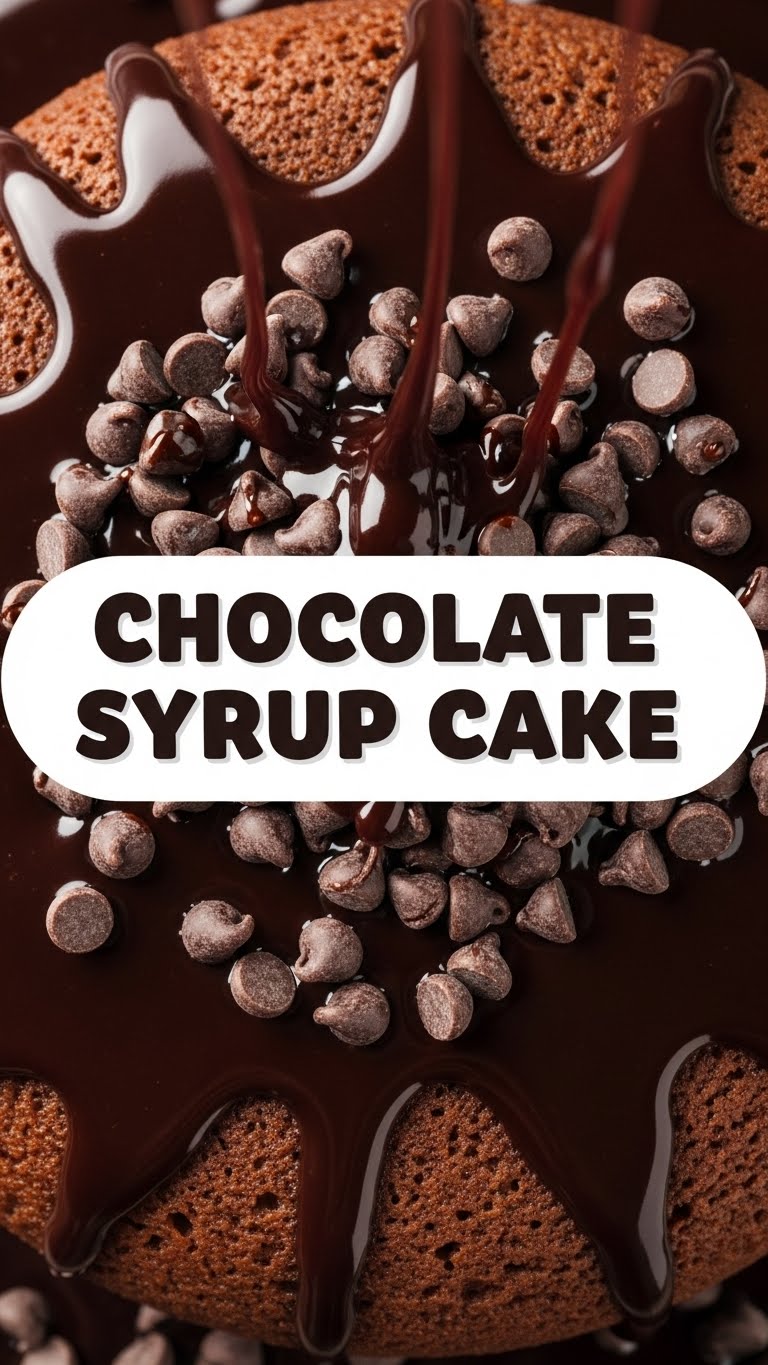
- 1 cup Chocolate Syrup (like Hershey’s or similar): This is the star of our show, folks! And no, not chocolate sauce, the *syrup*.
Step-by-Step Instructions
Ready to get your bake on? Follow these super simple steps, and you’ll be swimming in chocolatey goodness before you know it.
- Preheat & Prep: First things first, get that oven fired up to 350°F (175°C). While it’s heating, grab a 9×13 inch baking pan and give it a good spray with cooking spray or grease it with butter and flour. No one likes a sticky situation.
- Mix the Dry Crew: In a large mixing bowl, whisk together your flour, sugar, cocoa powder, baking soda, and salt. Make sure there are no lumpy bits. We’re going for smooth sailing here.
- Wet Ingredients Unite!: In a separate medium bowl, lightly beat your eggs. Then, add the milk, vegetable oil, and vanilla extract. Give it a good whisk until everything is happily combined.
- Combine Forces: Pour the wet ingredients into the dry ingredients. Stir them together until *just* combined. Don’t overmix! A few lumps are totally fine; overmixing leads to tough cake, and nobody wants that.
- Bake It Up: Pour your glorious batter into the prepared pan and smooth out the top. Pop it into the preheated oven and bake for 25-30 minutes, or until a toothpick inserted into the center comes out clean.
- Syrup Time (The Fun Part!): Once the cake is out of the oven, immediately grab your chocolate syrup. While the cake is still hot, use a fork or the blunt end of a wooden spoon to poke holes all over the top. Don’t be shy; you want those holes to be deep enough for the syrup to seep in.
- Drench & Devour: Pour the entire cup of chocolate syrup evenly over the hot, poked cake. Let it sit for about 10-15 minutes to allow all that chocolatey goodness to soak in. The anticipation is killer, I know, but it’s worth it.
- Serve It Up: Slice, serve, and bask in the glory of your moist, delicious creation. You can eat it warm or let it cool completely. Top with whipped cream or ice cream if you’re feeling extra fancy.
Common Mistakes to Avoid
Even though this recipe is pretty foolproof, there are a few rookie errors that can derail your chocolatey dreams. Learn from my past blunders, folks!
- Forgetting to Preheat the Oven: Rookie mistake! Your oven needs to be at temperature from the start for even baking. Don’t be that person.
- Overmixing the Batter: I repeat: Do not overmix! Stir until just combined. Too much stirring develops gluten, which makes your cake tough and chewy. We want tender and moist, remember?
- Not Greasing Your Pan Properly: Ever had a cake stick? It’s soul-crushing. Take an extra 30 seconds to grease and flour (or spray) that pan thoroughly.
- Opening the Oven Door Too Early: Patience, young padawan. Resist the urge to peek before the 20-minute mark, or your cake might sink in the middle.
- Skimping on the Poking: Those holes are crucial for the syrup to penetrate every delicious inch of your cake. Poke with purpose!
Alternatives & Substitutions
Life’s about options, right? While this recipe is fab as is, sometimes you gotta adapt. Here are a few tweaks you can make, but remember, I’m not responsible for any culinary catastrophes if you go too wild!
- Milk: No dairy milk? No problem! Almond milk, soy milk, or oat milk will work just fine. The texture might vary slightly, but it’ll still be delicious.
- Oil: While vegetable oil is my go-to for moisture, you can use melted butter if you prefer the flavor. Just know it might alter the texture a touch. Coconut oil (melted) also works for a subtle twist.
- Eggs: If you’re out of eggs or avoiding them, two flax eggs (2 tbsp ground flaxseed + 6 tbsp water, let sit for 5 mins) or ½ cup applesauce can often do the trick. Just manage your expectations; the texture won’t be identical.
- Chocolate Syrup: Stick to classic chocolate syrup for this one. Caramel or strawberry syrup would make it a *different* cake, and while those sound good, they aren’t *this* cake. But hey, if you’re feeling adventurous, who am I to stop you?
- Add-Ins: Feel free to fold in some chocolate chips, mini marshmallows, or chopped nuts (pecans or walnuts are divine) with the dry ingredients. Just don’t go overboard, we’re making a cake, not trail mix.
FAQ (Frequently Asked Questions)
Got questions? I’ve got (mostly sarcastic) answers!
- Can I make this cake ahead of time?
- Absolutely! This cake actually gets *better* on day two as the syrup really settles in. Cover it tightly and store at room temp. If it lasts that long, that is. 😉
- What kind of chocolate syrup should I use?
- A classic, thinner chocolate syrup like Hershey’s, Nestle, or your favorite store brand works best. We need it thin enough to seep into those glorious holes. Not the thick, fudge-like sauce you put on ice cream!
- My cake is dry! What happened?
- Oh no! Usually, a dry cake means you’ve either overbaked it or overmixed the batter. Make sure your oven temp is accurate, and always do that toothpick test without going past “clean.” Also, resist the urge to keep mixing once ingredients are just combined!
- Do I *really* need to poke holes in the cake?
- Do you *really* want a super moist, syrup-infused cake? Then yes! The holes are non-negotiable for that signature gooey texture. Embrace the poke!
- Can I use a different size pan?
- You can! A square 8×8 or 9×9 inch pan will make a thicker cake and might need a few extra minutes of baking time (up to 35-40 mins). Keep an eye on it and do the toothpick test. A round 9-inch pan would also work, but expect a slightly longer bake.
- How do I store leftovers?
- If by “leftovers” you mean the mythical slices that somehow survive the initial onslaught, just cover the pan tightly with plastic wrap or aluminum foil and keep it at room temperature for up to 3 days. It can also be refrigerated for longer, but I doubt it’ll make it that far.
Final Thoughts
And there you have it, folks! Your new favorite, ridiculously easy, and unbelievably delicious Chocolate Syrup Cake recipe. It’s the kind of cake that makes you look like a baking genius without actually having to break a sweat. So go ahead, whip up a batch, grab a fork (or just your hands, I won’t judge), and enjoy every single chocolatey bite. Now go impress someone—or yourself—with your new culinary skills. You’ve earned it! You’re basically a professional chef now, FYI.


