“`html
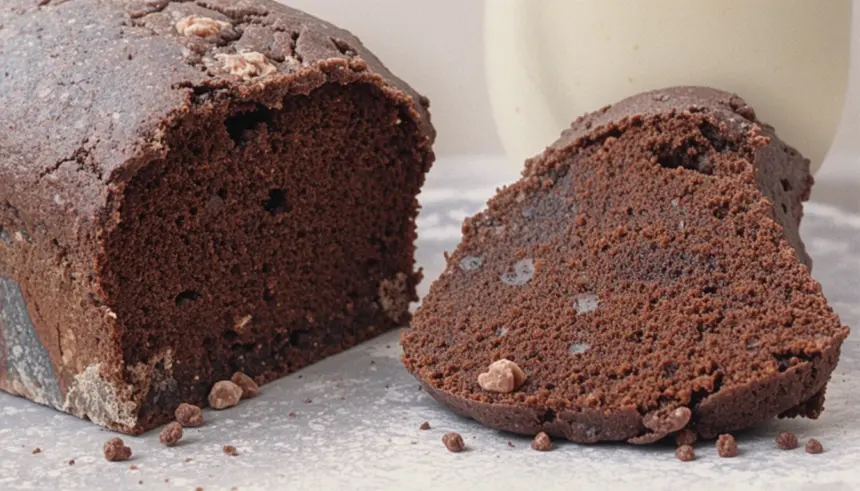
So, you’re having one of those days, huh? The kind where the only logical solution involves a serious chocolate intervention. And you want it NOW. But also, you don’t want to spend a gazillion hours in the kitchen because, let’s be real, that oven is basically a portal to another dimension when you’re waiting for cake. Well, my friend, I’ve got your back. This chocolate buttermilk pound cake is your new bestie. It’s decadent, it’s ridiculously moist, and it’s surprisingly chill to make.
Why This Recipe is Awesome
Honestly, what’s not to love? It’s chocolate. It’s a pound cake (which implies serious deliciousness). And it uses buttermilk, which is basically magic for making things tender and fluffy. Plus, it’s pretty forgiving. I’ve definitely forgotten a step or two (shhh, don’t tell anyone) and it still turned out amazing. It’s the kind of cake that makes you feel fancy without having to bust out the Michelin star techniques. It’s basically the culinary equivalent of a cozy blanket and a good movie.
Ingredients You’ll Need
- 2 ½ cups all-purpose flour: The sturdy foundation of our cakey dreams. Don’t get fancy, the regular stuff is fine.
- ¾ cup unsweetened cocoa powder: The star of the show! Use good quality stuff if you want maximum chocolate power.
- 1 ½ teaspoons baking soda: Our little leavening buddy. Don’t forget it, or your cake will be sad and flat.
- ½ teaspoon salt: This isn’t just for flavor, it actually makes the chocolate taste even more chocolatey. Science!
- 1 cup (2 sticks) unsalted butter, softened: Make sure it’s really softened. Like, finger-poke-test-makes-an-indent soft.
- 2 cups granulated sugar: For that sweet, sweet caramelization magic.
- 4 large eggs: Room temperature is your friend here. Cold eggs are like, “Nah, I’m not feeling this.”
- 1 teaspoon vanilla extract: The unsung hero of baking.
- 1 ½ cups buttermilk: The secret weapon. If you don’t have buttermilk, I’ll tell you how to fake it later.
Step-by-Step Instructions
- First things first, preheat your oven to 350°F (175°C). Grease and flour a 9×5 inch loaf pan. No one likes a cake stuck to the pan, it’s just plain rude.
- In a medium bowl, whisk together the flour, cocoa powder, baking soda, and salt. Give it a good stir until it’s all friends.
- In a large bowl, cream together the softened butter and sugar until light and fluffy. Think of it as giving the butter a good workout.
- Beat in the eggs one at a time, making sure each one is fully incorporated before adding the next. Then, stir in the vanilla extract.
- Now for the fun part! Alternate adding the dry ingredients and the buttermilk to the butter mixture. Start and end with the dry ingredients. Mix until just combined. **Don’t overmix!** Seriously, it’s the enemy of tender cake.
- Pour that glorious batter into your prepared loaf pan and smooth the top.
- Bake for 50-65 minutes, or until a toothpick inserted into the center comes out with moist crumbs (not wet batter). Ovens can be divas, so keep an eye on it!
- Let the cake cool in the pan for about 10-15 minutes before inverting it onto a wire rack to cool completely. Patience, grasshopper!
Common Mistakes to Avoid
- Using cold butter: This is a recipe for a dense, sad cake. Softened is key for that fluffy texture.
- Overmixing the batter: Like I said, this makes your cake tough. Mix until just combined, and then stop.
- Not preheating the oven: Rookie mistake! Your cake won’t bake evenly and might end up dense.
- Opening the oven door too early: This can cause your beautiful cake to sink. Resist the urge!
- Using stale baking soda: Your cake won’t rise properly. Check the expiration date, you know?
Alternatives & Substitutions
No buttermilk? No problem! You can totally make your own. Just take 1 ½ tablespoons of white vinegar or lemon juice and add enough milk (regular whole milk is best) to reach 1 ½ cups. Let it sit for 5-10 minutes until it looks a little curdled. Voila! Buttermilk substitute. It’s not *exactly* the same, but it’ll get you close. And if you’re feeling really lazy and want to skip the sifting, you *could* just dump everything in, but IMO, sifting makes a world of difference for a smooth cake.
FAQ (Frequently Asked Questions)
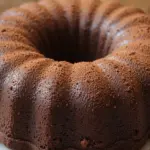
Can I make this cake in a bundt pan?
Sure! Just remember bundt pans have more surface area, so you might need to adjust the baking time. Start checking around 45 minutes.
My cake is a little dry, what did I do wrong?
Likely culprits: overbaking, overmixing, or using ingredients that weren’t the right temperature. Try to be more mindful next time, and maybe bake it for a few minutes less!
Can I use self-rising flour?
Nope, this recipe is designed for all-purpose. Stick to the plan for best results.
What if I don’t have cocoa powder?
Well, then it’s not a chocolate pound cake, is it? You’ll need to find a different recipe, my friend!
How long does this cake last?
Stored in an airtight container at room temperature, it should be good for about 3-4 days. Though, let’s be honest, it rarely lasts that long.
Can I add chocolate chips?
YES! Absolutely. Toss them in with the dry ingredients and you’ve just leveled up your cake game. You’re welcome.
Final Thoughts
And there you have it! A ridiculously delicious chocolate pound cake that’s way easier than it looks. It’s perfect for a lazy afternoon, an impromptu get-together, or just because you deserve a treat. So go forth, bake, and enjoy the pure, unadulterated joy of chocolate. You’ve earned it! Now go impress someone—or yourself—with your new culinary skills. You’ve earned it!
“`
