Okay, so someone’s got a birthday coming up, or maybe it’s just a Tuesday that feels like it deserves a medal. Either way, you need CAKE. And not just any cake, we’re talking about the kind of cake that makes angels sing and taste buds throw a party: Chocolate Peanut Butter Birthday Cake. If you’re craving something ridiculously tasty but don’t want to spend an eternity in the kitchen, you’ve hit the jackpot. Let’s get baking, buttercup!
Why This Recipe is Awesome
This isn’t just a cake; it’s a declaration of love for all things delicious and easy. Seriously, this recipe is your new best friend because:
- It’s practically **idiot-proof**. And trust me, if I can make it without setting off the smoke alarm, so can you.
- It combines two of the greatest things on Earth: chocolate and peanut butter. It’s like a Reese’s Cup exploded into cake form, but better.
- The cake itself is super moist, and the frosting is so creamy, you’ll want to bathe in it (don’t, but no judgment if you think about it).
- It’s a crowd-pleaser. Even your pickiest Aunt Mildred will ask for seconds. And that, my friend, is saying something.
- You don’t need fancy equipment. Just some bowls, a whisk, and maybe a stand mixer if you’re feeling extra.
Ingredients You’ll Need
Gather your troops! Make sure everything is at room temperature for best results. It makes a difference, trust me.
For the Chocolate Cake:
- 1 ½ cups (180g) All-Purpose Flour: The foundation of our dreams.
- ¾ cup (65g) Unsweetened Cocoa Powder: For that deep, dark chocolatey soul.
- 1 ½ teaspoons Baking Soda: Our lift-off crew.
- ½ teaspoon Salt: Balances all that sweetness. Don’t skip it!
- 1 cup (226g) Unsalted Butter: Softened, because everything’s better with butter, duh.
- 1 ¾ cups (350g) Granulated Sugar: For that sweet, sweet bliss.
- 2 Large Eggs: Room temp, our binding agents doing the lord’s work.
- 1 teaspoon Vanilla Extract: The secret weapon that makes everything taste better.
- 1 cup (240ml) Buttermilk: Room temp. Adds moisture and tang! If you don’t have it, see FAQ.
For the Peanut Butter Frosting:
- 1 cup (226g) Unsalted Butter: Softened, again. It’s a butter party!
- 1 cup (250g) Creamy Peanut Butter: The good stuff. Jif, Skippy, whatever makes your heart sing.
- 4 cups (480g) Powdered Sugar: Sifted, because no one likes lumpy frosting.
- ½ teaspoon Salt: A little pinch to cut through the sweetness.
- ¼ cup (60ml) Milk or Cream: Just enough to make it silky smooth.
- 1 teaspoon Vanilla Extract: Because you can never have enough.
Step-by-Step Instructions
Alright, apron on, good tunes playing, let’s do this!
Making the Cake:
- Preheat your oven to 350°F (175°C). Grease and flour two 8-inch round cake pans. Or line them with parchment paper. Whatever floats your boat.
- Whisk the Dry Stuff: In a medium bowl, whisk together the flour, cocoa powder, baking soda, and salt. Set aside.
- Cream the Wet Stuff (mostly): In a large bowl (or your stand mixer), cream together the softened butter and granulated sugar until it’s light and fluffy. This usually takes about **2-3 minutes**.
- Add Eggs & Vanilla: Beat in the eggs one at a time, mixing well after each addition. Then stir in the vanilla extract.
- Alternate Wet & Dry: With the mixer on low speed, add about a third of the dry ingredients to the butter mixture, mix until just combined. Then add half of the buttermilk, mix. Repeat, ending with the dry ingredients. **Don’t overmix!** Overmixing makes tough cake, and we want tender, happy cake.
- Divide & Conquer: Divide the batter evenly between your two prepared cake pans.
- Bake Time! Bake for **28-32 minutes**, or until a wooden skewer inserted into the center comes out clean.
- Cool Down: Let the cakes cool in the pans for about 10-15 minutes before inverting them onto a wire rack to cool completely. **This is crucial!** Don’t try to frost warm cake unless you want a molten, crumbly mess.
Making the Peanut Butter Frosting:
- Cream the Butter & PB: In a large bowl (or stand mixer), beat the softened butter and creamy peanut butter together until smooth and well combined, about **2-3 minutes**.
- Add the Sugar & Salt: Gradually add the sifted powdered sugar and salt, beating on low speed until just combined.
- Add Liquids: Pour in the milk (or cream) and vanilla extract. Beat on medium-high speed until the frosting is light, fluffy, and smooth. This could take another **3-5 minutes**. If it seems too thick, add a tiny bit more milk, a teaspoon at a time. If it’s too thin, add more powdered sugar.
Assembly (The Fun Part!):
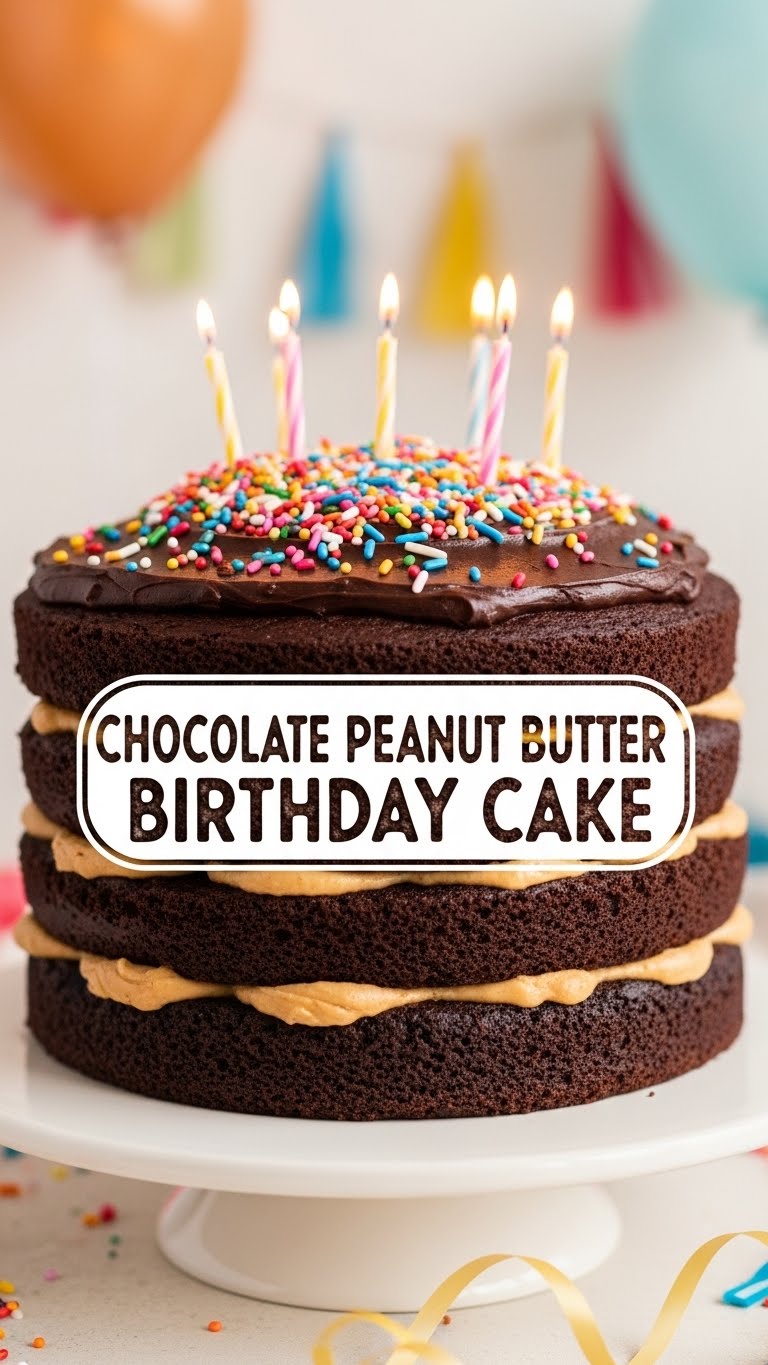
- Stack ‘Em Up: Once the cakes are completely cool, place one layer on your serving plate or cake stand. Spread about a third of the frosting evenly over the top.
- Second Layer: Carefully place the second cake layer on top.
- Frost Away! Spread the remaining frosting over the top and sides of the cake. Get creative! Swirls, peaks, whatever makes you happy.
- Decorate (Optional but Recommended): Sprinkle with chopped Reese’s, mini chocolate chips, or a drizzle of melted chocolate. Go wild!
- Serve & Devour: Slice, serve, and bask in the glory of your masterpiece.
Common Mistakes to Avoid
We’ve all been there. Learn from my “oops” moments!
- Not Preheating the Oven: Rookie mistake! Your oven needs to be at the correct temperature for even baking. Don’t rush it.
- Overmixing the Batter: Remember what I said about tough cake? Yeah, that. Mix until just combined, then stop.
- Frosting a Warm Cake: This isn’t just a mistake; it’s a cardinal sin. You’ll end up with sliding layers and melted frosting. Exercise patience, young padawan.
- Forgetting Room Temp Ingredients: Cold butter and eggs don’t emulsify as well, leading to a less smooth batter. Plan ahead!
- Not Scraping the Bowl: Make sure to scrape down the sides of your mixing bowl occasionally, especially when creaming butter and sugar. You want everything incorporated.
- **Thinking you can just eyeball the peanut butter.** No, friend, precision is key for optimal deliciousness, especially in the frosting.
Alternatives & Substitutions
Feeling adventurous or got dietary restrictions? No problem!
- Gluten-Free: Swap out the all-purpose flour for a 1:1 gluten-free baking blend. (FYI, some blends work better than others, so check reviews!)
- Dairy-Free: Use your favorite plant-based milk (almond, soy, oat) for the buttermilk (just add a splash of vinegar!) and frosting. For butter, use a good quality dairy-free butter alternative.
- Nut-Free: Sunbutter (sunflower seed butter) is a fantastic peanut butter alternative if you’re dealing with allergies. The flavor will be slightly different, but still delish!
- Darker Chocolate: Use Dutch-processed cocoa powder for an even darker, richer chocolate flavor. IMO, it takes the cake to another level!
- Extra Crunch: Fold in some chopped Reese’s cups or mini chocolate chips into the cake batter or sprinkle them on top for added texture.
FAQ (Frequently Asked Questions)
Got questions? I’ve got answers (mostly).
Q: Can I make this cake ahead of time?
A: Oh, absolutely! The unfrosted cake layers can be baked a day or two in advance, wrapped tightly in plastic wrap, and stored at room temperature. You can even freeze them for up to a month! Just thaw before frosting.
Q: What if I don’t have buttermilk?
A: No sweat! For every 1 cup of buttermilk, simply mix 1 cup of regular milk with 1 tablespoon of lemon juice or white vinegar. Let it sit for 5-10 minutes until it slightly curdles. Voila, instant buttermilk!
Q: Can I use crunchy peanut butter in the frosting?
A: You *can*, but it will definitely change the texture of your frosting. It won’t be as smooth and pipeable. Creamy is king for a silky-smooth finish, but if you love a little crunch, go for it!
Q: How long does this cake last?
A: In *my* house? About 30 minutes. Realistically, if stored properly (covered at room temperature or in the fridge), it’ll be good for 3-4 days. But let’s be honest, it probably won’t last that long.
Q: Do I *have* to chill the frosting?
A: Not necessarily, but if your kitchen is warm or you want it to be super firm for piping, a quick chill (15-20 minutes in the fridge) can help it firm up. Just give it a quick beat again before using.
Q: What size cake pans should I use?
A: Two 8-inch round pans are ideal for this recipe, giving you perfect two-layer bliss. You could also use two 9-inch pans, but the layers will be a bit thinner, so adjust baking time accordingly.
Final Thoughts
You did it! You’ve conquered the chocolate and peanut butter mountain and emerged victorious with a cake that’s bound to make everyone happy. Whether you’re celebrating a birthday, an anniversary, or just the fact that it’s Wednesday, this cake is your ticket to a good time.
Now go impress someone—or yourself—with your new culinary skills. You’ve earned it!


