So, you’ve got that pesky chocolate craving, but your brain’s also screaming “fresh!” at the same time? And you absolutely refuse to spend an entire afternoon in the kitchen, sacrificing your precious Netflix time? My friend, I get it. We’re about to whip up some Chocolate Orange Cake magic that’s as ridiculously easy as it is mind-blowingly delicious. Prepare to impress everyone (especially yourself) with minimal effort!
Why This Recipe is Awesome
Let’s be real, you’re not here for a lecture on baking science. You want a cake that tastes like a fancy patisserie creation but doesn’t require a culinary degree. Well, this is it! It’s like the culinary equivalent of a warm hug and a sassy wink. Seriously, it’s so straightforward, even your pet goldfish could probably follow along (if it had opposable thumbs, that is). We’re talking minimal fuss, maximum flavor, and everyone will think you’re a genius. Plus, chocolate and orange are a power couple; they just *get* each other. It’s truly idiot-proof, even I didn’t mess it up!
Ingredients You’ll Need
Gather your troops! No exotic, hard-to-find stuff here, just your pantry staples ready to become something glorious.
- 1 ¾ cups (220g) All-Purpose Flour: Just regular old flour. No fancy stuff unless you’re feeling extra.
- ¾ cup (75g) Unsweetened Cocoa Powder: The dark stuff. We’re adding sweetness later, don’t double dip!
- 1 ½ tsp Baking Soda: Our main lift-off agent. Don’t skip unless you like flat cakes.
- ½ tsp Salt: A pinch of salt makes everything shine, even chocolate. It balances the sweet, trust me.
- 1 ½ cups (300g) Granulated Sugar: The sweet stuff! Use the good kind, not the stuff you found in the back of the cupboard from 2008.
- 2 Large Eggs: Room temp is always best, they mix better. No frozen dinosaur eggs, please.
- ½ cup (120ml) Vegetable Oil: Or any neutral oil. For moisture, because nobody likes a dry cake.
- 1 cup (240ml) Milk: Any kind! Whole milk gives it that extra lushness, but whatever’s in your fridge works.
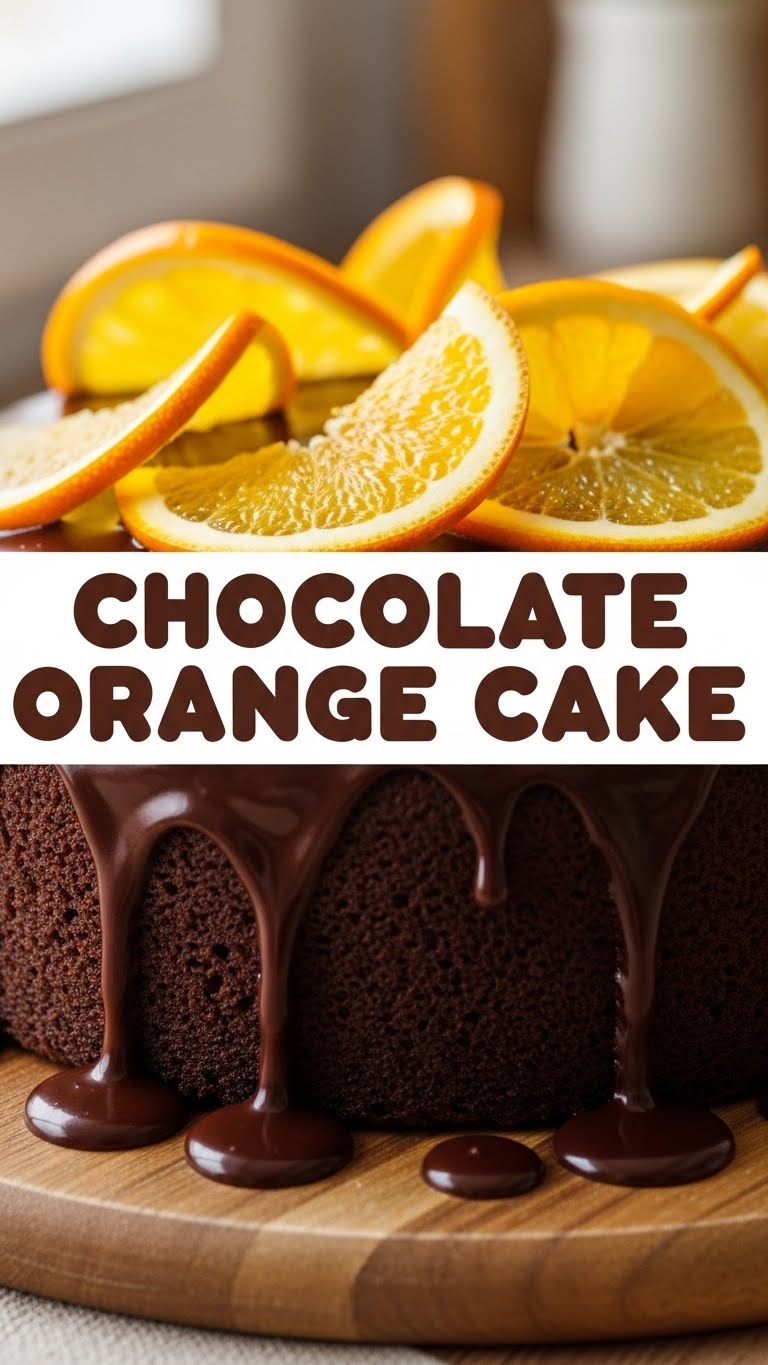
- Zest of 2 Medium Oranges: The star of the show! Don’t skimp on this vibrant beauty. This is where the magic happens.
- ¼ cup (60ml) Fresh Orange Juice: Freshly squeezed if you’re feeling fancy, but bottled is fine too, no judgment here.
- For the Ganache (because why not?):
- 6 oz (170g) Dark or Milk Chocolate: Chopped. Whatever your heart desires. Just make sure it melts nicely.
- ½ cup (120ml) Heavy Cream: For that silky smooth finish.
Step-by-Step Instructions
Alright, let’s get messy! (But not *too* messy, we still want to eat it.)
- Prep for Glory: Preheat your oven to 350°F (175°C). Grab a 9-inch round cake pan, grease it generously, and dust it with a little cocoa powder instead of flour (because chocolate on chocolate is always a good idea).
- The Dry Team: In a medium bowl, whisk together your flour, cocoa powder, baking soda, and salt. Give it a good whisk until no lumps are throwing shade.
- The Wet Crew: In a separate, larger bowl, combine the granulated sugar, eggs, and vegetable oil. Whisk ’em until they’re smooth and slightly pale. Now, stir in your glorious orange zest, milk, and orange juice. Mix until just combined.
- Merge and Conquer: Gradually add the dry ingredients to the wet ingredients. Mix on low speed (or by hand with a spatula) until just combined. **Stop mixing the second you don’t see any streaks of dry flour.** Seriously, don’t overdo it!
- Bake It ‘Til You Make It: Pour your beautiful batter into the prepared cake pan. Pop it into your preheated oven and bake for 30-35 minutes, or until a toothpick inserted into the center comes out clean.
- Cool Down: Let the cake cool in the pan for about 10-15 minutes. Then, gently invert it onto a wire rack to cool completely. Patience is a virtue, especially when warm cake wants to crumble.
- Ganache Glamour (Optional but Highly Recommended): While your cake is cooling, let’s make that luscious ganache. Heat the heavy cream in a small saucepan over medium heat until it just starts to simmer (don’t boil!). Pour the hot cream over your chopped chocolate in a heatproof bowl. Let it sit for 5 minutes, then whisk until smooth and shiny.
- The Grand Finale: Once your cake is completely cool, pour that glorious ganache over the top. Let it drip elegantly down the sides. You can add a little extra orange zest for garnish if you’re feeling fancy. Slice, serve, and accept all the compliments!
Common Mistakes to Avoid
We’ve all been there, staring at a deflated cake wondering where we went wrong. Learn from my past kitchen mishaps!
- Overmixing the Batter: This is the number one cake killer. Once the dry ingredients are just combined with the wet, **stop!** Overmixing develops gluten, leading to a tough, dense cake. Nobody wants a chewy cake.
- Not Preheating the Oven: Your oven isn’t a microwave; it needs time to get to the correct temperature. A cold oven means uneven baking and a sad, lopsided cake. Rookie mistake!
- Opening the Oven Door Too Soon: Curiosity killed the cake. Opening the door before the cake is set can cause it to collapse and deflate. Resist the urge for at least the first 25 minutes.
- Frosting a Warm Cake: Unless you enjoy a chocolatey avalanche situation, let your cake cool **completely** before attempting to ganache or frost. Otherwise, it’s just going to melt and slide right off.
Alternatives & Substitutions
Feeling adventurous? Or just missing an ingredient? No stress, we can totally improvise!
- Flour Power: Want to make it gluten-free? A good 1:1 gluten-free baking blend works great here. The cake might have a slightly different texture, but still totally delicious.
- Oil vs. Butter: You can absolutely use melted unsalted butter instead of oil for a richer flavor profile. (IMO, it’s worth the extra step for that buttery goodness!)
- Milk Swap: Dairy-free? No problem! Almond milk, oat milk, or soy milk work perfectly in this recipe.
- Chocolate Shenanigans: Instead of a dark chocolate ganache, try a white chocolate ganache with a touch of orange extract for a different vibe. Or skip the ganache entirely and dust with powdered sugar.
- Citrus Twist: Don’t have oranges? Lemon zest and juice makes a fabulous Chocolate Lemon cake. Or go wild with lime!
FAQ (Frequently Asked Questions)
Got questions? I’ve got answers (and probably a joke or two).
- Can I make this dairy-free? Absolutely! Use a plant-based milk (almond, oat, soy) and make sure your chocolate for the ganache is dairy-free. Easy peasy.
- How long does this cake last? If kept in an airtight container at room temperature, it’s usually good for 3-4 days. But let’s be honest, it won’t last that long. (Spoiler: It won’t!)
- Can I make cupcakes instead? You bet! Pour the batter into cupcake liners, filling them about two-thirds full. Adjust baking time down to 18-22 minutes, or until a toothpick comes out clean.
- Do I really need fresh orange zest? Yes, my friend, yes. It’s where the magic happens and gives it that bright, authentic orange flavor. Bottled orange extract just isn’t the same, FYI.
- Can I add chocolate chips to the batter? Why not? Live a little! Fold in about ½ cup of chocolate chips at the very end when mixing the wet and dry ingredients. (But don’t say I didn’t warn you about the extra deliciousness.)
- My cake sank in the middle, what happened? Oh, the dreaded sinkhole! This usually means too much leavening, the oven door was opened too soon, or the batter was overmixed. Don’t worry, even pros have off days!
Final Thoughts
So there you have it, your new favorite chocolate orange obsession. You’ve just created something truly amazing, blending the comforting depth of chocolate with the zesty kick of orange. Seriously, pat yourself on the back, then grab a slice (or two!). Now go impress someone—or yourself—with your new culinary skills. You’ve earned it!


