So, you’ve scrolled past one too many perfect-looking dessert photos and thought, “I can totally do that… eventually.” Well, ‘eventually’ is today, my friend, and we’re diving headfirst into the glorious, silky world of Chocolate Mousse with Nuts. And no, it won’t take all day, promise. In fact, it’s so easy, you’ll wonder why you ever bought those tiny, overpriced cups from the fancy store. Let’s get our chocolate on!
Why This Recipe is Awesome
Because it’s basically magic, but without the need for a wand or even much skill. Seriously, this chocolate mousse recipe is so **idiot-proof**, even *I* didn’t mess it up, and my kitchen adventures often end in culinary chaos. It looks fancy, tastes divine, and takes way less effort than telling people you ‘made it from scratch’ implies. Plus, the nuts add that perfect crunch contrast to the creamy goodness. It’s a win-win-win situation, IMO.
Ingredients You’ll Need
Get ready to gather your delicious arsenal. No obscure ingredients here, just the good stuff:
- Good Quality Dark Chocolate (60-70% cocoa): 8 oz (about 225g). This is not the time for sad, waxy chocolate. Go for something you’d happily eat on its own.
- Large Eggs: 4, separated (yolks and whites need their personal space for this recipe, trust me).
- Granulated Sugar: 1/4 cup. Just enough sweetness to balance the chocolate.
- Heavy Cream (aka Double Cream): 1 cup (240ml), chilled. We need it super cold for maximum fluffiness.
- Vanilla Extract: 1 teaspoon. A dash of pure happiness.
- Pinch of Salt: Literally a pinch. It makes the chocolate sing.
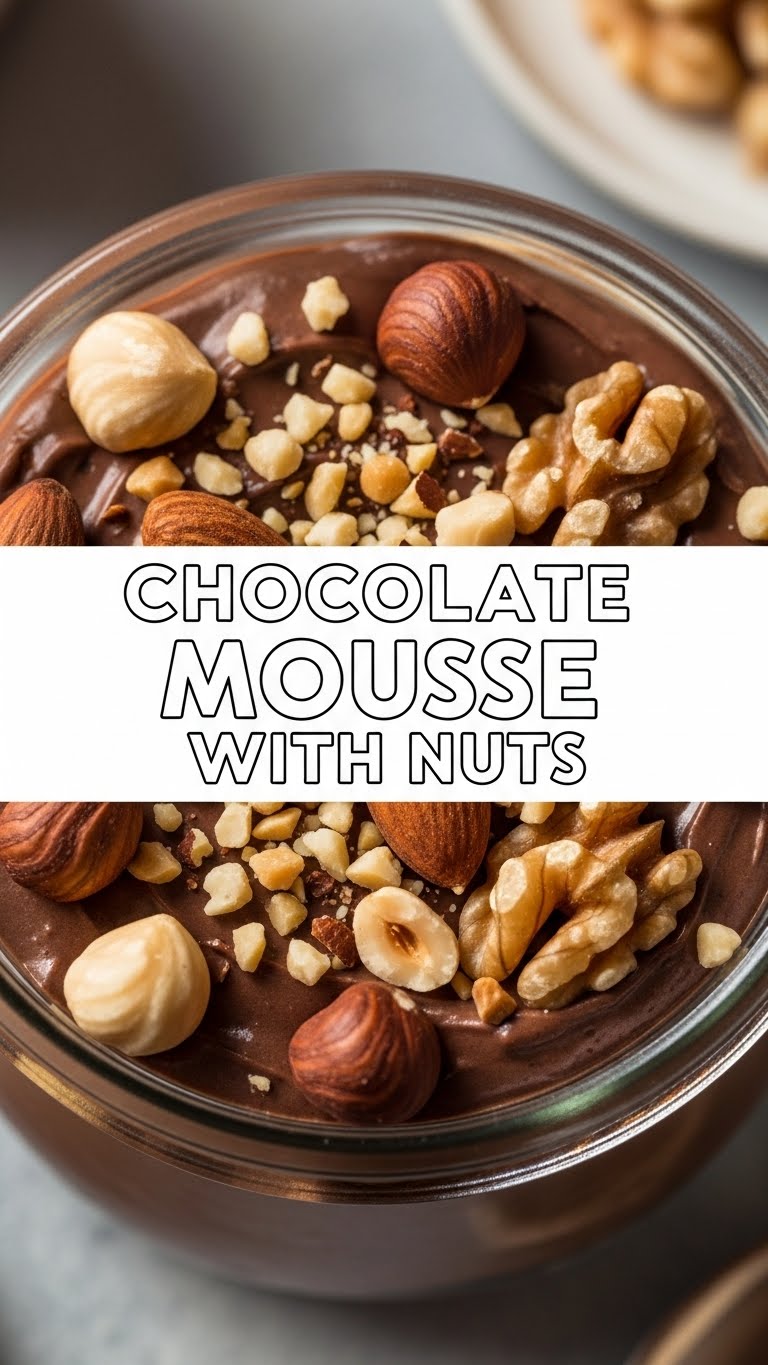
- Mixed Nuts: 1/2 cup, chopped and lightly toasted (pecans, walnuts, almonds, hazelnuts – your call!). Toasted makes all the difference, trust me on this.
- Optional: Butter or Coconut Oil: 1 tablespoon, for melting the chocolate smoothly.
Step-by-Step Instructions
Alright, apron on, game face ready. Let’s make some mousse!
- Melt the Chocolate: Break your beautiful chocolate into small pieces. Gently melt it in a heatproof bowl set over a saucepan of simmering water (a bain-marie), or in the microwave in 30-second bursts, stirring in between. If using, stir in the butter or coconut oil for extra smoothness. Set aside to cool slightly, but keep it liquid.
- Whip the Yolks: In a medium bowl, whisk the egg yolks with the sugar until the mixture is pale yellow and slightly thickened. This takes about 2-3 minutes.
- Combine Chocolate & Yolks: Slowly pour the slightly cooled, melted chocolate into the egg yolk mixture, whisking constantly until completely smooth and combined. It should be a beautiful, glossy chocolate paste.
- Whip the Cream: In a separate, clean, chilled bowl, whip the cold heavy cream with the vanilla extract until it forms soft peaks. You want it fluffy, but not stiff and grainy. **Don’t over-whip!**
- Whip the Whites: In another squeaky-clean bowl (any grease will ruin this!), beat the egg whites with that tiny pinch of salt until they form stiff, glossy peaks. This means they stand up proudly when you lift the whisk.
- Fold in the Cream: Gently fold about a third of the whipped cream into the chocolate mixture to lighten it. Then, carefully fold in the remaining whipped cream until just combined. We’re aiming for airy, not deflated!
- Fold in the Whites & Nuts: Now, for the delicate part. Gently fold the egg whites into the chocolate-cream mixture in two additions. Be super gentle to keep all that beautiful air in there. Finally, gently fold in about two-thirds of your toasted, chopped nuts.
- Chill Out: Divide the mousse into individual serving dishes or a large bowl. Sprinkle the remaining nuts on top. Cover and chill in the fridge for **at least 4 hours**, or ideally overnight. This is the hardest part: waiting!
Common Mistakes to Avoid
Hey, we all make ’em. But with these heads-up, you won’t!
- Using warm cream or bowls for whipping: Rookie mistake! **Always chill your cream, bowl, and even your whisk** for the best, fluffiest results.
- Over-whipping the cream or egg whites: Once they hit stiff peaks, stop. Over-whipped cream turns grainy, and over-whipped whites become dry and hard to fold.
- Folding too aggressively: We’re not doing a wrestling match here, we’re gently incorporating. Too much enthusiasm and you’ll lose all that lovely air. Your mousse will be dense, not dreamy.
- Not chilling enough: Unless you prefer chocolate soup, give it the full chill time. Patience is a virtue, especially in mousse making.
- Using cheap chocolate: Don’t do it. Seriously. The chocolate is the star here. Give it the spotlight it deserves.
Alternatives & Substitutions
Feeling creative? Go for it! This recipe is pretty forgiving.
- Nut Swaps: Not a fan of pecans? Use hazelnuts (they’re amazing with chocolate, FYI!), almonds, or even pistachios for a fancy green touch. Want an extra kick? Caramelize your nuts lightly before adding.
- Chocolate Varieties: While dark chocolate is my personal fave for that rich depth, you can totally use milk chocolate if you have a sweeter tooth. Just be aware it might be a bit less intense.
- Flavor Boosts: Add a tablespoon of espresso powder for a mocha mousse. A splash of your favorite liqueur (Grand Marnier, rum, Kahlúa) works wonders too. Or even a pinch of chili powder for a spicy kick!
- Dairy-Free: You can often make this with full-fat coconut cream (chilled overnight, use the thick cream part only) instead of heavy cream for a dairy-free version.
FAQ (Frequently Asked Questions)
Got questions? I’ve got casual, friendly answers!
- Can I make this ahead of time? Absolutely! It’s actually better made a day in advance as it gives the flavors time to meld and the mousse to firm up perfectly. Hello, stress-free dinner parties!
- How long does chocolate mousse last in the fridge? Since it contains raw egg yolks, it’s best consumed within 2-3 days. But honestly, who lets it last that long?
- My mousse isn’t setting, what gives? Did you rush the chill time? Or maybe, just maybe, your whipping arm gave up too soon on the cream/whites. Ensure your whites and cream reach proper peaks before folding, and give it ample chill time.
- Do I really have to separate the eggs? It’s messy! Yes, you really do. The separated egg whites are what give the mousse its incredibly light and airy texture. No cheating!
- Can I skip the nuts? Of course, it’ll still be delicious! But seriously, the crunch adds so much. Don’t deprive yourself of that textural bliss!
- What if I don’t have good quality chocolate? Can I still make it? Well, technically yes, but why hurt your soul like that? The chocolate is the star. Treat yourself and your mousse to the good stuff!
Final Thoughts
And there you have it, folks! Your very own, incredibly delicious, ridiculously impressive chocolate mousse with nuts. You’ve conquered the kitchen, faced the raw eggs (bravo!), and emerged victorious with a dessert that will make everyone think you’re a culinary genius. Now go impress someone—or yourself—with your new culinary skills. You’ve earned it!


