Ever had one of those days where your sweet tooth is screaming “FEED ME!”, but your ambition is just… *napping*? Yeah, me too. That’s where this glorious chocolate mousse swoops in like a superhero in a silky, delicious cape. Forget complicated soufflés or finicky tarts; we’re making something that looks like you spent hours, but actually takes less effort than deciding what to binge-watch next. You ready to get your chocolate on? Let’s do this!
Why This Recipe is Awesome
Okay, first things first: this isn’t just *any* chocolate mousse. This is the “I look like a Michelin-star chef but actually just followed super easy steps” kind of mousse. It’s **idiot-proof**, I swear. Even if your culinary skills are limited to microwaving popcorn (no judgment!), you can nail this. It’s rich, it’s velvety, it melts in your mouth, and it manages to be both light and incredibly satisfying. Plus, it only requires a handful of ingredients, most of which you probably already have lurking in your pantry. It’s perfect for impressing a date, dazzling dinner guests, or just having a super fancy dessert all to yourself on a Tuesday night. You deserve it, FYI.
Ingredients You’ll Need
Gather ’round, my sweet-toothed companions! Here’s what you’ll need for your chocolatey masterpiece:
- Good Quality Dark Chocolate (6-8 oz): The darker, the dreamier. Think 60-70% cacao. This isn’t the time for wimpy chocolate chips, unless that’s all you’ve got – then go for it, but be warned, the texture might be slightly different.
- Heavy Cream (2 cups): This is your magical cloud-maker. Don’t even *think* about light cream unless you want sad, runny mousse. We need that luscious fat content!
- Large Egg Yolks (3-4): For that rich, velvety texture and body. Don’t worry, we’ll be gently cooking these bad boys.
- Granulated Sugar (1/4 cup): Just a kiss of sweetness. Adjust if your chocolate is super bitter or super sweet.
- Unsalted Butter (2 tbsp): Because everything’s better with butter, right? It adds an extra layer of richness and helps with the texture.
- Vanilla Extract (1 tsp): A little hug in a bottle. It really makes the chocolate sing.
- Pinch of Salt: To balance and enhance those chocolatey notes. Don’t skip it!
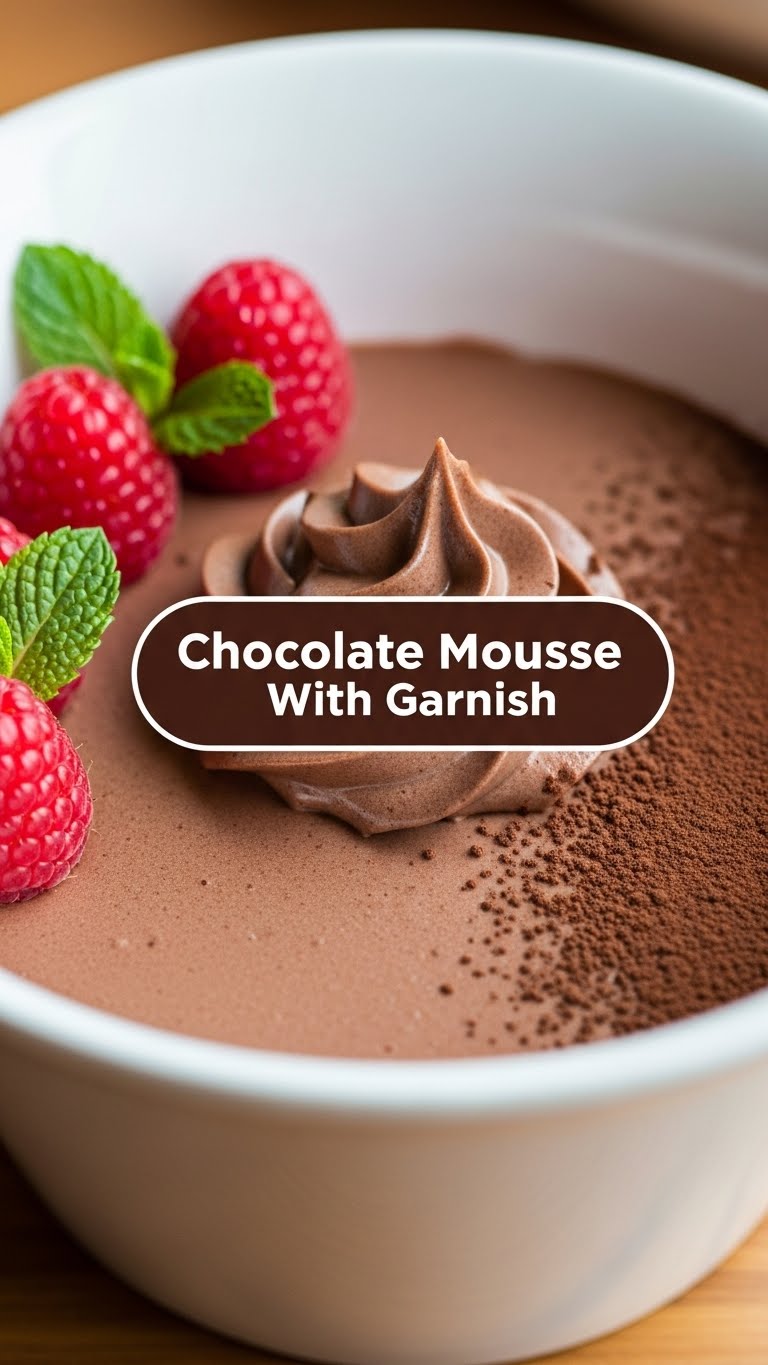
- For Garnish (Optional, but highly recommended): Fresh berries (raspberries are my fave!), chocolate shavings, a sprig of mint, or a dollop of extra whipped cream. Go wild!
Step-by-Step Instructions
Alright, apron on (or not, let’s be real), let’s get down to business!
Get Melty: Grab your favorite dark chocolate and butter. Chop the chocolate into small pieces. Place them in a heatproof bowl set over a saucepan of simmering water (a double boiler, for the fancy folks) or microwave in 30-second bursts, stirring in between. Melt until gloriously smooth. Once melted, remove from heat and let it cool slightly – we want it warm, not piping hot, to avoid scrambling our future eggs.
Whip It Good! In a separate, super clean, super cold bowl (chilling the bowl and beaters beforehand helps a ton!), pour in your heavy cream. Whip it with an electric mixer on medium-high speed until it forms **soft peaks**. Think fluffy clouds, not stiff mountain ranges. Stop just when it holds its shape. **Don’t overdo it**, or you’ll get butter, and while delicious, that’s not what we’re going for here. Gently fold in a tiny pinch of salt.
Egg-cellent Base: In another heatproof bowl, whisk your egg yolks and granulated sugar together until pale and slightly thickened. Now, bring about 1/4 cup of the remaining (unwhipped) heavy cream to a gentle simmer in a small saucepan. Slowly, and I mean *slowly*, drizzle the warm cream into the egg yolk mixture while whisking constantly. This is called “tempering” and prevents the eggs from scrambling. Once combined, pour the tempered mixture back into the saucepan. Cook over low heat, stirring constantly with a rubber spatula, until it thickens slightly and coats the back of a spoon. **Do not boil!** Remove from heat and stir in the vanilla extract.
The Grand Combination: Now for the magic! Gently fold the slightly cooled melted chocolate mixture into your warm egg yolk base until just combined. Next, add about a third of your whipped cream to the chocolate mixture and fold it in to lighten the base. Then, very gently, fold in the remaining whipped cream in two additions. Be a graceful ninja here; we want to keep all that beautiful air in there.
Chill Out: Divide the mousse into cute little ramekins, martini glasses, or just one big bowl if you’re planning a solo date with dessert. Cover them loosely with plastic wrap and pop them into the fridge for at least 4 hours, or ideally, overnight. Patience, young Padawan, is a virtue, especially when chocolate mousse is involved.
Garnish & Conquer: Once perfectly chilled and set, it’s garnish time! Sprinkle with chocolate shavings, add some fresh berries (raspberries and strawberries are amazing!), a tiny mint leaf, or another dollop of whipped cream. You’re basically a professional now. Take a picture, brag a little, then devour.
Common Mistakes to Avoid
We all make mistakes, but let’s try to avoid these mousse-wreckers, shall we?
- Over-whipping the Cream: You’re making mousse, not butter, friend! Stiff peaks are too far. Stop at soft peaks for that perfect airy texture.
- Scrambling the Eggs: This is a big one. When tempering the egg yolks, **go slow** with the hot cream and **whisk constantly**. When cooking the base, **keep the heat low** and **keep stirring**. Unless you fancy chocolate scrambled eggs, which, spoiler: you don’t.
- Not Chilling Enough: Impatience leads to runny, sad mousse. **Give it time to set!** Seriously, don’t rush the chill time.
- Hot Chocolate into Cold Eggs/Cream: Temperature matters! Make sure your melted chocolate has cooled slightly before folding it into the egg base. If it’s too hot, it can seize up or cook your eggs.
- Being Aggressive with Folding: Treat that whipped cream like a delicate cloud. If you stir too vigorously, you’ll deflate all that lovely air, and your mousse will be dense instead of light and fluffy.
Alternatives & Substitutions
Feeling creative? Here are some ways to shake things up:
- Chocolate Swap: Not a dark chocolate fan? You can use milk chocolate, but you might want to reduce the sugar slightly. White chocolate mousse is also a thing – just be sure to use good quality white chocolate (not baking chips!).
- A Little Kick: Add a splash (1-2 tablespoons) of your favorite liqueur to the melted chocolate or the egg base. Think Kahlua for a coffee note, Grand Marnier for orange, or a good dark rum. YUM!
- Dairy-Free Dream: Want to go plant-based? Use full-fat canned coconut cream (chill the can overnight and scoop out the thick cream on top) instead of heavy cream, and ensure your chocolate is dairy-free.
- Garnish Galore: Beyond berries and chocolate shavings, try toasted nuts (pistachios or hazelnuts!), a sprinkle of sea salt, espresso powder, or even a dollop of raspberry coulis. The world is your garnish oyster!
FAQ (Frequently Asked Questions)
Got questions? I’ve got answers (and probably some cheeky comments).
- Can I skip the raw egg yolks?
Well, technically yes, but then it’s a different recipe altogether, and you’ll miss out on that iconic rich, velvety texture. The yolks, when cooked properly into the créme anglaise base, are what give traditional mousse its glorious body. If you’re truly worried, ensure your eggs are pasteurized!
- My mousse is runny! What went wrong?
Oh no! Common culprits include over-whipped cream (or under-whipped!), chocolate being too hot when combined, or not enough chilling time. **The biggest one is usually impatience with the fridge!** Make sure your heavy cream forms proper soft peaks and your mousse chills for at least 4 hours, preferably overnight.
- Can I make this ahead of time?
Absolutely! In fact, I’d say it tastes even better the next day when all those glorious flavors have had a chance to mingle and deepen. It’s a fantastic make-ahead dessert for entertaining.
- What kind of chocolate is best for mousse?
High-quality dark chocolate (60-70% cacao) is your best friend here. It melts beautifully, has a deep flavor, and sets well. Avoid generic chocolate chips if you can, as they often contain stabilizers that can affect the texture.
- How long does it last in the fridge?
Covered and chilled, it’ll last for about 3 days. But let’s be real, are you honestly going to make it last that long? My money’s on “no.”
Final Thoughts
So there you have it, folks! Your new go-to dessert that screams “I’m fancy and sophisticated!” but quietly whispers “I barely lifted a finger, LOL.” This chocolate mousse is seriously impressive, incredibly delicious, and surprisingly simple. Now go forth and create chocolatey magic. You deserve all the velvety, rich goodness. And maybe save a bite for me?


