Ever stare into your fridge, feeling a dessert craving hit like a rogue wave, but the thought of baking anything complex makes you want to crawl under a blanket? Yeah, me too. Sometimes you just need something utterly decadent, supremely delicious, and ridiculously easy. Something that screams “I tried hard!” but actually whispers “I barely lifted a finger.”
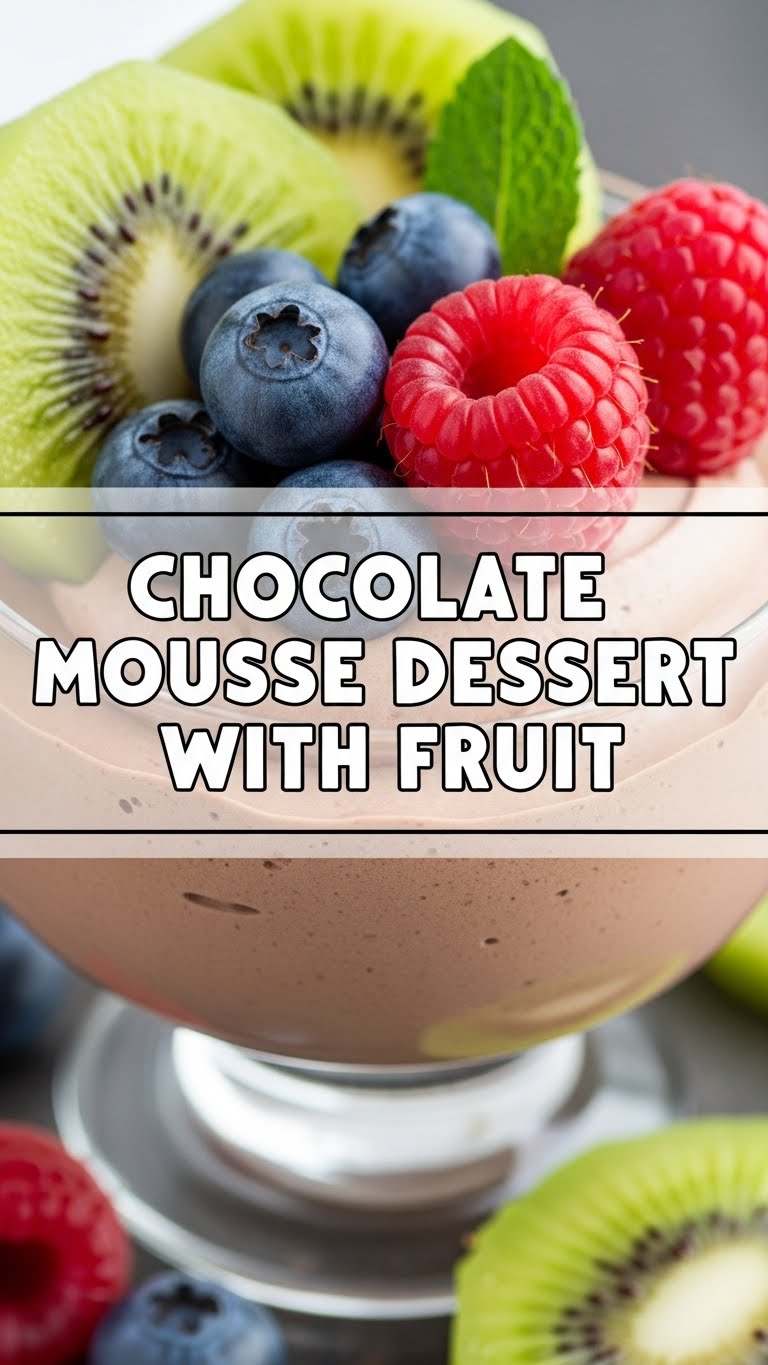
Good news, my friend. Today, we’re making chocolate mousse with fruit. The kind that tastes like you slaved for hours but actually just… didn’t. Prepare to have your mind blown and your taste buds sing.
Why This Recipe is Awesome
This isn’t just a recipe; it’s a cheat code for dessert enlightenment. Seriously, it’s practically magic. Here’s the deal:
- **No baking. Zero.** Put that oven mitt down. We won’t need it.
- It looks super fancy, tastes even better, and no one needs to know how ridiculously easy it was. Your secret weapon, essentially.
- It’s ridiculously adaptable. Feeling fruity? Add fruit. Want more chocolate? Go for it.
- **It’s idiot-proof, even I didn’t mess it up.** (And trust me, I’ve set water on fire). If you can melt chocolate and whip cream, you’re basically a Michelin-star chef with this one.
Ingredients You’ll Need
Gather your troops! These are the heroes of our no-bake dessert adventure:
- **Good Quality Dark Chocolate (8 oz / 225g):** Please! None of that waxy stuff. Aim for 60-70% cocoa solids for that deep, rich flavor we’re after.
- **Heavy Cream (2 cups / 480ml):** Also known as whipping cream. This is the stuff dreams are made of. Make sure it’s cold!
- **Granulated Sugar (2-3 tablespoons, or to taste):** Just a touch, because chocolate is queen and sometimes she likes a little sweet sidekick.
- **Vanilla Extract (1 teaspoon):** A splash for sophistication and warmth.
- **Pinch of Salt:** Don’t skip this! It enhances all the chocolatey goodness.
- **Fresh Fruit for Garnish (1 cup):** Berries (strawberries, raspberries, blueberries) are my go-to, but sliced bananas or cherries work too. Makes it look healthy, right?
Step-by-Step Instructions
Let’s get cooking (without cooking, ironically)! Follow these super simple steps:
- **Melt the Chocolate.** Grab your favorite dark chocolate and break it into pieces. Pop it in a microwave-safe bowl and heat in 30-second bursts, stirring well after each, until it’s smooth and glossy. Alternatively, use a double boiler if you’re feeling fancy (and have one). Don’t scorch it; we’re aiming for melted goodness, not charcoal! Let it cool slightly for a few minutes.
- **Whip the Cream.** In a separate, chilled bowl (important!), pour your heavy cream, sugar, and vanilla. Beat it with an electric mixer on medium-high speed until lovely, stiff peaks form. We’re talking cloud-like consistency here. **Don’t over-whip it into butter, unless you’re planning on making toast.**
- **Fold it In.** Remember that slightly cooled melted chocolate? Gently fold about a third of your whipped cream into the chocolate. This lightens it up and makes the rest easier to combine. Then, add the remaining whipped cream, folding gently with a spatula until just combined. **Over-mixing is the enemy of airy mousse!** We want it fluffy, not dense.
- **Chill Out.** Spoon your luscious mousse into pretty glasses, ramekins, or even small bowls. Cover them up (plastic wrap works wonders) and pop them in the fridge for at least 2 hours. Seriously, don’t rush perfection. This chilling time lets the mousse firm up and the flavors meld into pure bliss.
- **Garnish & Devour.** When you’re ready to serve, top your chocolate mousse with a generous scattering of fresh fruit. Berries are my go-to, but whatever makes your heart sing works. Take a picture for the ‘gram (or don’t, who cares?), then dig in!
Common Mistakes to Avoid
Even though this recipe is practically foolproof, there are a few rookie errors to watch out for. Learn from my past mistakes, my friend!
- **Overheating the Chocolate:** This makes it grainy and sad. Low and slow, or short bursts in the microwave, is the way to go. If it seizes, you might be out of luck, FYI.
- **Over-Whipping the Cream:** Congratulations, you’ve made butter! While delicious, it’s not mousse. Stop beating as soon as those stiff peaks form.
- **Folding Too Aggressively:** You’ll deflate all that lovely air, turning your mousse into a dense chocolate pudding (still tasty, but not the goal!). Be gentle, like you’re tucking in a baby cloud.
- **Not Chilling Long Enough:** Impatience is a virtue, but not here. Give it time to set, or you’ll have chocolate soup. Trust the process.
Alternatives & Substitutions
Feeling adventurous? Or just working with what you’ve got? Here are some ideas to tweak this masterpiece:
- **Chocolate Swap:** Milk or white chocolate works if you’re not a dark chocolate fan, but you might need to adjust the sugar (less for milk, more for white). IMO, dark chocolate is the MVP here for its depth.
- **Sweetener Switch:** Maple syrup or honey can replace granulated sugar, but be mindful of adding extra liquid. Powdered sugar dissolves more easily if you’re worried about graininess.
- **Flavor Boosters:** Instead of vanilla, try almond extract, peppermint extract, or a tiny splash of your favorite liqueur (coffee, rum, orange, raspberry!). A little orange zest folded in is also divine.
- **Fruit Freedom:** Any berries, sliced bananas, passionfruit, cherries, or even a sprinkle of toasted coconut flakes – whatever looks good at the market. Or no fruit, if you’re a purist!
FAQ (Frequently Asked Questions)
Got questions? I’ve got (casual) answers!
- **Can I make this ahead of time?** Absolutely! It’s even better the next day, so it’s a perfect make-ahead dessert for parties. Just add fruit right before serving so it stays fresh.
- **My mousse is too runny! What happened?** Likely suspects: your chocolate was too hot when folded in (it melted the cream!), or you under-whipped the cream. Pop it back in the fridge for longer, cross your fingers, and if all else fails, just call it “chocolate sauce” over ice cream. No one needs to know!
- **What kind of chocolate is best?** **Good quality dark chocolate (60-70% cocoa solids) is your best bet.** It provides a rich, deep flavor without being overly bitter. Avoid chocolate chips if possible; they often have stabilizers that make them melt weirdly.
- **Do I need an electric mixer?** Technically, no. Your arm will get a killer workout whipping cream by hand. But if you value your time and bicep strength, an electric mixer (handheld or stand mixer) is your bestie.
- **Can I make this vegan?** You bet! Use full-fat coconut cream (chilled overnight, scoop out only the thick cream from the top) instead of dairy cream, and ensure your chocolate is vegan. It works like a charm!
Final Thoughts
See? I told you it was easy. You just whipped up a dessert that tastes like a fancy restaurant experience, and you barely broke a sweat. Your kitchen is probably still clean-ish, too. Go you!
Now go impress someone—or yourself—with your new culinary skills. You’ve earned it! And if you eat it all yourself… well, that’s just good self-care, right? Enjoy every chocolatey, fruity bite!


