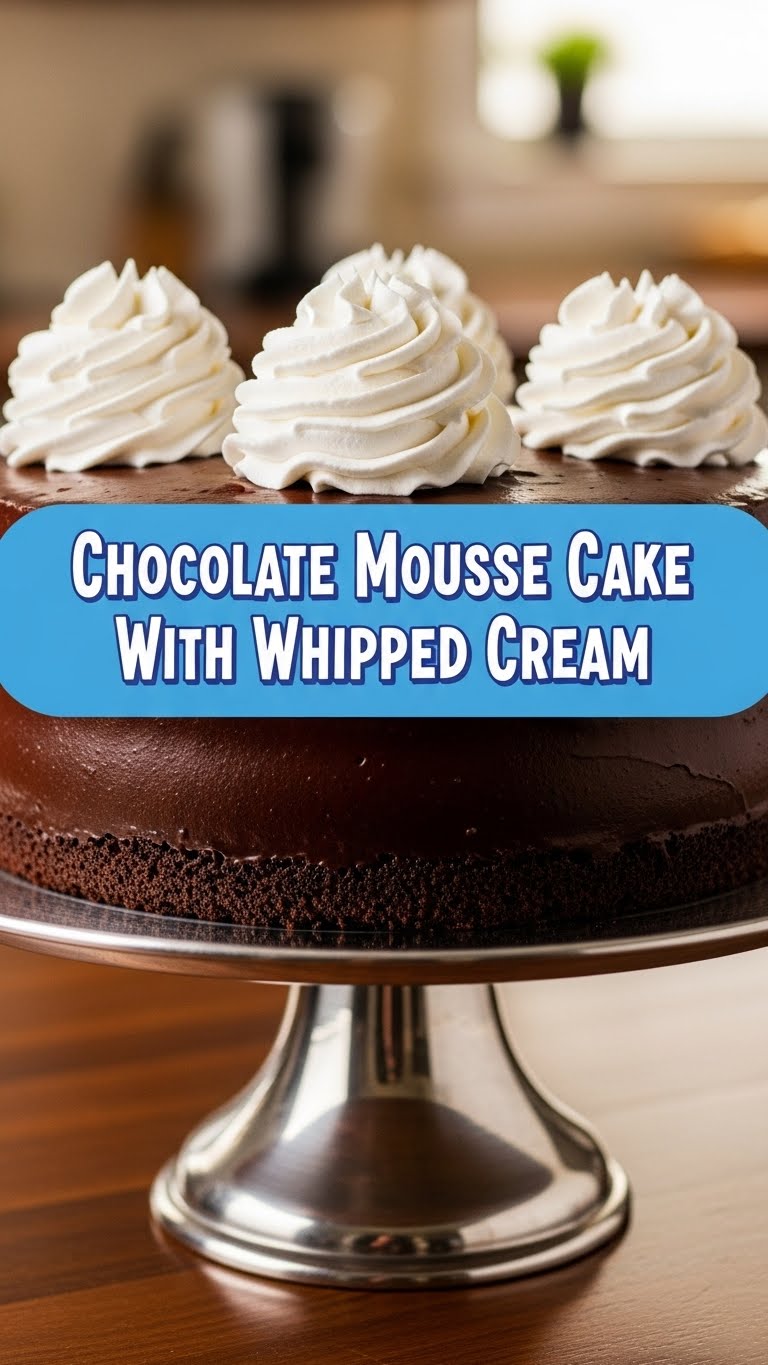
So you’re craving something that screams ‘I’m a sophisticated dessert connoisseur’ but also whispers ‘I totally just whipped this up in my pajamas,’ huh? You’ve come to the right place, my friend. This isn’t just any chocolate cake; it’s a luscious, dreamy chocolate mousse cake, crowned with pillowy whipped cream. Get ready to impress yourself (and maybe a few lucky others) with minimal fuss and maximum deliciousness.
Why This Recipe is Awesome
Okay, first off, it looks like you spent hours slaving away, when in reality, it’s pretty darn chill. Think ‘effortless elegance’ meets ‘chocolate coma.’ Plus, it combines cake AND mousse AND whipped cream. It’s basically the dessert equivalent of a triple threat! This recipe is also surprisingly beginner-friendly—even your notoriously clumsy friend (me) could pull it off without setting off the smoke detector. Win!
Seriously, this is one of those desserts that delivers huge on flavor and presentation without demanding your firstborn or an advanced pastry degree. It’s rich, it’s smooth, it’s chocolatey perfection. You’re gonna love it, I promise.
Ingredients You’ll Need
Gather ’round, my fellow kitchen wizard! Here’s your shopping list. Don’t skimp on quality for the chocolate, it really makes a difference!
For the Cake Base:
- 1 ½ cups all-purpose flour: The backbone of all things cakey.
- ¾ cup unsweetened cocoa powder: Because we’re making chocolate cake, obvs.
- 1 ½ cups granulated sugar: Sweet, sweet granulated joy.
- 1 ½ teaspoons baking soda: Our lift-off engineer for fluffy cake.
- ¾ teaspoon baking powder: More lift, because we like ’em tall.
- ¾ teaspoon salt: Just a pinch, to make things pop.
- 2 large eggs: Room temp, for better emulsification – fancy word for ‘mixes better.’
- ¾ cup whole milk: Because richness is key. Skim? We don’t know her.
- ⅓ cup vegetable oil (or canola): Keeps it moist, no dry cake allowed!
- 1 ½ teaspoons vanilla extract: A hug in a bottle.
- ¾ cup hot water or hot coffee: This is a secret weapon. It makes the chocolate really sing. Trust me on this one.
For the Chocolate Mousse:
- 10 oz good quality dark chocolate: At least 60% cacao. This is where the magic happens, so no cheap stuff!
- 2 cups heavy cream: For that silky, dream-like texture. Chilled, please!
- ¼ cup powdered sugar: For sweetness without the gritty texture.
- 1 teaspoon vanilla extract: Again, always a good idea.
For the Whipped Cream Topping:
- 1 ½ cups heavy cream: Chilled, for peak fluffiness.
- 2 tablespoons powdered sugar: Just a touch of sweetness.
- ½ teaspoon vanilla extract: You know the drill.
- Optional: Chocolate shavings or extra cocoa powder for garnish. Because we fancy.
Step-by-Step Instructions
- Prep Time! Preheat your oven to 350°F (175°C). Grease and flour an 8-inch round cake pan. For easy release, line the bottom with parchment paper.
- Dry Mix Fun: In a large bowl, whisk together the flour, cocoa powder, granulated sugar, baking soda, baking powder, and salt. Make sure there are no lumps!
- Wet Mix Wonders: In a separate, medium bowl, whisk the eggs, whole milk, vegetable oil, and vanilla extract until well combined.
- Combine & Conquer: Slowly add the wet ingredients to the dry ingredients, mixing with a spatula or whisk until just combined. Don’t overmix! Overmixing develops gluten and makes for a tough cake.
- The Secret Weapon: Gently stir in the hot water or hot coffee. The batter will be quite thin, and that’s exactly what we want.
- Bake It Up: Pour the thin batter into your prepared cake pan. Bake for 30-35 minutes, or until a toothpick inserted into the center comes out clean. Let the cake cool in the pan for 10-15 minutes, then carefully invert it onto a wire rack to cool completely. Patience is a virtue here! A warm cake will melt your mousse, and nobody wants that.
- Mousse Magic (Part 1 – Chocolate): While the cake cools, chop your dark chocolate into small pieces. Melt it in a heatproof bowl set over a saucepan of simmering water (a double boiler) or in short bursts in the microwave, stirring until smooth. Let it cool slightly, until it’s barely warm to the touch.
- Mousse Magic (Part 2 – Cream): In a separate, chilled large bowl, whip 2 cups of heavy cream with the ¼ cup powdered sugar and 1 teaspoon vanilla extract until soft peaks form. Be careful not to over-whip!
- Fold It In: Gently fold the slightly cooled melted chocolate into the whipped cream until no streaks remain and the mousse is uniform in color. Work quickly but gently.
- Assemble Your Masterpiece! Once the cake is completely cool, place it on your desired serving plate. Pour the chocolate mousse over the top, spreading it evenly. Chill the cake for at least 2 hours (or preferably overnight) to allow the mousse to set properly.
- Whipped Cream Grand Finale: Just before serving, whip the remaining 1 ½ cups of chilled heavy cream with 2 tablespoons powdered sugar and ½ teaspoon vanilla extract until stiff peaks form. Pile it high on top of your set mousse cake.
- Garnish & Glory: If you’re feeling extra fancy, sprinkle with chocolate shavings, cocoa powder, or even a few fresh raspberries. Slice and enjoy your utterly decadent creation!
Common Mistakes to Avoid
- Overmixing the batter: Seriously, once you see no dry streaks, stop. Overmixing = dense, sad cake. Nobody wants a sad cake!
- Not cooling the cake completely: Trying to add mousse to a warm cake? That’s just asking for a melty, messy disaster. Chill out, literally.
- Over-whipping the cream (for mousse or topping): Unless you’re going for butter, stop when it hits soft or stiff peaks. Otherwise, you’ll have grainy mousse or lumpy topping. Blegh.
- Using bad quality chocolate: This is a chocolate mousse cake, folks. Invest in decent chocolate. Your taste buds (and your guests) will thank you.
- Skipping the chilling time: The mousse needs time to set. Be patient. Good things come to those who wait (or who have excellent self-control).
Alternatives & Substitutions
Feeling adventurous or working with what you’ve got? No stress, here are some ideas:
- Gluten-Free? Swap out the all-purpose flour for a good 1:1 gluten-free baking blend. Easy peasy lemon squeezy.
- Dairy-Free? You can totally use plant-based milks and oils for the cake. For the mousse and whipped cream, look for full-fat coconut cream (chilled overnight, use the thick part!) or other dairy-free whipping creams. Just make sure your chocolate is dairy-free too, FYI.
- Different Chocolate? Dark chocolate gives that rich, intense flavor, but if you’re a milk chocolate fiend, go for it! Just know it’ll be sweeter and potentially less “moussey” if it has a lower fat content. White chocolate mousse is also an option, if you’re feeling super wild!
- Spice it Up: A pinch of cinnamon or a tiny dash of chili powder in the cake batter can add a surprising kick! Don’t knock it ’til you try it.
- Boozy Boost: Add a tablespoon of Kahlua, Grand Marnier, or even a good whiskey to the mousse for an adult twist. IMO, it’s a great addition!
FAQ (Frequently Asked Questions)
Got questions? I’ve got (casual) answers!
- Can I make this ahead of time? Absolutely! The cake can be baked a day in advance, and the assembled cake (mousse on top) can chill overnight. Just do the final whipped cream right before serving for maximum fluffiness and best texture.
- My mousse is runny! What did I do wrong? Likely a couple of things: your melted chocolate wasn’t cool enough (it “cooked” the cream), or you might have under-whipped your cream a tad too much before folding. Don’t fret too much! Pop it back in the fridge and hope for the best, or just call it a ‘chocolate pudding cake’ and move on with your fabulous life.
- Do I need a special pan? An 8-inch round cake pan works best. A springform pan is also a fantastic idea for super easy removal, but not strictly necessary if you line your regular pan well.
- Can I use chocolate chips instead of a baking bar? Yes, but choose good quality ones. Chips often have stabilizers that can make them melt differently than baking bars, so just be aware. Ghirardelli or Guittard chips tend to melt nicely.
- Why hot water/coffee in the batter? It “blooms” the cocoa powder, enhancing that deep, rich chocolatey goodness! Seriously, it’s a game changer. It also helps create a very moist crumb.
- What if I don’t have parchment paper? You can just grease and flour the pan really well, but parchment helps a ton with non-sticking and easy removal. Consider it an investment in your sanity!
- Can I make individual mousse cakes? Oh, you fancy! Yes, you can bake the cake in muffin tins (adjust baking time) and then cut out rounds, or even layer the mousse in small glasses with cake crumbles for adorable individual servings.
Final Thoughts
And there you have it, folks! Your very own Chocolate Mousse Cake with Whipped Cream, ready to make jaws drop and taste buds sing. You’ve conquered the cake, mastered the mousse, and whipped up some serious cream. Go forth and share your delicious creation (or hoard it all, no judgment here!). You’ve earned every single bite. Happy baking, my friend!


