So, your sweet tooth is screaming for something utterly decadent, but your energy levels are currently hovering somewhere between ‘sloth’ and ‘sleeping sloth’? Been there, my friend. Many, many times. Good news! We’re about to whip up a Chocolate Melting Cake that is so ridiculously easy, so unbelievably quick, and so mind-blowingly delicious, you’ll wonder why you ever bothered with anything else. Think warm, fudgy, molten chocolate bliss. You’re welcome.
Why This Recipe is Awesome
Okay, let’s be real. This isn’t just a recipe; it’s a life hack for chocolate lovers. First off, it’s pretty much **idiot-proof**. Seriously, even I, a person known for occasionally burning water, have aced this. Secondly, it’s fast. Like, “I suddenly need chocolate NOW” fast. We’re talking minimal fuss, maximum reward. And finally, it tastes like you spent hours slaving away, when in reality, you probably just scrolled through TikTok while it baked. It’s the ultimate show-off dessert with minimal effort. What’s not to love?
Ingredients You’ll Need
- **Good quality dark chocolate (60-70% cacao is my jam)**: Around 120g (about 4 oz). Don’t skimp here; life’s too short for mediocre chocolate, IMO.
- **Unsalted butter**: 100g (about 3.5 oz or 7 tablespoons). The good stuff, not that weird spreadable stuff.
- **Large eggs**: 2. Straight from the fridge is fine, we’re not baking a soufflé.
- **Granulated sugar**: 50g (about 1/4 cup). Just enough sweetness to balance the chocolate without making it cloying.
- **All-purpose flour**: 2 tablespoons. Just a tiny bit to give it some structure.
- **Pinch of salt**: A tiny pinch, I promise it makes a difference and enhances the chocolate flavor.
- **Optional**: Vanilla extract (1/2 tsp) or a shot of espresso (1 tbsp) for extra depth.
Step-by-Step Instructions
- **Preheat Power**: Get your oven fired up to 200°C (400°F). While it’s heating, grab two small ramekins or oven-safe dishes and give them a good buttering and a light dusting of cocoa powder or flour. This ensures your cake slides out like a dream.
- **Melt & Mix**: In a microwave-safe bowl or over a double boiler, melt your chocolate and butter together. Stir until it’s smooth and glossy. If you’re microwaving, do it in 30-second bursts, stirring each time, to avoid burning that precious chocolate.
- **Sweet Swirl**: In a separate bowl, whisk the eggs, sugar, and the pinch of salt until they’re light and frothy. This usually takes a minute or two. If you’re adding vanilla or espresso, now’s the time!
- **Combine Forces**: Gently fold the melted chocolate mixture into the egg mixture. Be a little delicate; we want to keep that lovely airy texture from the eggs. Once combined, fold in the flour until just incorporated. **Don’t overmix!**
- **Fill ‘Em Up**: Divide the batter evenly between your prepared ramekins. Don’t fill them right to the brim; give them a little room to breathe and do their melting thing.
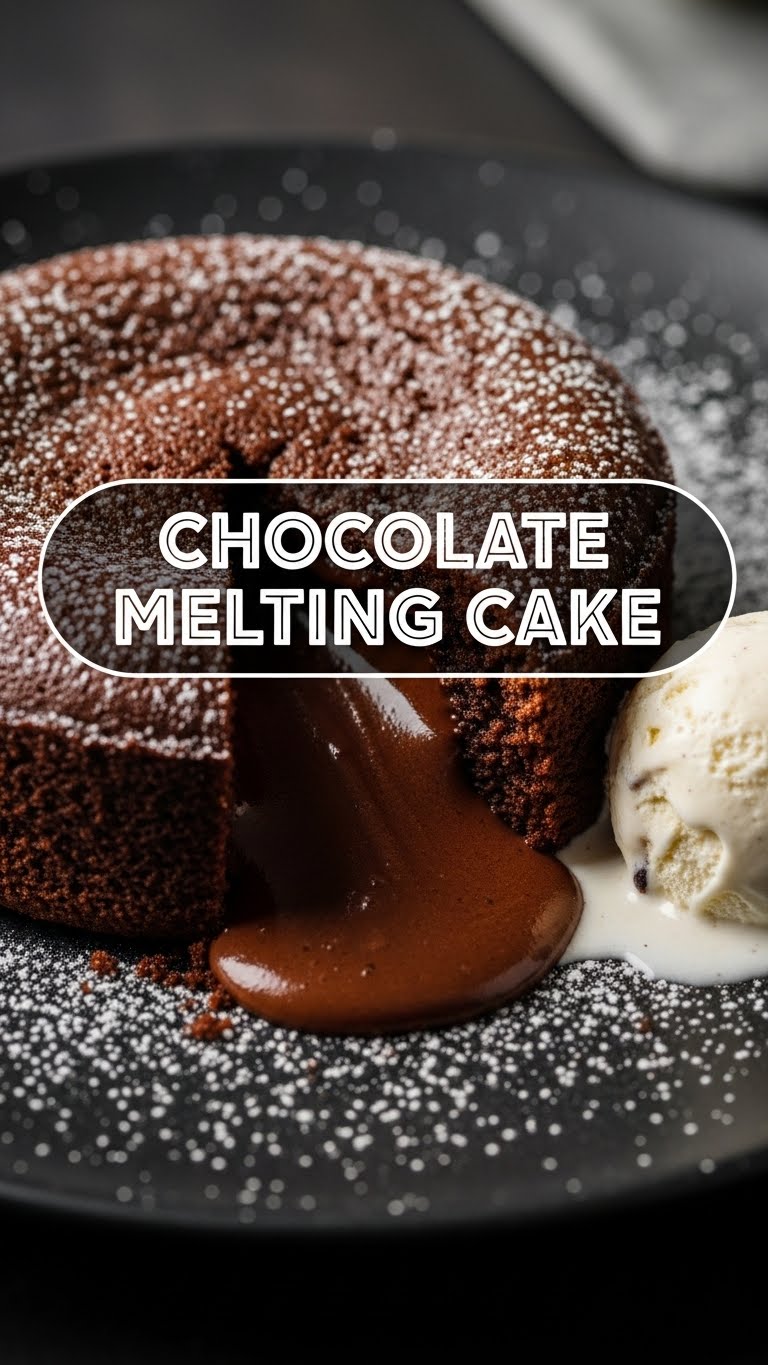
- **Bake ‘Til Gooey**: Pop them into the preheated oven for about **12-14 minutes**. The edges should look set, but the center should still be gloriously jiggly. That jiggle is your molten gold, FYI.
- **Serve Hot!**: Carefully remove from the oven. Let them cool for just a minute or two, then run a knife around the edges and invert onto serving plates. A dusting of powdered sugar or a scoop of vanilla ice cream is highly encouraged.
Common Mistakes to Avoid
- **Forgetting to Grease Your Ramekins**: This isn’t a suggestion, it’s a command. Without proper greasing (and dusting!), your beautiful cake will cling for dear life, and you’ll end up with a delicious mess instead of a gorgeous dessert.
- **Over-baking**: This is the cardinal sin of melting cakes. If you bake it too long, you’ll lose that magical molten center, and you’ll just have a regular (albeit tasty) chocolate cake. Keep an eye on the clock and trust the jiggle!
- **Not Using Good Chocolate**: I know, I sound like a snob, but truly, the quality of your chocolate makes or breaks this. Don’t use chocolate chips unless they’re *really* good ones. Regular baking bars are your best bet.
- **Impatience**: Yes, it’s tempting to dig in the second it’s out of the oven. But a minute or two to cool in the ramekin helps it set just enough to hold its shape when you invert it.
Alternatives & Substitutions
Feeling adventurous? Here are some ways to shake things up:
- **Chocolate Swap**: Not a dark chocolate fan? You can definitely use semi-sweet chocolate for a sweeter, milder flavor. Milk chocolate might be a bit too sweet and runny, but hey, you do you!
- **Flour Power**: If you’re gluten-free, a 1:1 gluten-free all-purpose flour blend usually works perfectly here. Since it’s such a small amount, you often don’t notice a difference.
- **Flavor Boosts**: Stir in a tiny pinch of cayenne pepper for a subtle spicy kick (trust me on this, it’s divine!). Or add some orange zest, a dash of almond extract, or even a splash of your favorite liqueur (like Kahlúa or Grand Marnier) with the wet ingredients.
- **Nutty Fun**: Fold in a handful of chopped toasted nuts (pecans or walnuts work great) into the batter for some textural contrast.
FAQ (Frequently Asked Questions)
- **”Can I make this ahead of time?”** You *can* make the batter a few hours in advance and keep it covered in the fridge. Just let it sit at room temp for 15-20 minutes before baking. But honestly, it’s so quick, fresh is best for that ultimate ooey-gooey factor.
- **”My cake didn’t melt in the middle! What went wrong?”** You likely over-baked it, my friend. Next time, pull it out when the edges are set but the center is still visibly wobbly. Oven temperatures vary, so adjust your timing.
- **”What if I don’t have ramekins?”** No worries! Small oven-safe custard cups, coffee mugs (check they’re oven-safe!), or even muffin tins (fill only 2/3 full, bake for less time, maybe 8-10 mins) can work in a pinch.
- **”Can I use margarine instead of butter?”** Well, technically yes, but why hurt your soul like that? Butter tastes better, performs better, and is just generally superior in baking. Stick with butter for optimal results.
- **”How should I serve these?”** Warm, immediately, with a scoop of vanilla bean ice cream, a dollop of whipped cream, fresh berries, or just a simple dusting of powdered sugar. The world is your oyster, or rather, your molten chocolate cake.
Final Thoughts
There you have it! Your new go-to dessert that screams “I’m a culinary genius” but secretly whispers “I just wanted chocolate fast.” This Chocolate Melting Cake is the perfect blend of elegant and effortless. So, go on, channel your inner pastry chef (even if that chef is wearing sweatpants) and whip up this deliciousness. Now go impress someone—or yourself—with your new culinary skills. You’ve earned it!


