So you’re craving something ridiculously delicious but too lazy to spend forever in the kitchen, huh? Same. We’re talking about a dessert that’s basically magic – minimal effort, maximum “OMG, did you make this?!” factor. Enter the Chocolate Icebox Cake. It’s so easy, it feels like cheating, but in the best way possible. Get ready to become a hero of your own kitchen.
Why This Recipe is Awesome
Seriously, this cake is your new best friend. It requires absolutely zero baking. ZIP. NADA. That’s right, no oven disasters, no burnt edges, just pure, unadulterated chocolatey goodness. Plus, it’s ridiculously adaptable. Think of it as a blank canvas for your dessert dreams. It’s so simple, even your cat could probably make it (though I wouldn’t recommend letting them handle the whipped cream). It’s the perfect “surprise guest” dessert or the ultimate “I deserve this” treat.
Ingredients You’ll Need
- Chocolate Wafer Cookies: The backbone of our operation. Nab a box (or two, no judgment).
- Sweetened Condensed Milk: This is where the magic happens. Don’t skimp!
- Unsweetened Cocoa Powder: For that deep, dark chocolate flavor.
- Vanilla Extract: Just a splash to make everything sing.
- Heavy Whipping Cream: We need clouds of fluffy goodness.
- Powdered Sugar: To sweeten our clouds just right.
- Optional, but highly recommended: Chocolate shavings or fresh berries for extra pizzazz.
Step-by-Step Instructions
- First things first, let’s whip up that luscious chocolatey mixture. In a bowl, whisk together the sweetened condensed milk, cocoa powder, and vanilla extract until it’s smooth and looks like a chocolate potion. This is your flavor bomb.
- Now, let’s get our whipped cream ready. In a separate, chilled bowl, beat the heavy whipping cream with your electric mixer (or a whisk and some serious arm power) until it starts to thicken. Gradually add the powdered sugar and keep beating until you have stiff peaks that stand up straight. Think fluffy, dreamy clouds.
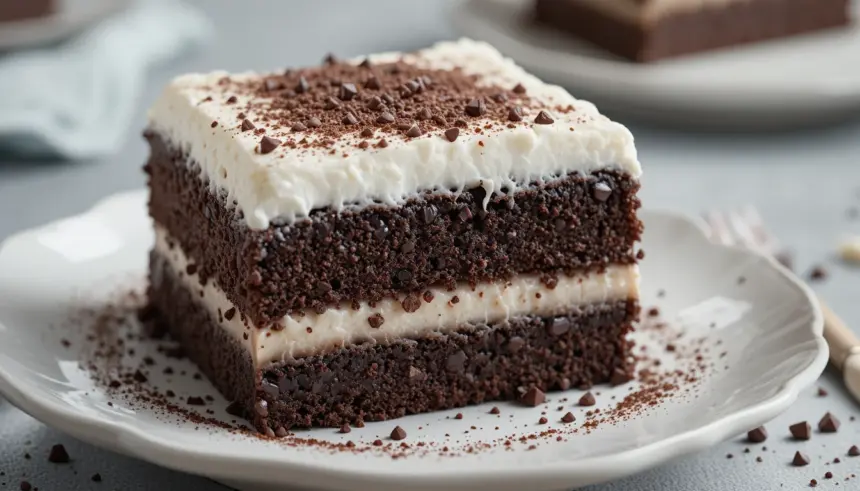
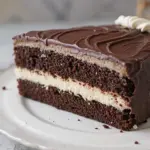
- Time to assemble! Grab a loaf pan or any dish that makes you happy. Line it with parchment paper for easy removal (future you will thank you). Spread a thin layer of the chocolate mixture on the bottom.
- Now, arrange a layer of chocolate wafer cookies over the chocolate mixture. Try to cover as much as possible; no sad gaps allowed!
- Spread a generous layer of whipped cream over the cookies. Don’t be shy! This is the good stuff.
- Repeat the layers: cookies, chocolate mixture, whipped cream. Continue until you’ve used up all your ingredients or reached the top of your pan. The top layer should be whipped cream.
- Cover it up and **chill, chill, chill!** Pop this bad boy in the fridge for at least 6 hours, or preferably overnight. This is crucial for the cookies to soften and meld into cake-like perfection.
- Once it’s chilled and ready to impress, carefully invert it onto a serving plate. Decorate with those optional chocolate shavings or berries if you’re feeling fancy. Slice and devour!
Common Mistakes to Avoid
- Skipping the chilling time: Seriously, don’t be that person. This is where the magic happens! If you don’t let it chill, you’ll just have soggy cookies and whipped cream. Yuck.
- Not using enough cocoa powder: A sad, pale chocolate mixture is a crime. Make it dark, make it intense!
- Over-whipping the cream: Nobody likes gritty, buttery whipped cream. Stop when it forms those lovely stiff peaks.
- Not lining the pan: Unless you enjoy scraping hardened dessert off a dish, do yourself a favor and use parchment paper.
Alternatives & Substitutions
Okay, so maybe you’re out of chocolate wafers. No worries! **Graham crackers** are a totally acceptable substitute. They’ll give it a slightly different, but still delicious, vibe. Feeling extra fancy? Try using some thin **chocolate sponge cake** slices instead of cookies. For the chocolate mixture, if you’re feeling adventurous, you could add a tablespoon or two of instant coffee to really amp up the chocolate flavor. And if you’re dairy-free, there are some excellent dairy-free whipped creams and even vegan condensed milks out there now. Get creative!
FAQ (Frequently Asked Questions)
Q: Can I make this ahead of time?
A: Absolutely! This cake is *made* to be made ahead. In fact, the longer it chills, the better it gets. It’s your secret weapon for stress-free entertaining.
Q: What if I don’t have a loaf pan?
A: No biggie! Any rectangular dish will work. An 8×8 inch square pan is also a great option. Just adjust your cookie layers accordingly.
Q: My whipped cream isn’t stiff enough. What did I do wrong?
A: Did you chill your bowl and whisk? That’s a game-changer! Also, make sure your cream is super cold. If it’s still not cooperating, try adding a tiny bit more powdered sugar and whipping it a little longer.
Q: Can I add other flavors?
A: You bet! A little pinch of cinnamon in the chocolate mixture? Some finely chopped nuts? A swirl of caramel sauce? Go wild! Just try not to go *too* wild and overwhelm the chocolate.
Q: How long does this cake last in the fridge?
A: It’s best within 2-3 days. Honestly though, it rarely lasts that long. It’s just too darn good!
Final Thoughts
And there you have it! A dessert that’s impressive, incredibly easy, and downright delicious. This Chocolate Icebox Cake is proof that you don’t need to be a Michelin-star chef to whip up something amazing. It’s the perfect sweet escape for those days when cooking feels like too much effort. So go ahead, gather your ingredients, embrace the simplicity, and get ready to wow yourself (and anyone lucky enough to share it with you). Now go impress someone—or yourself—with your new culinary skills. You’ve earned it!
