So, you’ve hit that point in the day (or night, no judgment here) where only a massive scoop of creamy, dreamy chocolate ice cream will do? And maybe, just *maybe*, you’re picturing it with a cloud of whipped cream on top, because why settle for less? My friend, you’ve come to the right place. We’re about to dive into a recipe that’s so good, you’ll wonder why you ever bothered with the store-bought stuff. Let’s get scooping!
Why This Recipe is Awesome
Look, I get it. Life’s too short for complicated recipes that require a culinary degree and equipment you only see on TV. This chocolate ice cream recipe? It’s basically ‘set it and forget it’ territory once you do a tiny bit of stirring. **Seriously, it’s idiot-proof.** Even *I* didn’t mess it up, and my track record with anything more complex than toast is… questionable. Plus, you get to tell people you *made* ice cream. Instant culinary cred, without the actual effort. Win-win! It’s rich, it’s decadent, and it’s perfectly paired with a mountain of homemade whipped cream that takes literally minutes to make. Prepare for compliments.
Ingredients You’ll Need
Gather ’round, my sweet-toothed compatriot! Here’s what you’ll need to make this magic happen:
- 2 cups (480ml) Heavy Cream: The hero, the MVP, the reason this isn’t just chocolate milk. Get the good stuff, full fat.
- 1 cup (240ml) Whole Milk: Heavy cream’s slightly less flamboyant but equally important sidekick.
- ¾ cup (150g) Granulated Sugar: Sweetness! Duh.
- ½ cup (50g) Unsweetened Cocoa Powder: The chocolatey soul of our operation. Don’t skimp on quality here; it makes a difference.
- 1 teaspoon Vanilla Extract: A tiny bit makes a big difference. Don’t skip it, even if you think you don’t care.
- Pinch of Salt: Sounds weird, but trust me, it makes the chocolate taste *more* chocolatey. It’s science! Or magic. Whatever.
For the Glorious Whipped Cream:
- 1 cup (240ml) Cold Heavy Cream: Yes, more cream! Because one cloud of cream isn’t enough.
- 2 tablespoons Powdered Sugar: Finer than granulated, so it dissolves smoothly.
- ½ teaspoon Vanilla Extract: More vanilla, more joy!
Step-by-Step Instructions
Alright, let’s get down to business. Follow these steps and prepare to be amazed!
- Whisk It Up: In a medium saucepan, combine your heavy cream, whole milk, granulated sugar, cocoa powder, and that tiny pinch of salt.
- Heat Gently: Place the saucepan over medium-low heat. Whisk continuously until the sugar and cocoa powder are completely dissolved and the mixture is warm, but **do not let it boil!** We’re not making hot cocoa, we’re making ice cream base.
- Add Vanilla: Remove the pan from the heat. Stir in the vanilla extract. Give it a good swish.
- Chill Out: This step is crucial! Pour your chocolate base into an airtight container or a bowl covered with plastic wrap. Pop it in the fridge for at least 4 hours, or ideally, overnight. **The colder, the better!** You can even place the bowl over an ice bath to speed up the chilling process if you’re impatient (who isn’t?).
- Churn, Baby, Churn: Once thoroughly chilled, pour the mixture into your ice cream maker. Churn according to your machine’s instructions. This usually takes about 20-30 minutes, turning into a soft-serve consistency.
- Freeze to Perfection: Transfer the soft ice cream into a freezer-safe container. Cover it tightly and freeze for another 2-4 hours, or until firm enough to scoop.
- Whip Up the Cream: While your ice cream is firming up (or right before serving), grab a cold bowl and cold beaters (pop them in the freezer for 10 minutes beforehand for best results). Pour in the cold heavy cream, powdered sugar, and vanilla extract. Beat on medium-high speed until stiff peaks form. Don’t overbeat, or you’ll get butter!
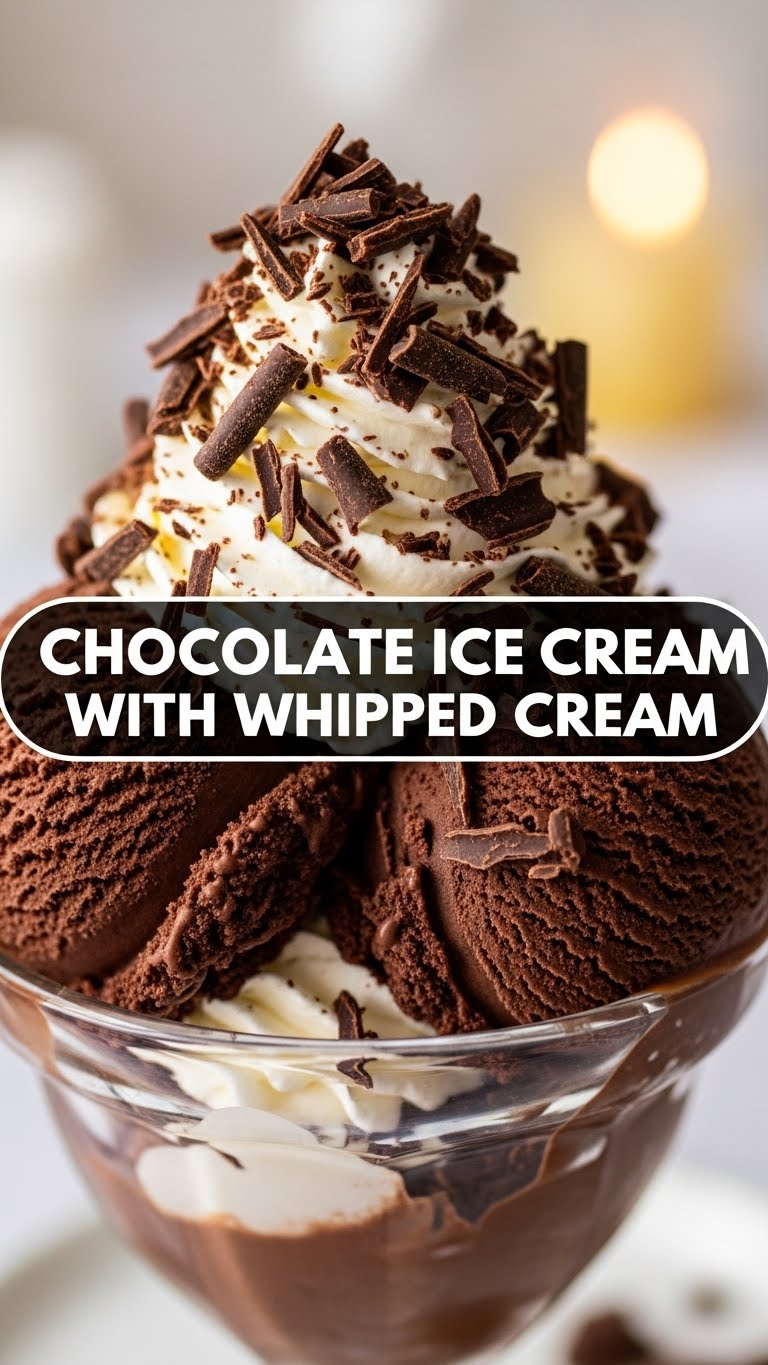
- Serve and Devour: Scoop generous portions of your homemade chocolate ice cream into bowls. Top with massive, glorious dollops of that freshly whipped cream. Enjoy every single, amazing bite!
Common Mistakes to Avoid
Nobody’s perfect, but we can try to minimize the oopsies, right? Here’s what to watch out for:
- Not Chilling the Base Enough: This is probably the biggest rookie mistake. Think of it like trying to run a marathon without warming up – bad idea. If your base isn’t super cold, your ice cream maker will struggle, and you’ll end up with an icy, less creamy result. **Patience, my friend, is a virtue here.**
- Over-churning: Once it hits that soft-serve stage, stop the machine. Keep going, and you’ll end up with butter, not ice cream. Unless you *want* chocolate butter? No, you don’t.
- Using Low-Fat Milk/Cream: Save it for your ‘health kick’ day. Today is not that day. **Full fat is your friend here,** providing the richness and creaminess we all crave.
- Skipping the Salt: Your chocolate will taste… flatter. Like a bad joke. That tiny pinch seriously boosts the chocolate flavor. Trust the process!
- Eating the Whole Batch in One Sitting: I mean, I’m not *judging* (I’ve been there), but maybe portion control? Or don’t. It’s your life. Just be prepared for a major sugar rush.
Alternatives & Substitutions
Feeling adventurous? Or just missing an ingredient? No worries, we’ve got options!
- Darker Chocolate: For the “I’m an adult and I like bitter things” vibe, use dark cocoa powder or even melt in some good quality dark chocolate (about 2-3 ounces) with the wet ingredients.
- Add-Ins Galore: Once the ice cream is done churning (before freezing), stir in chocolate chips, chopped nuts (walnuts, pecans, hazelnuts!), mini marshmallows, or even swirls of caramel or fudge. Go wild! It’s your masterpiece.
- Flavor Boosters: A splash of espresso powder (about 1 tsp) mixed into the base will deepen the chocolate flavor beautifully. Mint extract for a mint-chocolate vibe? A dash of chili powder for a spicy kick? The world is your oyster! Espresso powder in the base? **Game changer, IMO.**
- Dairy-Free Option: You can try substituting full-fat canned coconut milk or cream (chilled overnight!) for the dairy, but be aware the texture will be slightly different – still delicious, though!
- Whipped Cream Flavors: For the whipped cream, swap vanilla for almond extract, or add a tiny pinch of cinnamon. Fancy!
FAQ (Frequently Asked Questions)
Got questions? I’ve got answers! (Mostly.)
- Can I make this without an ice cream maker?
You totally can! It requires a bit more effort, though. Pour your chilled base into a shallow freezer-safe pan. Freeze for 30-45 minutes, then remove and whisk vigorously with a fork or electric mixer to break up ice crystals. Repeat this every 30-45 minutes for 3-4 hours, until it reaches a scoopable consistency. It won’t be quite as smooth, but still yummy!
- How long does homemade ice cream last in the freezer?
Properly stored in an airtight container, it’s good for about 2-3 weeks. But let’s be real, are you really going to let it last that long? Probably not.
- Why is my ice cream icy instead of creamy?
Usually, this means your base wasn’t cold enough before churning, or it wasn’t churned long enough. Not enough fat content can also be a culprit, so stick with that full-fat cream!
- Can I add booze to my ice cream?
Absolutely! A tablespoon or two of liqueur (like Kahlua, Baileys, or even rum) can add a lovely flavor and actually helps keep the ice cream softer due to the alcohol content. Don’t overdo it, though, or it won’t freeze properly.
- What if I don’t have vanilla extract for the whipped cream?
You can skip it, and your whipped cream will still be good, but the vanilla adds a nice depth of flavor. If you have a different extract (like almond), a tiny dash could work, or a pinch of cinnamon is surprisingly good!
- Can I use low-fat cream for the whipped cream?
Nope. Just… no. Low-fat cream doesn’t have enough fat content to create those beautiful, stable stiff peaks. You’ll beat it forever and just get sad, runny liquid. You’ll cry. I’ll cry. It’s a whole thing. **Stick to full-fat heavy cream.**
Final Thoughts
So there you have it, my friend! Your passport to chocolatey, creamy bliss. Go forth and conquer your cravings. Make this, share it (or don’t, I won’t tell), and bask in the glory of your own homemade deliciousness. You’ve earned it, you magnificent culinary wizard, you! Now go impress someone – or just your couch – with your mad skills. Bon appétit!


