Ever have one of those days where your brain screams “CHOCOLATE!” but your body whispers “couch… just… couch…”? Yeah, me too. And then, a craving hits. Not just any craving, but the kind that demands something rich, something creamy, something utterly decadent, yet doesn’t require you to sell your soul (or an arm and a leg) to a fancy ice cream parlor.
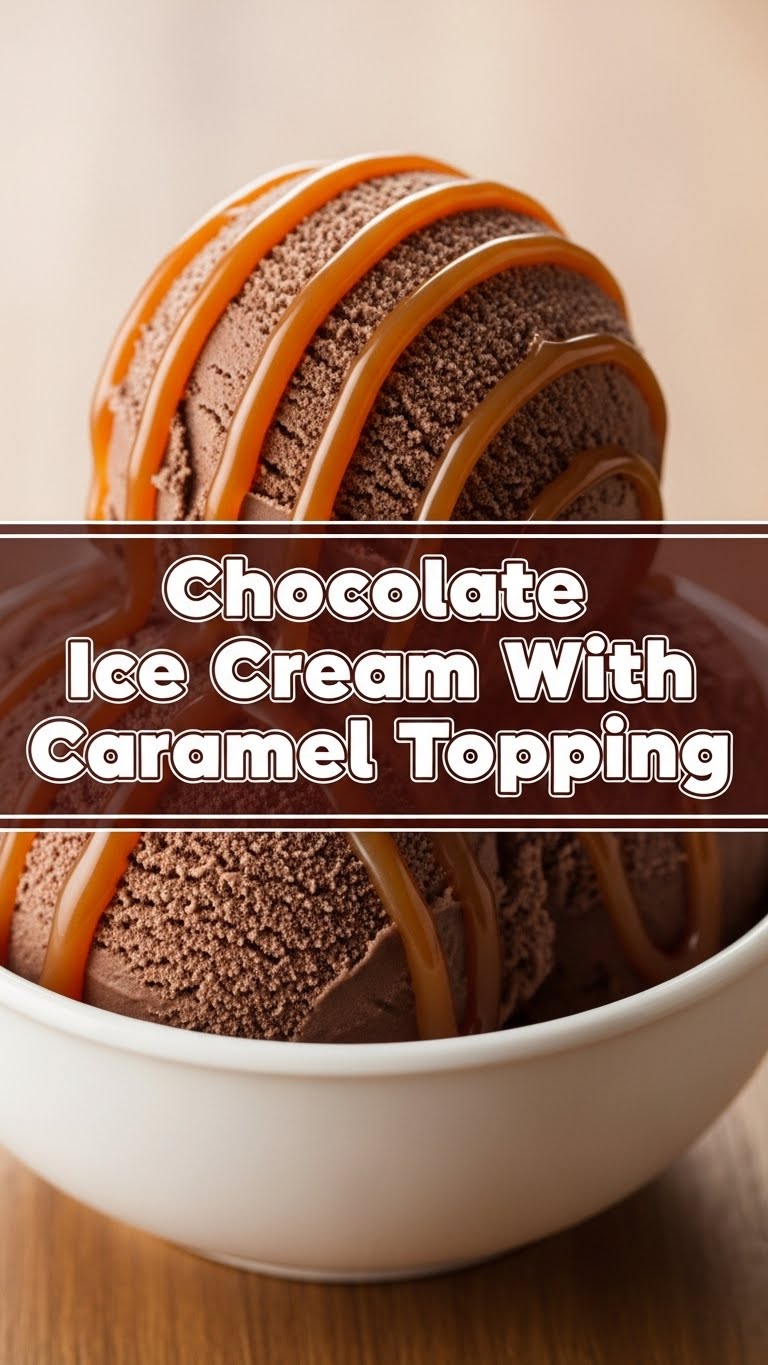
Good news, my friend! I’ve got the ultimate fix that’s going to make your taste buds do a happy dance without turning your kitchen into a disaster zone. We’re talking **Chocolate Ice Cream with a luscious, salty-sweet Caramel Topping**. Get ready to become your own favorite dessert hero.
Why This Recipe is Awesome
Alright, let’s be real. There are a million recipes out there. So why *this* one? Because it’s basically magic. Seriously, even if your culinary skills peak at microwaving instant noodles, you got this. Here’s the lowdown:
- **No-Churn Wonder:** That’s right, no fancy ice cream maker required! We’re talking pure, unadulterated ice cream bliss with just a mixer (or strong arms, if you’re feeling ambitious).
- **Idiot-Proof Caramel:** Making caramel can sound intimidating, but my version is so straightforward, you’ll wonder why you ever bought it in a jar. Plus, it’s that perfect balance of sweet and salty.
- **Impressive AF:** Serve this to anyone, and they’ll think you’re some kind of dessert wizard. You made *homemade* chocolate ice cream *and* caramel? Bow down!
- **Instant Mood Booster:** Bad day? Good day? Any day is a good day for this chocolate caramel hug in a bowl. **Trust me on this one.**
Ingredients You’ll Need
Gather your troops! Here’s what you’ll need to assemble your creamy, dreamy masterpiece. Nothing too wild, just good stuff.
For the Chocolate Ice Cream:
- **2 cups (480ml) Heavy Cream:** The MVP, seriously. Don’t skimp. Cold is key!
- **1 (14-ounce/397g) can Sweetened Condensed Milk:** This is your no-churn magic maker. No substitutes!
- **½ cup (45g) Unsweetened Cocoa Powder:** Go dark or go home… or just regular, it’s totally fine. Whatever tickles your chocolate fancy.
- **1 teaspoon Vanilla Extract:** A splash of fancy. Always.
- **Pinch of Salt:** Don’t skip it! It brings out all that chocolatey goodness.
For the Caramel Topping:
- **1 cup (200g) Granulated Sugar:** The foundation of all things gooey and delicious.
- **¼ cup (60ml) Water:** Just a tiny bit, for sugar’s spa day.
- **6 tablespoons (85g) Unsalted Butter:** Because butter makes everything better, duh. Cut it into a few pieces.
- **½ cup (120ml) Heavy Cream:** Our MVP swoops in again. Warm it up slightly first, makes life easier!
- **½ teaspoon Vanilla Extract:** Another splash for good measure.
- **¼ teaspoon Salt:** To balance the sweet and make it sing. A little more if you like it extra salty!
Step-by-Step Instructions
Alright, apron on (or not, I’m not your mom), let’s get cooking! These steps are short, sweet, and to the point. You’ve got this!
Part 1: The Glorious Chocolate Ice Cream
- **Chill Out:** Pop your mixing bowl and beaters (if using an electric mixer) in the freezer for 10-15 minutes. **Cold tools = happy cream.**
- **Whip It Good:** Pour your very cold heavy cream into the chilled bowl. Beat on medium-high speed until stiff peaks form. This means when you lift the beaters, the cream holds its shape. Don’t overdo it, or you’ll get butter!
- **Sweet Swirl:** Gently fold in the sweetened condensed milk, cocoa powder, vanilla extract, and that pinch of salt. Mix until just combined – no need to go crazy, just make sure there are no streaks of unmixed cocoa.
- **Freeze Fest:** Pour the mixture into a freezer-safe container (a loaf pan covered tightly with foil works great!). Pop it in the freezer for at least 6 hours, or ideally, overnight. Patience is a virtue here, my friend.
Part 2: The Dreamy Caramel Topping
- **Sugar Melt:** In a medium, heavy-bottomed saucepan, combine the granulated sugar and water. Stir gently to moisten all the sugar.
- **Heat & Watch:** Cook over medium heat, without stirring, until the sugar dissolves and the mixture starts to boil. Once boiling, stop stirring! Just let it bubble.
- **Golden Glow:** Keep cooking until the caramel turns a beautiful amber color. This usually takes 5-8 minutes. **Keep an eye on it – it goes from perfect to burnt in a flash!**
- **Butter Up:** Remove from heat immediately. Carefully add the butter pieces (it will bubble up like crazy, so be cautious!). Whisk until the butter is fully melted and incorporated.
- **Creamy Goodness:** Slowly pour in the warm heavy cream, whisking constantly. Again, it will bubble and seize a bit, but keep whisking! The heat from the pan will melt it smooth.
- **Finishing Touches:** Whisk in the vanilla extract and salt. Pour the caramel into a heatproof jar or bowl and let it cool completely. It will thicken as it cools.
Common Mistakes to Avoid
Nobody’s perfect, but we can try to avoid these classic pitfalls. Learn from my (many) mistakes, folks!
- **Over-whipping the Cream:** You want stiff peaks, not butter! Stop as soon as it holds its shape. Seriously, once it starts looking grainy, you’ve gone too far.
- **Not Chilling Your Tools:** For the ice cream, **a cold bowl and beaters are your best friends.** Warm tools make for sad, runny cream.
- **Ignoring the Caramel:** Making caramel is like watching a baby. You cannot walk away. It goes from perfect to a smoking, bitter mess faster than you can say “oops.” Stay glued to that pan!
- **Cold Cream for Caramel:** When adding heavy cream to the hot caramel, if it’s straight from the fridge, it can make the caramel seize up more aggressively. **Warm it up slightly first.**
- **Impatience:** I know, I know. You want that ice cream *now*. But it needs time to properly freeze and firm up. Don’t peek every five minutes.
Alternatives & Substitutions
Feeling adventurous? Or maybe you’re missing an ingredient? Here are some ideas to tweak this already amazing recipe:
- **Chocolate Variations:** Instead of just cocoa powder, you could fold in **½ cup of mini chocolate chips** or chopped dark chocolate for extra texture and melty goodness. Or swirl in some melted white chocolate!
- **Spice It Up:** Add a tiny pinch of cayenne pepper to the cocoa powder for a subtle, spicy Mexican hot chocolate vibe. Don’t knock it till you try it!
- **Mocha Magic:** Add **1 tablespoon of instant espresso powder** along with the cocoa for a rich mocha ice cream. You’re welcome.
- **Store-Bought Caramel:** Look, I get it. Sometimes life happens. If making caramel feels like too much, grab a good quality jarred caramel sauce. **No judgment here!** Just warm it up slightly before drizzling.
- **Nutty Professor:** Fold in some chopped toasted pecans, walnuts, or peanuts into the ice cream mixture, or sprinkle them over the top with the caramel. Extra crunch, extra yum.
FAQ (Frequently Asked Questions)
Got questions? I’ve got answers. Mostly.
- **Can I use regular milk instead of heavy cream for the ice cream?** Nope, not for this no-churn method. Heavy cream is essential for that creamy, scoopable texture without an ice cream maker. It won’t work otherwise, **FYI**.
- **My caramel seized up! What do I do?** Don’t panic! Place the saucepan back on very low heat and whisk constantly. It should melt back into a smooth sauce. If it’s still chunky, a few drops of hot water might help, but often just low heat and whisking is enough.
- **How long does the homemade ice cream last in the freezer?** If stored in an airtight container, it’s generally good for about 2-3 weeks. But honestly, it usually doesn’t last that long, IMO.
- **Can I make the ice cream without an electric mixer?** Yes, but prepare for an arm workout! You’ll need a whisk and a lot of elbow grease to get that cream to stiff peaks. Totally doable, though!
- **Is it okay to store the caramel in the fridge?** Absolutely! It will get very firm in the fridge, so just gently warm it up in the microwave (short bursts!) or a saucepan before drizzling. It’ll last a few weeks.
- **My ice cream isn’t firm enough. What went wrong?** It likely didn’t freeze long enough. Ensure your freezer is cold enough and give it ample time (at least 6 hours, overnight is best). Also, ensure your heavy cream was whipped to stiff peaks.
Final Thoughts
Phew! You made it. You’ve now unlocked the secret to making ridiculously delicious, homemade chocolate ice cream with a killer caramel topping. This isn’t just a dessert; it’s an experience. It’s a “treat yourself” moment that you absolutely deserve.
So, what are you waiting for? Go forth and conquer those cravings! Make this for a party, for a quiet night in, or just because it’s Tuesday. You’re basically a dessert wizard now, and the world needs more magic. Now go impress someone—or yourself—with your new culinary skills. You’ve earned it!


