So, you’re staring into the abyss of your fridge, dreaming of something decadent, chocolaty, and blissfully cold, but the thought of spending hours baking makes you want to just order pizza instead, right? Same, friend, same. Well, grab your spoon and a can-do attitude (mostly the spoon, though), because we’re about to make a Chocolate Ice Cream Cake that’s so easy, you’ll wonder why you ever bothered with complicated things. Like, ever.
Why This Recipe is Awesome
Let’s be real, life is complicated enough. Your dessert shouldn’t be. This Chocolate Ice Cream Cake is the culinary equivalent of a warm hug and a pat on the back, all while requiring minimal brainpower. It’s **idiot-proof**, seriously. If I, a person who once managed to burn water (don’t ask), can nail this, so can you. It’s perfect for impressing guests (who will think you’re a genius), satisfying your deepest chocolate cravings, or just, you know, eating a whole lot of ice cream without judgment. Plus, it involves very little actual baking, which is a win in my book, IMO.
Ingredients You’ll Need
Get ready for a super short shopping list. We’re keeping it simple, because gourmet doesn’t have to mean complicated. Unless you want it to, then go wild later!
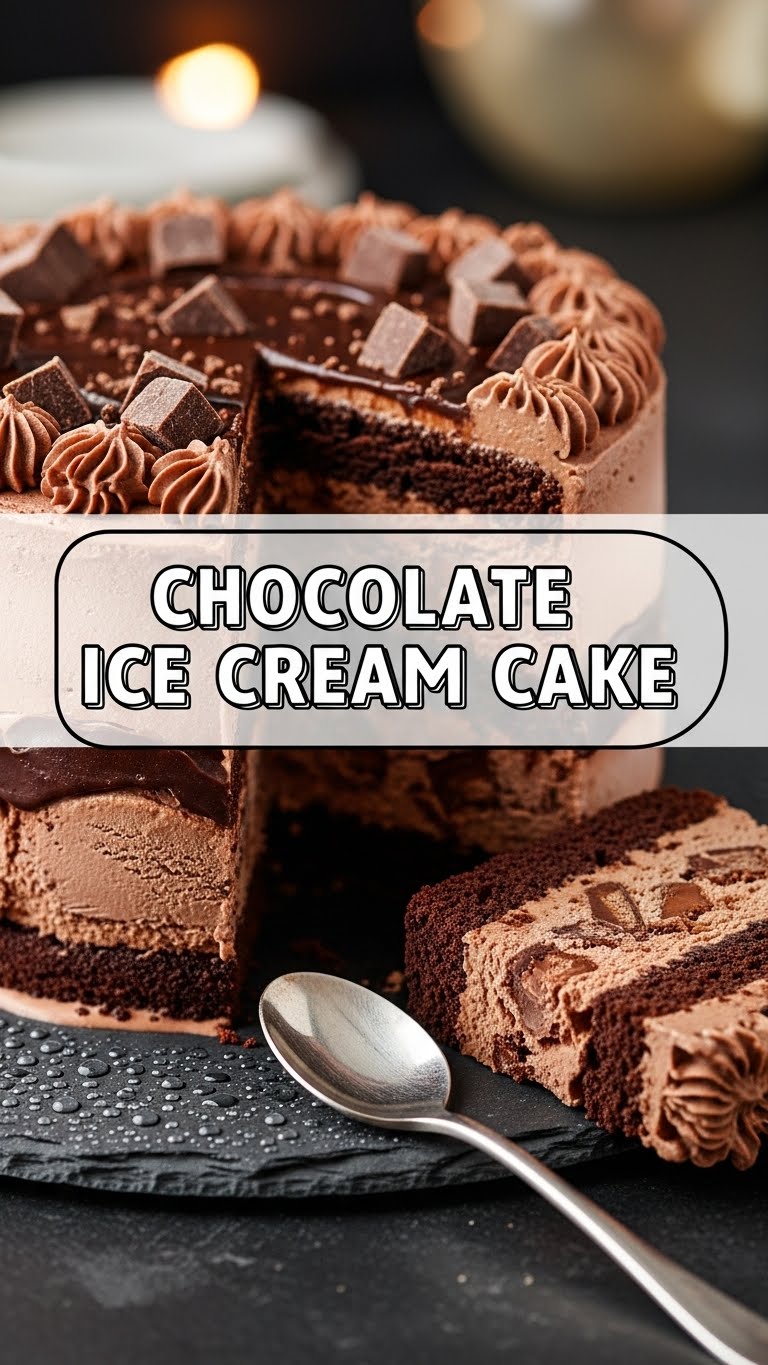
- 1 box brownie mix (plus the usual suspects for making it, like oil, eggs, water. Pick your favorite fudgy kind!)
- 1.5 quarts chocolate ice cream (or two regular tubs. Don’t skimp on quality here; this is the star of the show!)
- 1 tub whipped topping (like Cool Whip, thawed. Or go fancy with homemade whipped cream if you’re feeling ambitious, but let’s be honest, we’re not that ambitious right now.)
- 1 jar chocolate fudge sauce (the kind that gets gooey when warm, because science.)
- Optional fun stuff: Sprinkles, chocolate shavings, mini chocolate chips, crushed Oreos – whatever makes your heart sing!
Step-by-Step Instructions
- Bake the Brownies: Get your brownie mix on! Follow the box directions for an 8×8 or 9×13 inch pan (depending on how thick you want your base). **Don’t overbake!** A slightly gooey brownie makes for a superior cake base. Let it cool completely. Seriously, totally cool.
- Soften the Ice Cream: While your brownies are chilling out, take your chocolate ice cream out of the freezer and let it sit on the counter for about 10-15 minutes. You want it softened enough to spread easily, but not melted into a soup.
- Layer Up! Once the brownies are cool, spread the softened chocolate ice cream evenly over the top of the brownie layer. Work relatively quickly so the ice cream doesn’t melt too much.
- Freeze Time, Part 1: Pop that pan into the freezer for at least 30 minutes, or until the ice cream layer is firm. This step is crucial, don’t skip it!
- Add the Toppings: Once the ice cream is firm, take the cake out. Now, spread your thawed whipped topping over the ice cream layer. Drizzle generously with chocolate fudge sauce. This is where your optional fun stuff comes in – sprinkle away!
- Freeze Time, Part 2: Back into the freezer it goes for at least 2-3 hours. **For best results, an overnight freeze is ideal.** This ensures everything is super firm and easy to slice.
- Serve and Devour: When you’re ready to serve, take the cake out of the freezer and let it sit at room temperature for 5-10 minutes to make slicing easier. Then, cut yourself a glorious piece and enjoy the fruits of your very minimal labor!
Common Mistakes to Avoid
Even though this recipe is practically foolproof, there are a couple of speed bumps you might hit. Let’s make sure you don’t!
- Trying to spread ice cream on warm brownies: This is a rookie mistake. You’ll end up with chocolate soup and a very sad cake. **Cool those brownies completely!**
- Using rock-hard ice cream: You’ll bend your spoon and maybe your will. Let it soften a bit, but not too much.
- Not freezing between layers: Seriously, this is key. If you try to spread the whipped cream on soft ice cream, it’ll all turn into a muddy mess. Patience, young padawan!
- Cutting into it too soon: I know, it’s tempting. But a proper freeze makes for clean, beautiful slices. Wait for it!
Alternatives & Substitutions
Feeling creative? Want to mix things up? Here are a few ideas:
- Brownie Base Swap: Not a brownie person? (Gasp! But okay.) You could use a chocolate cookie crust (crushed Oreos + melted butter, pressed into the pan) or even a thin layer of pre-made chocolate cake.
- Ice Cream Flavors: While this is a *chocolate* ice cream cake, who’s to say you can’t experiment? Mint chip, coffee, or even a swirl of vanilla would be delish. Just don’t tell the purists I suggested it.
- Whipped Topping Upgrade: If you’re feeling fancy, make your own whipped cream with heavy cream, a touch of sugar, and vanilla. It tastes amazing, but FYI, Cool Whip holds its shape better in the freezer.
- Fudge Sauce: Caramel sauce, peanut butter sauce, or even a berry compote could be fun if you’re feeling adventurous.
- Extra Mix-ins: Fold mini chocolate chips, chopped nuts, or crushed candies into your softened ice cream layer before spreading for extra texture and flavor!
FAQ (Frequently Asked Questions)
- Can I make this ahead of time? Heck yes! This cake actually *needs* to be made ahead. An overnight freeze is practically mandatory for structural integrity and optimal deliciousness.
- How long does it last in the freezer? Wrapped tightly, it’ll last for about a week. After that, the ice cream can start to get a little icy, but it’ll still probably disappear quickly.
- My ice cream is too hard to scoop! What gives? Did you let it sit out for a bit? If it’s still rock solid, run your scoop under hot water for a few seconds. That usually does the trick!
- Can I use a springform pan? Absolutely! A 9-inch springform pan is perfect for a prettier, easy-to-release cake. Just line the bottom with parchment paper.
- Do I really need to freeze between layers? Yes, you absolutely, unequivocally do. It’s not a suggestion; it’s a command from the dessert gods. Trust me on this one.
Final Thoughts
See? That wasn’t so bad, was it? You just whipped up (pun intended) a magnificent Chocolate Ice Cream Cake with minimal fuss and maximum deliciousness. Now go forth and impress someone—or better yet, just yourself—with your new culinary skills. You’ve earned every single glorious bite. And don’t forget to save a slice for me, okay? You’re basically a dessert wizard now, go get ’em!


