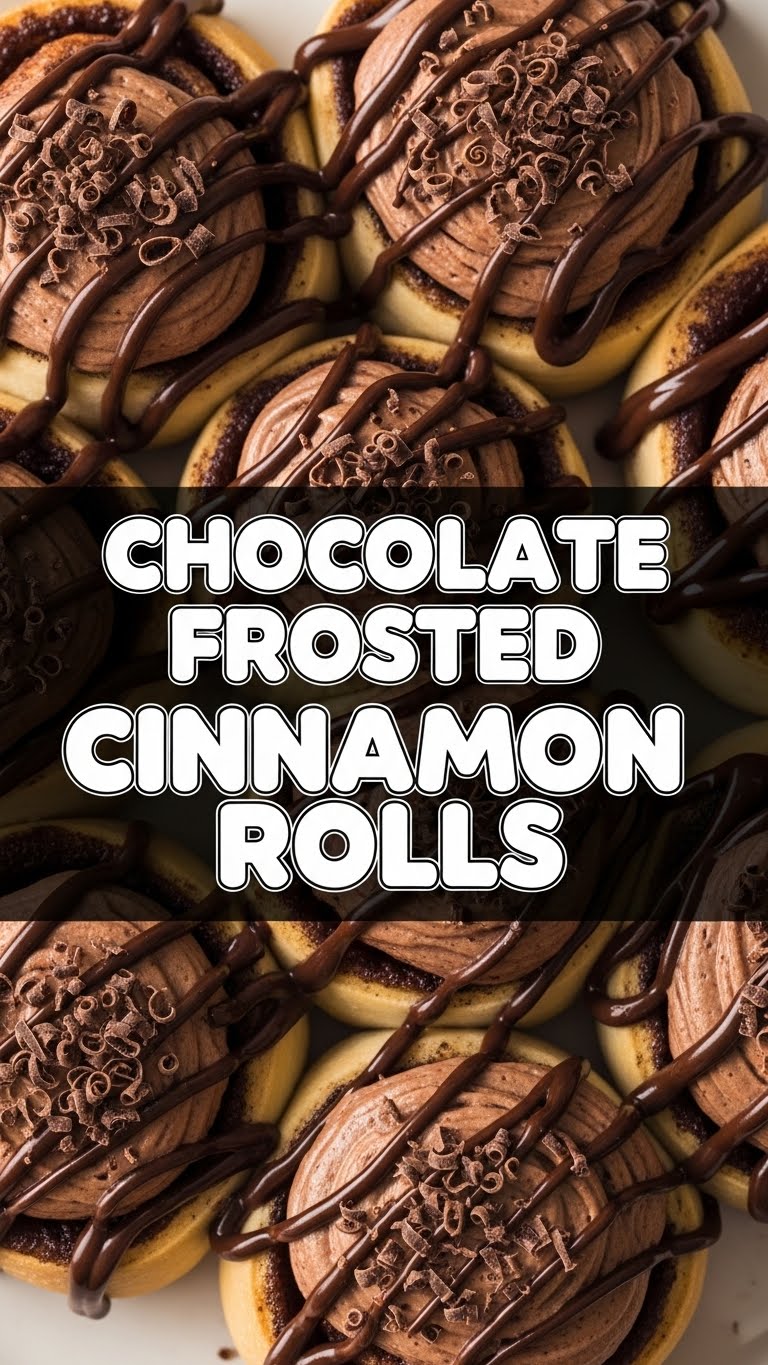
So, you’ve reached that peak adulting moment where you want something ridiculously delicious, comforting, and kinda fancy-looking, but the thought of spending all day in the kitchen makes you want to curl up with Netflix instead? Same, friend, same. That’s why we’re making Chocolate Frosted Cinnamon Rolls today. It’s like your favorite cinnamon roll had a glow-up and decided to get cozy with a rich chocolate frosting. Prepare for pure bliss, without the kitchen meltdown!
Why This Recipe is Awesome
Let’s be real, you’re here because you love cinnamon rolls, and you love chocolate. This recipe isn’t just a delicious mash-up; it’s practically idiot-proof. Seriously, I (the queen of minor kitchen mishaps) managed to pull these off without a hitch. It’s straightforward enough for a beginner but impressive enough to make everyone think you’re a culinary genius. Plus, the smell alone will make your house feel like the coziest bakery on earth. Who needs scented candles when you have baking?
It’s also a fantastic way to impress your friends, significant other, or just your very hungry self. Because let’s be honest, you deserve all the good things, especially when they’re warm, gooey, and covered in chocolate.
Ingredients You’ll Need
Gather ’round, my fellow food adventurer! Here’s what you’ll need to make these bad boys come to life:
- For the Dough:
- ½ cup warm milk (around 105-115°F / 40-46°C). Not boiling, not cold. We’re waking up the yeast, not giving it a shock.
- 2 ¼ teaspoons active dry yeast (that’s one standard packet, folks!).
- ¼ cup granulated sugar + 1 teaspoon (the tiny bit is for the yeast, the rest for the dough).
- 1 large egg, room temperature.
- ¼ cup unsalted butter, melted. Because butter makes everything better.
- ½ teaspoon salt. Just a pinch to balance the sweetness.
- 2 ½ to 3 cups all-purpose flour. Start with 2.5 cups; you might need a bit more or less.
- For the Cinnamon Filling:
- ½ cup packed light brown sugar. For that rich, molasses-y sweetness.
- 2 teaspoons ground cinnamon. Don’t skimp, it’s the star!
- ¼ cup unsalted butter, softened. Spreading perfection.
- For the Chocolate Frosting:
- 1 cup powdered sugar (confectioners’ sugar). Sift it if you want super smooth frosting, but no judgment if you don’t.
- ¼ cup unsweetened cocoa powder. For that deep, dark chocolatey goodness.
- 3 tablespoons unsalted butter, melted.
- 2 tablespoons milk (any kind, even plant-based works here!).
- ½ teaspoon vanilla extract. A little something extra.
- Pinch of salt (optional, but it makes the chocolate pop!).
Step-by-Step Instructions
Alright, apron on (or not, we’re informal here), let’s get baking!
- Wake Up the Yeast: In a large bowl, pour your warm milk. Sprinkle the 1 teaspoon of granulated sugar and the active dry yeast over the milk. Give it a gentle stir and let it sit for about 5-10 minutes. It should get foamy and bubbly. If it doesn’t, your yeast might be dead (RIP), or your milk was too hot/cold. Start over!
- Mix the Wet Stuff: Once your yeast is happy and foamy, add the remaining ¼ cup granulated sugar, the egg, melted butter, and salt to the bowl. Whisk it all together until well combined.
- Add the Flour: Gradually add the flour, about a cup at a time, mixing with a wooden spoon or a stand mixer (with a dough hook!) until a shaggy dough forms. Turn the dough out onto a lightly floured surface and knead for 5-7 minutes, until it’s smooth and elastic. It should spring back when you poke it.
- Let it Rise, Baby! Lightly grease your mixing bowl, place the dough back in, and turn it once to coat. Cover the bowl with plastic wrap or a clean kitchen towel. Let it rise in a warm place for 1 to 1.5 hours, or until it has doubled in size. Patience is key here!
- Roll ‘Em Out: Once the dough has risen, punch it down gently to release the air. Turn it out onto a lightly floured surface and roll it into a large rectangle, about 12×18 inches.
- Get Cinnamony: In a small bowl, mix together the softened butter, brown sugar, and ground cinnamon for the filling. Spread this glorious mixture evenly over your dough rectangle, leaving about a ½-inch border on one of the long edges.
- Roll ‘Em Up Tight: Starting from the opposite long edge (the one *with* the filling all the way to the edge), tightly roll the dough into a log. Pinch the seam closed to seal.
- Slice and Dice: Using a sharp knife or, even better, unflavored dental floss (seriously, it gives cleaner cuts!), cut the log into 12 equal slices (about 1.5 inches thick).
- Second Rise & Bake: Arrange the rolls in a lightly greased 9×13 inch baking dish. Cover with plastic wrap or a kitchen towel again and let them rise for another 30-45 minutes, or until puffy. While they’re rising, preheat your oven to 375°F (190°C). Bake for 20-25 minutes, or until lightly golden brown. Don’t overbake!
- Whip Up the Frosting: While the rolls are baking or cooling slightly, whisk together the powdered sugar, cocoa powder, melted butter, milk, vanilla extract, and a pinch of salt in a bowl until smooth. If it’s too thick, add a tiny bit more milk; too thin, add more powdered sugar.
- Frost and Devour: Let the rolls cool for about 5-10 minutes (they should still be warm, but not piping hot, otherwise your frosting will melt into a puddle). Drizzle or spread that luscious chocolate frosting all over the warm rolls. Serve immediately and watch them disappear!
Common Mistakes to Avoid
Look, we all make mistakes. It’s part of the fun! But here are a few classic screw-ups you can totally sidestep:
- Killing the Yeast: Too hot milk? Dead yeast. Too cold? Sluggish yeast. Aim for bathwater warm, not lava hot or ice cold. Your yeast friends need a comfy environment to wake up.
- Eyeballing Measurements: Unless you’re a seasoned baker who can summon quantities with your mind, **use measuring cups and spoons!** Baking is a science, not abstract art (unless you want wonky results).
- Not Kneading Enough (or Too Much): Under-kneaded dough will be tough and won’t rise well. Over-kneaded dough can also get tough. Aim for smooth and elastic. If it resists a little when you pull it, you’re good.
- Skipping the Rise Time: Seriously, don’t rush the rise. That’s where all the magic happens! Your rolls won’t be fluffy and light if you don’t give them proper time to puff up.
- Overbaking: Dry cinnamon rolls are a travesty. Pull them out when they’re just lightly golden. They’ll continue to cook slightly from residual heat.
- Frosting Hot Rolls: Unless you’re aiming for a chocolate soup disaster, let those beauties cool down a bit before frosting. Warm is good, lava-hot is not.
Alternatives & Substitutions
Feeling adventurous? Or maybe you just ran out of something. No worries, I’ve got your back!
- Dairy-Free Delight: You can absolutely swap regular milk for a plant-based alternative like almond, oat, or soy milk. Use a vegan butter substitute for both the dough and the filling, and you’ve got yourself a dairy-free treat!
- Buttery Alternatives: While **butter is king for flavor**, if you’re in a pinch, margarine can work for the dough and filling. For the frosting, stick with butter if you can – it just tastes better, IMO.
- Frosting Flavors: Not a chocolate purist? No problem! You could make a classic cream cheese frosting, a simple vanilla glaze, or even add a hint of orange zest to the chocolate frosting for a “Terry’s Chocolate Orange” vibe.
- Spice it Up: Feel free to add a pinch of nutmeg or cardamom to your cinnamon filling for an extra layer of warmth and complexity.
- Whole Wheat Wonders: You can substitute up to half of the all-purpose flour with whole wheat flour for a slightly healthier, nuttier roll. Just be aware the texture might be a bit denser.
FAQ (Frequently Asked Questions)
Got questions? I probably do too, but let’s tackle yours first!
- Can I make the dough ahead of time? Absolutely! After the first rise (step 4), you can punch down the dough, cover it tightly, and pop it in the fridge overnight (up to 24 hours). The next day, let it come to room temp for about 30-60 minutes before rolling and continuing with the recipe. It might even enhance the flavor!
- My dough isn’t rising, what gives? Uh oh! Most likely culprits: your yeast was old or dead (always check the expiration date!), or your milk was too hot or too cold, killing the yeast before it could get bubbly. Ensure your kitchen isn’t super chilly, either.
- Can I use instant yeast instead of active dry? Yep! You can usually substitute instant yeast 1:1 for active dry. The main difference is you can skip the “waking up” step and just add it directly with your dry ingredients. But **always double-check your yeast package instructions** as brands can vary.
- Why are my rolls dry and tough? This usually means they were either overbaked (watch that oven like a hawk!) or you added too much flour to the dough, making it stiff. Sometimes not enough fat (butter) in the dough can also lead to a drier texture.
- Do I *have* to knead by hand? My arms are tired already. Nope! A stand mixer with a dough hook attachment is your best friend here. It does all the hard work for you. Just knead on medium-low speed for about 5-7 minutes.
- Can I freeze these cinnamon rolls? Yes! You can freeze them unbaked (after slicing, before the second rise), wrapped tightly, for up to a month. Thaw in the fridge overnight, then let them rise and bake as usual. Or, freeze them baked and unfrosted. Thaw, warm gently, and then frost.
- How long do these delightful rolls last? While they are unequivocally best enjoyed fresh and warm, you can store leftovers in an airtight container at room temperature for 2-3 days. Reheat gently in the microwave or oven for that “just baked” feel!
Final Thoughts
And there you have it! You’ve just conquered the magical world of Chocolate Frosted Cinnamon Rolls. Give yourself a high-five, because you totally deserve it. Whether you share them or hoard them all for yourself (no judgment here, FYI), these rolls are guaranteed to bring a smile to your face and a happy dance to your taste buds. Now go forth and impress someone—or yourself—with your new culinary skills. You’ve earned it!


