So, you’ve scrolled past enough perfectly plated gourmet meals on Instagram to last a lifetime, and now your sweet tooth is screaming for something truly indulgent, but also, like, *not* a whole day’s commitment? Same, friend, same. Enter the **Chocolate Forest Cake** – a dessert so rich, so decadent, and yet so surprisingly chill to make, you’ll wonder if you accidentally swapped your chef hat for a wizard’s cap. Let’s get baking!
Why This Recipe is Awesome
Okay, let’s be real. We all want to impress, but some days, even tying our shoelaces feels like a monumental task. This Chocolate Forest Cake? It’s your secret weapon. It’s got that dark, mysterious vibe, a rich chocolatey hug, and it looks like you spent hours crafting it. But here’s the kicker: it’s shockingly simple. Seriously, it’s practically idiot-proof. Even if your culinary skills usually peak at instant noodles, you’ve got this. Plus, it uses common ingredients, so no hunting down obscure spices from an enchanted forest (unless you want to, I guess, but that’s extra). It’s big on flavor, low on fuss. Win-win!
Ingredients You’ll Need
Gather your troops! Here’s what you’ll need for your delicious journey into the Chocolate Forest. Don’t worry, no actual foraging required.
- All-Purpose Flour: 1 ½ cups. The backbone of your cake, keeping it all together.
- Granulated Sugar: 1 ½ cups. For that sweet, sweet bliss. Don’t skimp, this is a cake, not a health food.
- Unsweetened Cocoa Powder: ¾ cup. Go for good quality here, please! This is the *chocolate* in Chocolate Forest.
- Baking Soda: 1 ½ teaspoons. Our little magic fluffy-maker.
- Baking Powder: 1 ½ teaspoons. Its equally important fluffy-making partner.
- Salt: 1 teaspoon. Just a pinch, to make all the other flavors sing.
- Milk: 1 cup. Whole milk is best for richness, but whatever you have will probably work (don’t tell anyone I said that).
- Vegetable Oil: ½ cup. Keeps things moist and lovely.
- Large Eggs: 2. Room temperature, if you’re feeling fancy (it helps with emulsification, FYI).
- Vanilla Extract: 2 teaspoons. Essential. Don’t skip the vanilla, it’s like the background music to the chocolate symphony.
- Boiling Water: 1 cup. This is the secret to that ridiculously moist crumb. Don’t be scared!
- For the Frosting (optional, but highly recommended): Your favorite chocolate buttercream or a simple ganache. Or, hey, a tub of store-bought works too, no judgment here!
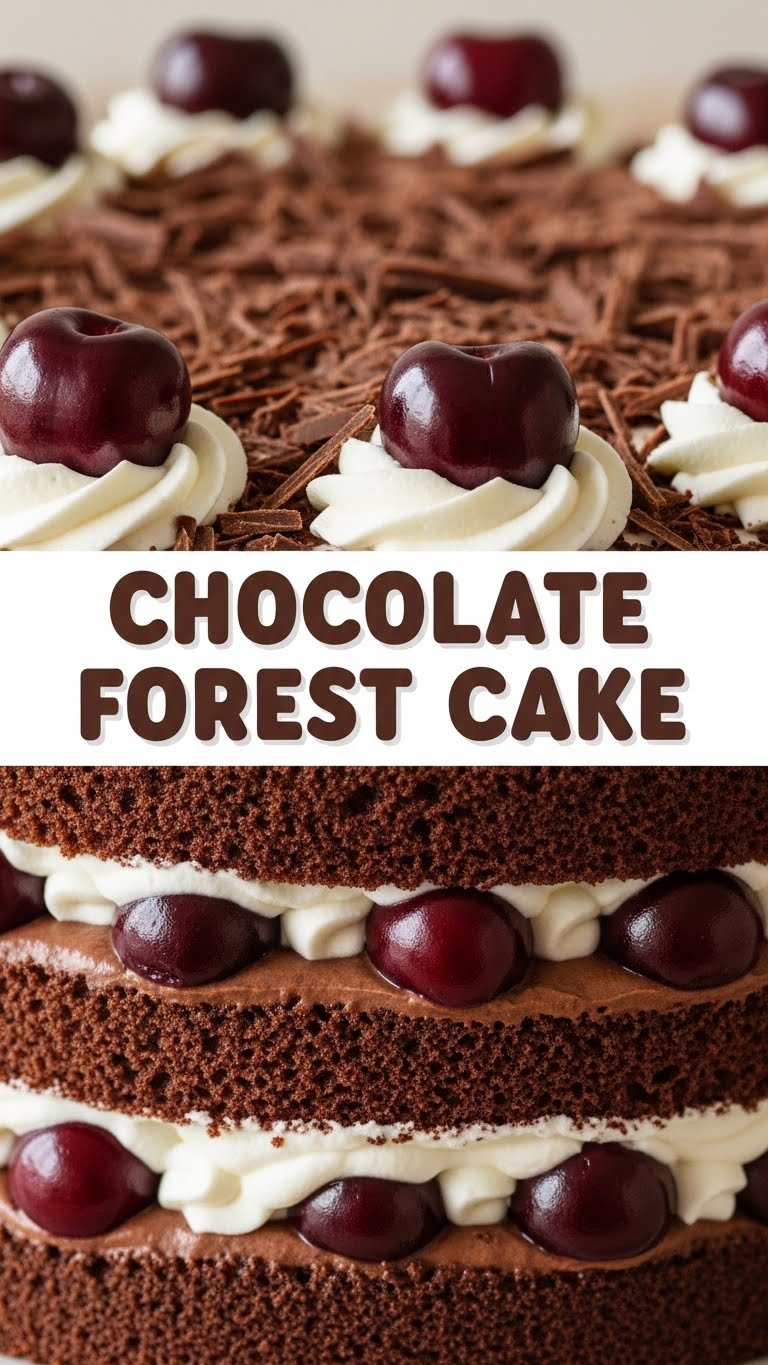
- Cherries: Fresh or jarred (pitted!) for decorating. It *is* a forest cake, after all.
- Chocolate Shavings/Curls: For that authentic “forest floor” aesthetic.
Step-by-Step Instructions
Alright, let’s get down to business! Follow these simple steps and you’ll be swimming in chocolate in no time. Read through once before you start, trust me.
- Preheat & Prep: Get your oven to a cozy 350°F (175°C). Grease and flour two 8-inch round cake pans. Don’t skip the greasing, unless you enjoy playing “cake-stuck-to-pan.”
- Whisk the Dry Stuff: In a large bowl, whisk together your flour, sugar, cocoa powder, baking soda, baking powder, and salt. Make sure there are no lumpy bits.
- Add the Wet Wonders: Pour in the milk, vegetable oil, eggs, and vanilla extract. Beat with an electric mixer (or a strong arm and a whisk) on medium speed for about 2 minutes, until everything is nicely combined and smooth.
- The Hot Secret: Carefully pour the boiling water into your batter. It will look super thin and watery – don’t panic! Whisk it in until just combined. This is the magic that makes your cake incredibly moist.
- Divide & Bake: Divide the batter evenly between your two prepared cake pans. Bake for 30-35 minutes, or until a wooden skewer inserted into the center comes out clean.
- Cool Down: Let the cakes cool in their pans for about 10-15 minutes. Then, carefully invert them onto a wire rack to cool completely. This is crucial! Don’t try to frost warm cakes unless you’re aiming for a melty, messy disaster.
- Frost & Decorate: Once your cakes are totally cool (and I mean totally!), frost them with your chosen chocolate frosting. Stack them up, then go wild with fresh cherries and chocolate shavings on top and around the sides. Voilà!
Common Mistakes to Avoid
We’ve all been there. The kitchen is a minefield of potential mishaps. Here are a few to dodge like a pro:
- Not Preheating the Oven: Rookie mistake! Your cake needs that consistent heat from the get-go to rise properly. Don’t be that person who shoves a cold cake into a cold oven.
- Overmixing the Batter: Once you add the wet ingredients, mix until just combined. Overmixing develops the gluten too much, leading to a tough, dense cake. We want light and fluffy, people!
- Opening the Oven Door Too Soon: Curiosity killed the cat, and it will also make your cake sink. Resist the urge to peek before the 25-minute mark.
- Frosting a Warm Cake: I already warned you, but it bears repeating. Your frosting will melt, slide, and weep, and so will you. Patience, young Padawan.
- Forgetting to Grease and Flour Your Pans: Unless you love scraping cake bits off metal, do this step religiously. Parchment paper circles on the bottom also help.
Alternatives & Substitutions
Life’s too short for rigid rules, right? Here are some ways to shake things up:
- Dairy-Free? Swap the milk for a dairy-free alternative like almond or soy milk. It works like a charm.
- No Vegetable Oil? Canola oil, or even melted coconut oil (if you like a subtle coconut hint) will do the trick. Butter can work, but it might change the texture slightly.
- Different Frosting? Hey, if chocolate overload isn’t your jam (gasp!), a cream cheese frosting or even a simple whipped cream can lighten things up. Or just a dusting of powdered sugar. Your cake, your rules!
- Cherry Swaps: If cherries aren’t in season or not your vibe, raspberries or strawberries would also be delightful. Or, skip the fruit entirely and just go full chocolate. No judgment!
FAQ (Frequently Asked Questions)
- Can I make this as a bundt cake?
You totally can! Just make sure your bundt pan is *really* well greased and floured. You might need to adjust baking time; start checking around 45-50 minutes. And maybe skip the stacking, obvs.
- My cake sunk in the middle, what happened?
A few culprits! Either you opened the oven door too soon, your oven temperature was off (an oven thermometer is a baker’s best friend!), or you might have overmixed the batter. Don’t fret, it happens to the best of us!
- Can I make this ahead of time?
Absolutely! The unfrosted cake layers can be wrapped tightly in plastic wrap and stored at room temperature for a day or two, or frozen for up to a month. Frosted cake is best eaten within 3-4 days (if it even lasts that long!).
- Do I *have* to use boiling water?
Technically, no, you could use hot coffee, which will enhance the chocolate flavor even more (trust me, it’s amazing!). But if you use room temp water, the texture won’t be quite as heavenly moist. The boiling water ‘blooms’ the cocoa, unlocking deeper chocolate notes.
- Can I use margarine instead of butter in the frosting?
Well, technically yes, but why hurt your soul like that? Butter just tastes better and gives a superior texture for frosting. If you must, go for it, but just know it won’t be quite the same level of creamy deliciousness, IMO.
Final Thoughts
And there you have it, my friend! Your ticket to chocolatey bliss, and a seriously impressive dessert that tastes like a dream. This Chocolate Forest Cake is not just a cake; it’s a statement. A statement that says, “Yes, I can make something incredible without breaking a sweat, and now I’m going to eat it all.” So go forth, conquer that craving, and maybe even share a slice (or not, I won’t tell). You’ve earned it!


