Listen, between you and me, there are two kinds of people in this world: those who think a cake needs to be perfectly smooth and minimalist, and those of us who know the truth—that the best cakes are the ones practically collapsing under the weight of cookies, candy, and chocolate dripping down the sides like some kind of sugar waterfall. If you’re in the second camp (the correct one, BTW), then buckle up because this Chocolate Drip Cake is about to become your new party trick.
Why This Recipe is Awesome
First off, this cake is basically the dessert equivalent of “go big or go home.” It’s what happens when a regular chocolate cake decides to put on its party clothes and hit the town. The best part? It looks way more complicated than it actually is. Your friends will think you spent all day slaving away, when really you were just throwing cookies at it and calling it art. That’s my kind of baking.
Plus, it’s completely customizable. Hate Oreos? Use Chips Ahoy! Can’t stand M&Ms? Throw some Reese’s Pieces on there instead. It’s like the cake version of “choose your own adventure,” except all paths lead to a sugar coma.
Ingredients You’ll Need
For the cake:
- 2 boxes of chocolate cake mix (yes, boxed—we’re making a masterpiece, not auditioning for Cake Boss)
- 6 eggs (the chicken kind, not chocolate)
- 1 cup vegetable oil (or whatever oil you’ve got, except maybe motor oil)
- 2 cups water (tap is fine, no need to import from the Alps)
For the frosting:
- 2 cups unsalted butter, softened (leave it out while you binge an episode of something—it’ll be ready after)
- 6 cups powdered sugar (also known as “the stuff that will definitely end up all over your kitchen”)
- 1/2 cup cocoa powder (the good kind, if you’re feeling fancy)
- 4 tbsp heavy cream (not milk—this isn’t the time for diet choices)
- 2 tsp vanilla extract (real extract, not the fake stuff that tastes like chemical sadness)
For the chocolate drip:
- 1 cup chocolate chips (semi-sweet, dark, or milk—pick your poison)
- 1/2 cup heavy cream (yes, more—your arteries had a good run)
For decoration:
- A handful of Oreos (whole and crushed—anger management therapy optional)
- M&Ms or your favorite colorful candy (the more colors, the more impressive you look)
- Chocolate chip cookies (store-bought is fine, we’re not judging)
- Kit Kat bars, Reese’s cups, or whatever chocolate bars make your heart sing
Step-by-Step Instructions
- Bake the cake layers. Follow the box instructions—it’s literally designed for people who can’t bake. Make two or three layers depending on how tall you want your sugar tower to be. Let them cool completely (I mean it—hot cakes + frosting = sliding disaster).
- Make the frosting. Beat the butter until it’s fluffy enough to use as a pillow. Add powdered sugar gradually unless you enjoy wearing it. Mix in cocoa powder, cream, and vanilla until smooth. If it’s too thick, add more cream; if too thin, more sugar. Taste test liberally.
- Stack and frost those layers. Put a dollop of frosting on your cake plate to anchor the bottom layer. Stack, frost between layers, then cover the whole thing. Doesn’t need to be perfect—that’s what the candy avalanche is for.
- Chill the frosted cake. Pop it in the fridge for at least 30 minutes. This is non-negotiable unless you want your drip to slide right off onto the countertop.
- Make the chocolate drip. Heat the cream just until it bubbles around the edges, then pour over chocolate chips. Let sit for 3 minutes, then stir until smooth. Let it cool until it’s thick but still pourable—too hot and it’ll run straight to the bottom of your cake like it’s racing for a prize.
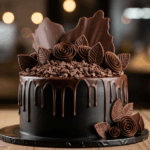
- Apply the drip. Use a spoon to push small amounts of chocolate over the edge of the cake, letting it drip down naturally. Then spread the remaining chocolate over the top. It should look artfully messy, like your cake had a wild night out.
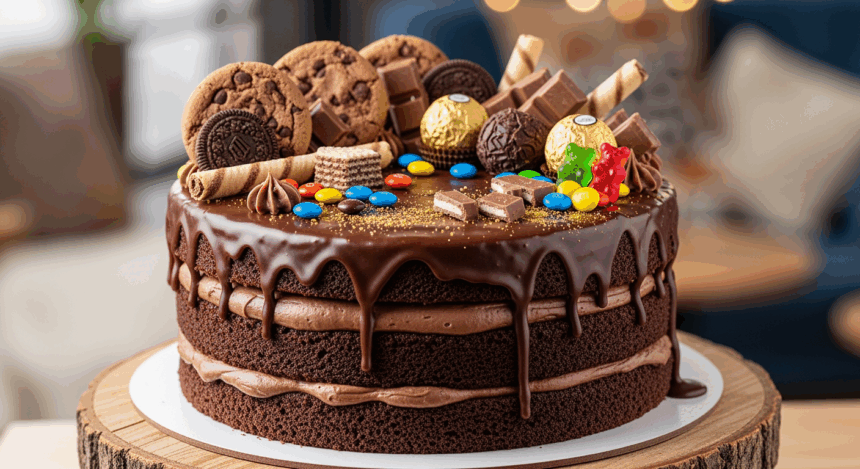
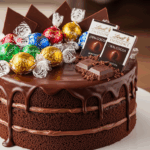
- Go decoration crazy. While the drip is still tacky, press cookies around the sides. Pile more cookies, candy, and chocolate pieces on top in what I like to call “controlled chaos.” The more random it looks, the more intentional people will think it was.
- Take photos for the ‘gram. Because if you don’t document this masterpiece, did you even bake it?
Common Mistakes to Avoid
Rushing the cooling process. I get it—you want cake NOW. But a warm cake under frosting is like building a house on quicksand. It will end in tears and Instagram fails.
Making the drip too hot. Your chocolate drip should be like good gossip—spreadable but not running wild all over the place.
Being stingy with decorations. This cake is essentially a vessel for cookies and candy. “Less is more” doesn’t apply here. This is a “more is more” situation.
Trying to slice it nicely. Accept now that this cake will fall apart when cut. It’s part of its charm. Embrace the mess or serve it with bowls.
Alternatives & Substitutions
Not a chocolate fan? (Who are you and are you okay?) Use vanilla cake mix and vanilla frosting instead. The drip can be white chocolate or even caramel.
Dietary restrictions? Gluten-free cake mix works fine. Dairy-free? Use plant-based butter and coconut cream instead of heavy cream. The cake doesn’t care as long as it gets its cookie crown.
Seasonal variations: Use themed candy for holidays—candy corn for Halloween, mini candy canes for Christmas, conversation hearts for Valentine’s. Your cake, your rules.
IMO, the best variation is using dark chocolate cake with mint chocolate chip cookies and Andes mints. It tastes like dessert at a fancy restaurant, but looks like it was decorated by someone having a sugar-induced meltdown.
FAQ (Frequently Asked Questions)
How far in advance can I make this?
You can bake the layers a day ahead and frost the morning of your event. Assemble the toppings as close to serving time as possible, unless you enjoy soggy cookies (no judgment).
Will this fit in my regular fridge?
Depends on how tall you go with your decorations. If you’re planning a skyscraper of cookies, maybe measure first or be prepared to remove a shelf. Milk cartons can temporarily relocate to the door.
Can I use canned frosting instead of making it?
Can you also use a paper bag instead of a designer purse? Technically yes, but the results will speak for themselves. That said, we’re already using boxed cake mix, so who am I to judge? Go for it.
How do I transport this monstrosity?
Very carefully, preferably in a cake carrier with a tall lid. No cake carrier? A large pot can work in a pinch. Just don’t brake suddenly—physics is not this cake’s friend.
Can kids help make this?
Absolutely! Kids are perfect for the decoration part. Just accept that for every cookie that goes on the cake, at least two will go directly into their mouths. Plan your quantities accordingly.
Final Thoughts
Look, at the end of the day, this cake is basically a vehicle for all the desserts you couldn’t decide between. It’s the “why choose one when you can have them all” approach to baking. Is it sophisticated? Not even slightly. Will people lose their minds when you bring it out? Absolutely.
So go ahead and embrace your inner sugar artist. Make this cake for birthdays, celebrations, or random Tuesdays when you need a win. There are no cake police, and if there were, they’d probably just want a slice anyway.
And remember—calories consumed while saying “but I made it myself” don’t count. That’s just science.
