So you’re craving something tasty but too lazy to spend forever in the kitchen, huh? Same. We’ve all been there – staring into the fridge, contemplating a sad bowl of cereal for the fifth time, when all you *really* want is a warm, gooey, chocolatey hug. And honestly, who has time for elaborate soufflés when adulting is already demanding enough? Well, my friend, you’ve stumbled upon the culinary oasis you never knew you needed. Get ready to whip up some seriously delicious Chocolate Cookies with White Chocolate Chips without breaking a sweat (or a spirit).
Why This Recipe is Awesome
Let’s be real, you’re not here for a lecture on molecular gastronomy. You’re here for cookies that taste like pure joy, are ridiculously easy to make, and won’t require a culinary degree. And guess what? This recipe delivers on all fronts. It’s practically **idiot-proof** – even I, a person who once set off the fire alarm microwaving popcorn, can nail these. You’ll look like a baking superstar with minimal effort, and your taste buds (and anyone you deign to share with) will thank you profusely. Plus, the combo of rich, dark chocolate and sweet, creamy white chocolate? Pure genius. It’s like a party in your mouth, and everyone’s invited.
Ingredients You’ll Need
Time to gather your edible treasures! Don’t fret, most of these are probably already lurking in your pantry. No fancy-pants ingredients here, promise.
- 1 ½ cups All-Purpose Flour: The foundation of our cookie dreams.
- ¾ cup Unsweetened Cocoa Powder: Go for a good quality one. Dutch-processed is awesome for that deep, dark chocolatey goodness.
- 1 teaspoon Baking Soda: Our little lift-me-up agent. Don’t skip it!
- ½ teaspoon Salt: Seriously, don’t skip it. It balances all the sweetness.
- ¾ cup (1 ½ sticks) Unsalted Butter: **Softened to room temperature!** This is key, folks. Don’t be lazy and use cold butter, your cookies will thank you.
- ½ cup Granulated Sugar: For that classic sweetness.
- ¾ cup Packed Light Brown Sugar: Adds moisture and chewiness. So good.
- 2 Large Eggs: Our trusty binders.
- 1 teaspoon Vanilla Extract: A hug in a bottle. Use the real stuff, please.
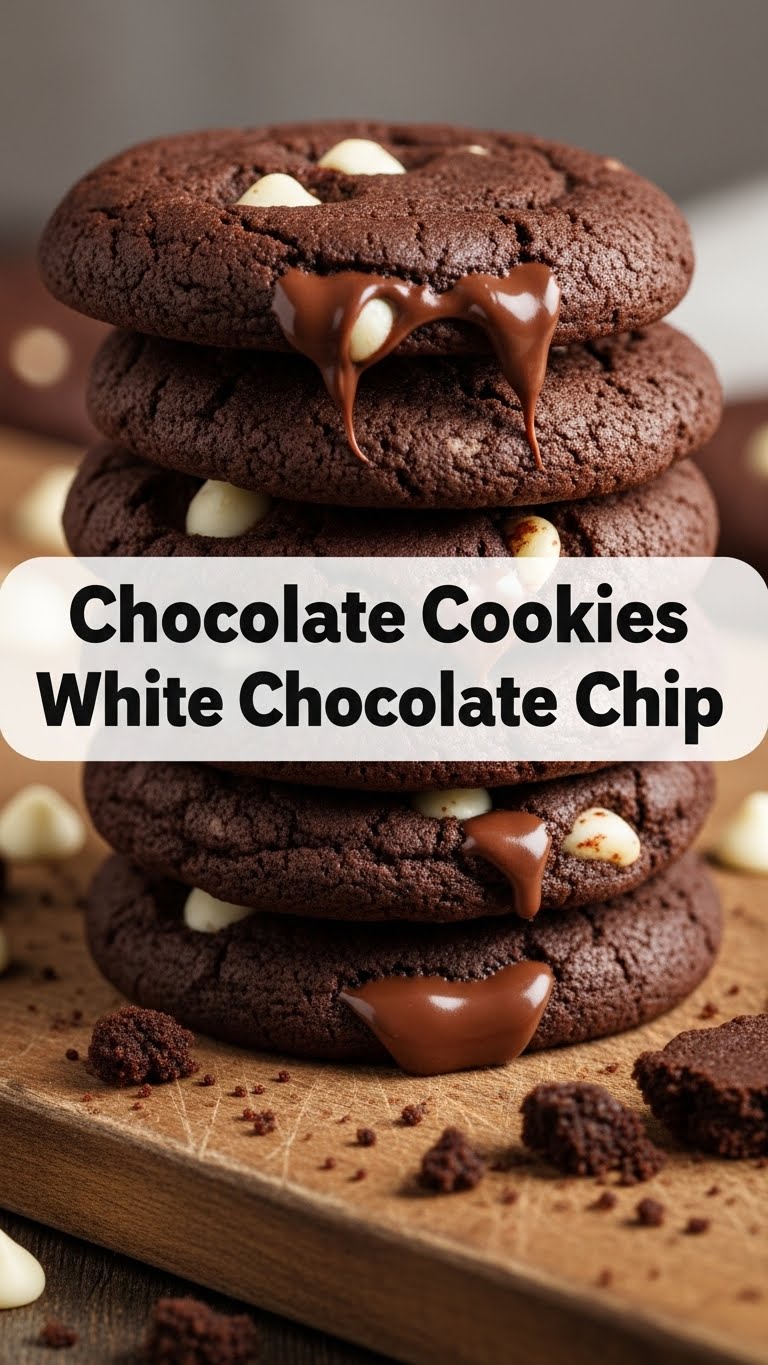
- 1 ½ cups White Chocolate Chips: The stars of the show! Feel free to be generous.
Step-by-Step Instructions
Alright, apron on (or not, we don’t judge), let’s get baking! These steps are super straightforward, so no overthinking allowed.
- **Preheat Your Oven:** Set it to 350°F (175°C). Line a couple of baking sheets with parchment paper or silicone mats. This makes cleanup a breeze, FYI.
- **Whisk the Dry Squad:** In a medium bowl, whisk together the flour, cocoa powder, baking soda, and salt. Give it a good whisk to get rid of any lumps and distribute everything evenly.
- **Cream the Wet Wonders:** In a large bowl, using an electric mixer (or some serious arm muscle), beat the softened butter with the granulated sugar and brown sugar until it’s light and fluffy. This usually takes about 2-3 minutes.
- **Egg-cellent Addition:** Beat in the eggs, one at a time, making sure each is fully incorporated before adding the next. Then, stir in the vanilla extract. Scrape down the sides of the bowl to ensure everything mixes properly.
- **Combine Forces:** Gradually add the dry ingredient mixture to the wet ingredients, mixing on low speed until *just* combined. **Do not overmix!** Overmixing is the enemy of tender cookies.
- **Chip It In:** Gently fold in the white chocolate chips using a spatula. We want them evenly distributed, but don’t go crazy.
- **Scoop ‘Em Up:** Drop rounded tablespoons of dough onto your prepared baking sheets, leaving a couple of inches between each cookie for spreading. You can use a cookie scoop for perfectly uniform cookies, if you’re feeling fancy.
- **Bake to Perfection:** Pop those beauties into your preheated oven and bake for 10-12 minutes. The edges should be set, but the centers will still look a little soft. That’s exactly what you want for chewy cookies!
- **Cool Down:** Let the cookies cool on the baking sheets for 5 minutes before transferring them to a wire rack to cool completely. Or, you know, eat one straight off the sheet. I won’t tell.
Common Mistakes to Avoid
Nobody’s perfect, but we can avoid some classic cookie catastrophes. Learn from my past (and many, many) mistakes!
- **Skipping the Preheat:** Thinking you don’t need to preheat the oven? Rookie mistake! An unheated oven will mess with the cookie texture. Patience, young grasshopper.
- **Using Cold Butter:** We talked about this! **Cold butter doesn’t cream properly**, leading to dense, sad cookies. Let it sit out, or give it a few quick zaps in the microwave (but be careful not to melt it!).
- **Overmixing the Dough:** Once you add the flour, mix until *just* combined. Too much mixing develops the gluten, making your cookies tough. No one wants a tough cookie.
- **Baking Too Long:** Resist the urge! Cookies will continue to cook a bit on the hot baking sheet even after you pull them out. If they look perfectly done in the oven, they’re probably overdone.
- **Eating Half the Dough Before Baking:** Okay, this isn’t a “mistake” per se, more of a personal challenge. But try to leave enough for actual cookies!
Alternatives & Substitutions
Feeling adventurous? Or maybe you’re just missing an ingredient (it happens!). Here are a few ways to tweak this recipe without totally derailing it.
- **Chocolate Chips:** Not a white chocolate fan? Gasp! Just kidding. You can totally swap them out for milk chocolate, semi-sweet, dark chocolate, or even a mix. Go wild!
- **Add Nuts:** A handful of chopped walnuts or pecans would add a lovely crunch and extra flavor. About ½ cup should do it.
- Different Extracts: Instead of (or in addition to) vanilla, try a hint of almond extract for a different flair, or peppermint extract for a festive twist!
- **Make it Vegan-ish:** For a dairy-free version, use a good quality plant-based butter (like Miyoko’s Kitchen or Earth Balance sticks) and try an egg replacer like Bob’s Red Mill Egg Replacer or flax eggs. Just be aware texture might vary slightly.
- **More Chocolate:** Because when is more chocolate ever a bad idea? Throw in an extra ¼ cup of cocoa or chips. Your secret’s safe with me.
FAQ (Frequently Asked Questions)
Got questions? I’ve got (casual) answers!
- **Can I chill the dough?** Oh absolutely! Chilling the dough for at least 30 minutes (or even overnight) can deepen the flavors and make for a chewier cookie. Plus, it helps prevent spreading.
- **My cookies are flat, what happened?** Ugh, the worst! This usually happens if your butter was too warm/melted, your baking soda is old, or your oven temperature is off. Make sure to use room temperature, not melted, butter!
- **Can I use margarine instead of butter?** Well, technically yes, but why hurt your soul like that? Butter provides a richer flavor and better texture. IMO, it’s worth the splurge.
- **How long do these cookies last?** In my house? About an hour. Kidding! They’ll stay fresh in an airtight container at room temperature for up to 3-4 days. But let’s be honest, they won’t last that long.
- **Can I freeze the cookie dough?** Yes, you brilliant planner, you! Scoop the dough onto a baking sheet and freeze until firm, then transfer the frozen dough balls to a freezer-safe bag. Bake from frozen, adding a couple of extra minutes to the bake time.
- **Why white chocolate with dark chocolate? Isn’t it too sweet?** Nope! The bitterness of the dark cocoa powder is perfectly balanced by the sweet, creamy white chocolate. It’s a flavor symphony, trust me.
- **Do I *really* need room temperature butter?** Yes, yes, a thousand times yes! It’s crucial for achieving that light, fluffy texture when creaming with sugar. Cold butter won’t incorporate properly, and melted butter will make your cookies flat and greasy. **This is a non-negotiable!**
Final Thoughts
See? That wasn’t so scary, was it? You just made a batch of incredible chocolate cookies with white chocolate chips, and you barely broke a sweat. Now go impress someone – or yourself – with your new culinary skills. You’ve earned every single delicious bite. So grab a glass of milk (or a strong coffee, depending on your vibe) and enjoy your triumph. Happy baking, my friend!


