So, you’ve got that *look* in your eye, huh? The one that screams ‘I need warm, gooey chocolate right now, but adulting is hard.’ Been there, friend. And guess what? I’ve got your back with a recipe so good, you’ll think you just robbed a Mrs. Fields. Get ready to bake some serious happiness!
Why This Recipe is Awesome
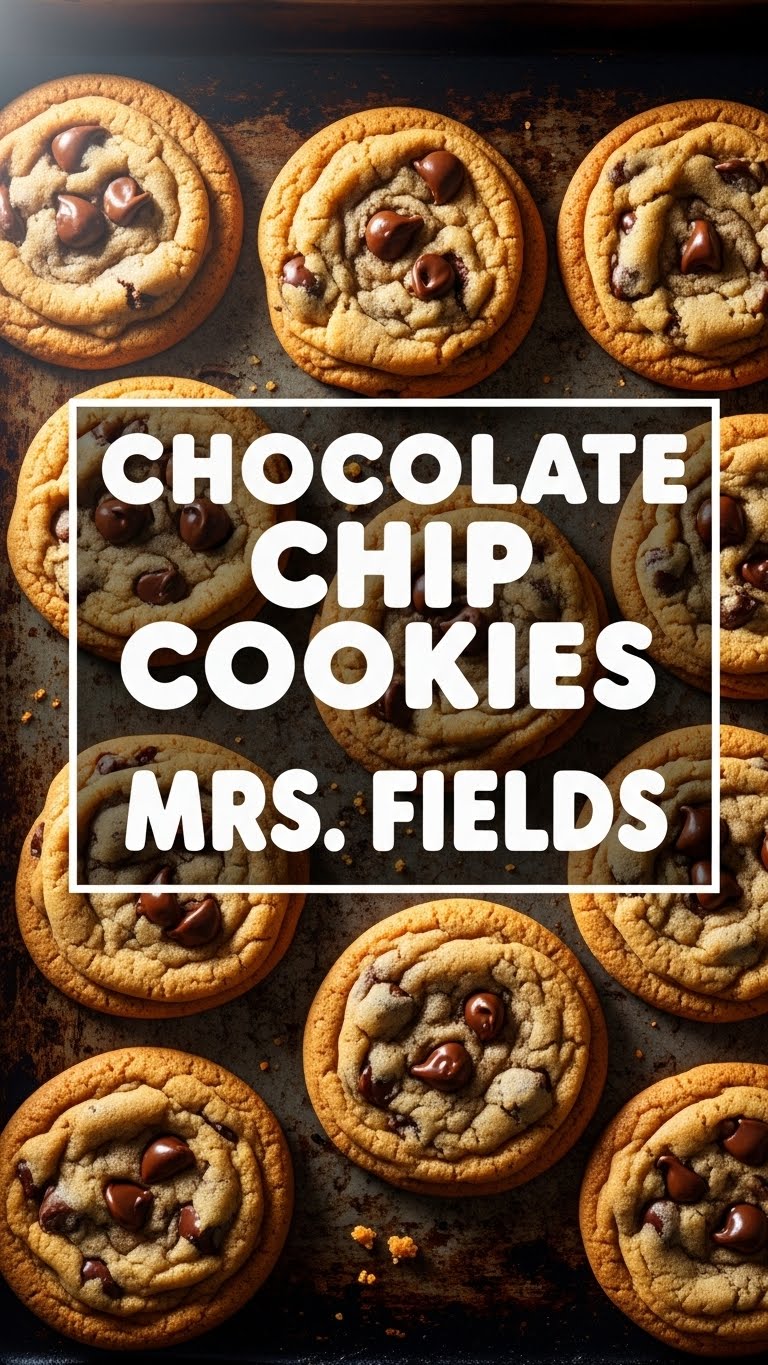
Ever dreamt of biting into a cookie that’s crispy on the edges, chewy in the middle, and bursting with chocolatey goodness, just like the ones from the mall food court that cost an arm and a leg? Well, buckle up, buttercup. This isn’t just *a* recipe; it’s *the* recipe.
Seriously, it’s pretty much **idiot-proof**. If I can do it without setting off the smoke detector, you’re golden. Plus, it uses ingredients you probably already have lying around, so no wild goose chase at the grocery store. Winning!
Ingredients You’ll Need
Here’s your shopping list for cookie supremacy. Don’t skimp on the good stuff!
- 1 cup (2 sticks) Unsalted Butter: Softened to room temperature. Not melted, not rock hard. The Goldilocks zone is key.
- ¾ cup Granulated Sugar: For that classic sweet kiss.
- ¾ cup Light Brown Sugar: Packed tightly! This is where the magic happens for that irresistible chewiness.
- 2 Large Eggs: Make sure they’re not straight from the arctic tundra. Room temp is best.
- 2 teaspoons Vanilla Extract: The real deal. Don’t cheap out here; it makes a huge difference to the flavor.
- 2 ¼ cups All-Purpose Flour: The binder of our cookie dreams.
- 1 teaspoon Baking Soda: For that perfect lift and spread. Science!
- ½ teaspoon Salt: Balances all that sweetness. Crucial, trust me.
- 2 cups (12 oz bag) Chocolate Chips: A mix of semi-sweet and milk chocolate is my personal fav for ultimate flavor. Go wild!
Step-by-Step Instructions
- Preheat & Prep: Crank up your oven to 375°F (190°C). Line a couple of baking sheets with parchment paper or silicone mats. Trust me, less sticking, less crying later.
- Cream the Butter & Sugars: In a large bowl, or your stand mixer if you’re fancy, cream together the softened butter, granulated sugar, and brown sugar until it’s light and fluffy. We’re talking 2-3 minutes here. Don’t rush perfection.
- Add Eggs & Vanilla: Beat in the eggs one at a time, mixing well after each addition. Then stir in that glorious vanilla extract. Scrape down the sides of the bowl; we don’t want any delicious stragglers.
- Dry Ingredients Unite: In a separate bowl, whisk together the flour, baking soda, and salt. This ensures even distribution – no lumpy surprises in your finished cookie!
- Combine Wet & Dry: Gradually add the dry ingredients to the wet, mixing on low speed (or by hand) until *just* combined. **Do not overmix!** That’s how you get tough cookies, and nobody wants those.
- Fold in the Chips: Gently fold in your chocolate chips. The more, the merrier, right?
- Scoop & Bake: Scoop tablespoon-sized balls of dough onto your prepared baking sheets, leaving a little space between them. Bake for 8-10 minutes, or until the edges are golden brown and the centers still look a little soft. **Don’t overbake!** Seriously, pull them out when they look slightly underdone.
- Cool Down (If You Can): Let them cool on the baking sheets for a few minutes before transferring them to a wire rack. Or just eat one right off the sheet. I won’t tell.
Common Mistakes to Avoid
Listen up, buttercup, these are the pitfalls that stand between you and cookie perfection. Don’t be that person!
- **Using cold butter.** Seriously, room temp means room temp. It makes all the difference for that creamy texture and proper spread.
- **Overmixing the dough.** Remember what I said about tough cookies? Don’t do it. Mix until *just* combined, then stop.
- **Overbaking.** This is probably the number one cookie killer. Those centers should still look slightly gooey when you pull them out. They’ll continue to cook a bit on the hot pan. **Trust the process!**
- **Not using parchment paper.** Or forgetting to grease your pan. Unless you like playing ‘scrape the cookie’ with a spatula, do yourself a favor.
- **Eating all the dough before it hits the oven.** I mean, I get it, but then you won’t have actual cookies. Priorities, people!
Alternatives & Substitutions
Feeling adventurous? Or just missing an ingredient? Here are some tweaks:
- **Butter:** Can you use margarine? Well, technically yes, but why hurt your soul like that? Butter is king here for flavor and texture. If you must use a substitute, go for a good quality plant-based butter, but know the texture might vary a bit.
- **Chocolate Chips:** Mix it up! White chocolate, dark chocolate chunks, peanut butter chips, M&M’s, chopped nuts – whatever floats your boat. I’m partial to a dark chocolate chunk in there for some bitterness against the sweet.
- **Flour:** For a gluten-free version, a 1:1 gluten-free baking blend usually works, but again, texture might be slightly different. You might need to add a touch more liquid or let the dough rest longer.
- **Vanilla Extract:** Seriously, don’t skimp. But if you’re truly out, a dash of almond extract can add a different, but still delicious, twist.
FAQ (Frequently Asked Questions)
Got questions? I’ve got (casual) answers!
- “My cookies spread too much! What happened?” Likely culprits: your butter was too soft/melted, your oven isn’t calibrated correctly (invest in an oven thermometer!), or you added too much liquid/not enough flour. Also, sometimes a quick chill of the dough helps.
- “Can I make the dough ahead of time?” Heck yes! You can chill the dough in the fridge for up to 3 days. In fact, some say it makes the flavor even better! Just let it come to room temp slightly before scooping, or scoop and then chill the balls.
- “Can I freeze the cookie dough?” Absolutely! Scoop the dough onto a baking sheet, freeze until solid, then transfer to an airtight freezer bag. When you’re ready to bake, just pop them straight from the freezer into the oven, adding a couple of minutes to the baking time.
- “Why do my cookies always come out hard?” Overmixing the dough or overbaking are the biggest offenders. Remember: **just combined**, and **slightly underbaked** is the secret to soft, chewy cookies.
- “What kind of chocolate chips are best?” Honestly, a good quality brand makes a difference. I love Ghirardelli or Guittard. A mix of semi-sweet and milk chocolate gives a nice balance of sweetness and richness. Or go crazy with dark chocolate chunks!
- “Do I need to chill the dough?” For this recipe, it’s not strictly necessary, but if you’re finding your cookies are spreading too much, a 30-minute chill in the fridge can definitely help them hold their shape better. And as mentioned, it can deepen the flavor!
Final Thoughts
There you have it, my friend! Your ticket to warm, gooey, ‘I-made-these-myself-and-I’m-awesome’ cookies. Whether you’re impressing guests (or just your cat), these Mrs. Fields-style chocolate chip cookies are going to be a hit. So go on, get baking! You’ve earned that sweet, sweet victory. And maybe save one for me?


