So, you’ve got a chocolate chip cake sitting there, looking all delicious but maybe a *tad* bit… naked? You want to jazz it up, make it look like it just walked off a fancy bakery shelf, but without, you know, actually going to a fancy bakery or spending three hours meticulously piping tiny edible pearls. 😉 You’re after that “effortlessly amazing” vibe, right? Good, because that’s exactly what we’re doing today!
Why This Recipe is Awesome
Because let’s be real, you already did the hard part: baking the cake! Now it’s time for the fun, low-stress, highly gratifying part. This “recipe” (if we can even call it that, it’s more like a vibe, really) is designed for maximum visual impact with minimum fuss. It’s **idiot-proof**, even if you consider “art” to be drawing stick figures. Plus, it makes your cake look so good, people will actually believe you spent hours on it. Win-win, baby!
Ingredients You’ll Need
Alright, gather ’round, my fellow kitchen minimalists. Here’s what you’ll want on standby for transforming that lovely chocolate chip canvas:
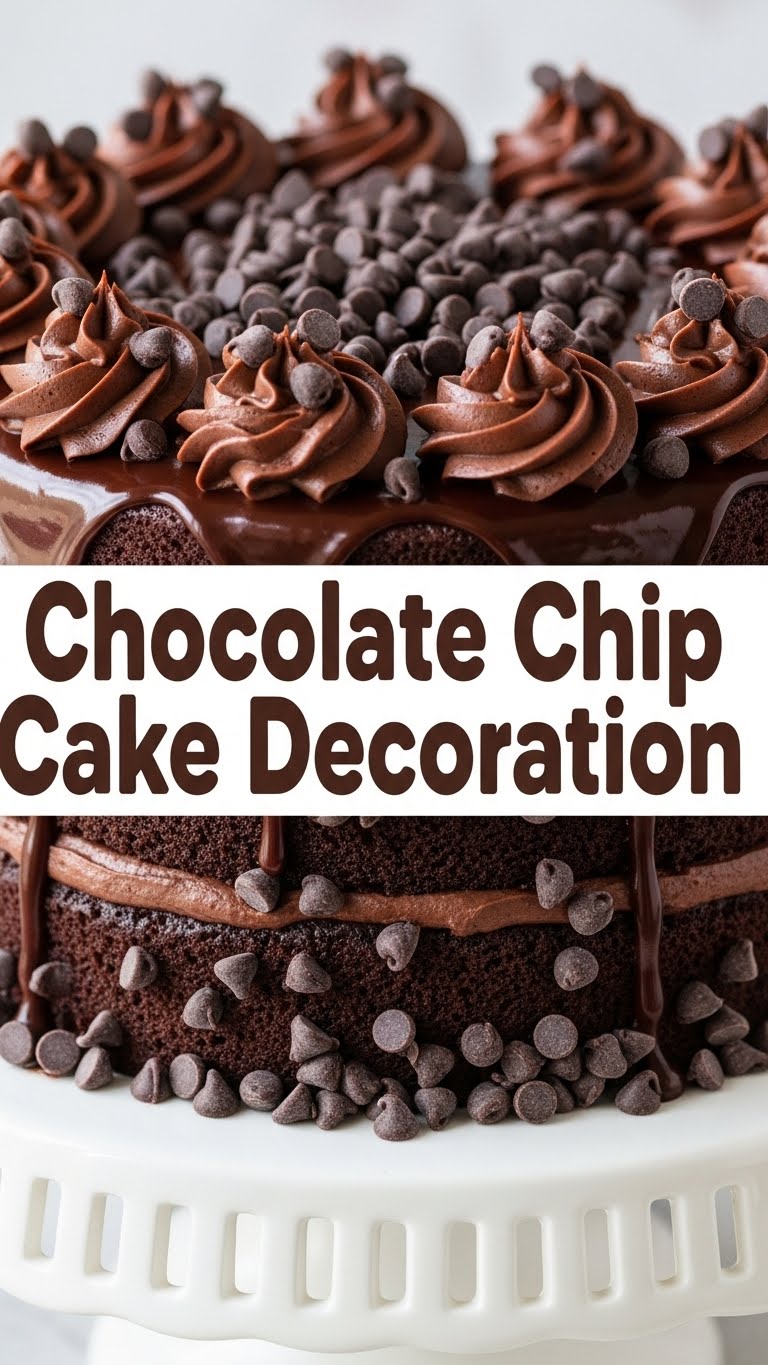
- 1 already baked Chocolate Chip Cake: Round, square, sheet – doesn’t matter. Just make sure it’s cool, unless you want a melty, disastrous mess. (Trust me, been there.)
- 1 batch of your favorite frosting: Vanilla buttercream, cream cheese frosting, chocolate ganache – whatever makes your heart sing. Or just buy a tub from the store; no judgment here!
- Extra Chocolate Chips: A mix of mini and regular chips works wonders for texture and visual interest. Because clearly, there aren’t enough *inside* the cake.
- Sprinkles (optional, but highly recommended): Rainbow, chocolate, gold, silver – whatever makes you feel festive. They hide a multitude of sins, FYI.
- Chocolate Syrup or Caramel Sauce (optional): For a fancy drizzle.
- A few small chocolate chip cookies (optional): Mini ones look super cute perched on top. Talk about meta!
Step-by-Step Instructions
Ready to make some magic? Put on your favorite tunes and let’s get decorating!
- Cool it Down: Seriously, make sure your cake is completely, utterly cool. **A warm cake + frosting = sad, sliding frosting.** You’ve been warned.
- The Crumb Coat (Optional, but smart): If you’re using a spreadable frosting, apply a very thin layer all over your cake. This traps any loose crumbs. Pop it in the fridge for 15-20 minutes to set. This step is a game-changer for a smooth finish, IMO.
- Frost with Flair: Now for the main event! Apply your remaining frosting generously over the entire cake. Use an offset spatula or a butter knife to spread it smoothly or create fun swirls and peaks. Don’t stress about perfection; rustic chic is totally in!
- Sprinkle the Joy: Grab those extra chocolate chips! Scatter them over the top and press a few into the sides if you’re feeling ambitious. Then, add your sprinkles. Go wild! More is more, right?
- Drizzle, Dazzle, Done: If you’re using chocolate or caramel sauce, drizzle it artfully over the top. Hold the bottle high for thinner lines, or closer for thicker, more dramatic drips.
- Cookie Crown (if using): Gently place a few mini chocolate chip cookies on top of the cake. Nestle them into the frosting. It’s like a tiny edible crown for your masterpiece!
- Admire Your Work: Step back and behold! You’ve just transformed a humble cake into a showstopper. Snap a pic for the ‘gram – you earned it!
Common Mistakes to Avoid
Nobody’s perfect, but we can learn from past decorating blunders. Here are a few to steer clear of:
- **Frosting a Warm Cake:** We talked about this, but it bears repeating. It’s like trying to build a sandcastle in quicksand. Don’t do it!
- **Skimping on Frosting:** This isn’t the time to be shy! Frosting is delicious and often the best way to hide uneven cake layers or less-than-perfect edges.
- **Overthinking It:** This is *decoration*, not rocket science. Don’t aim for perfection if it stresses you out. Embrace the homemade charm!
- **Forgetting the Crumb Coat (if you want smooth edges):** If you skip this, you might end up with crumbs mixed into your final frosting layer. Not the end of the world, but not ideal.
- **Eating all the chocolate chips before they make it to the cake:** Self-control, my friend. Self-control.
Alternatives & Substitutions
Feeling creative? Here are a few ways to mix things up:
- Different Frosting Flavors: Not a vanilla fan? Try a rich dark chocolate ganache for extra decadence, or a tangy cream cheese frosting to cut through the sweetness. Lemon zest in your buttercream? Ooh la la!
- Edible Decorations: Instead of just chips and sprinkles, how about some candied pecans, mini M&Ms, or even some fresh berries for a pop of color? My personal fave is pretzel bits for a sweet and salty crunch.
- Theme It Up: Hosting a party? Use colored sprinkles to match your theme. Green and red for Christmas, pastels for Easter. Easy peasy.
- No Piping Bag? No Problem! Use a ziploc bag with the corner snipped off for simple piping, or just stick to spreading with a knife. Who needs fancy tools?
FAQ (Frequently Asked Questions)
- Do I *really* need a crumb coat? Well, technically no, but why hurt your chances of a beautifully smooth finish? It’s like wearing a base layer under your makeup – not essential, but it makes a difference!
- My frosting is too stiff/runny, what do I do? Too stiff? Add a tiny splash of milk or cream, a teaspoon at a time. Too runny? Add a tablespoon of powdered sugar, again, a bit at a time. Patience, grasshopper!
- Can I decorate the cake ahead of time? Absolutely! Most frosted cakes can hang out in the fridge for a day or two. Just let it come to room temp for about 30 minutes before serving for the best texture.
- What if my cake isn’t perfectly level? Fear not! Frosting is your friend. You can add a bit more frosting to the lower spots to even it out, or just embrace the charmingly rustic look. Nobody’s perfect, neither is your cake!
- I ate half the frosting before it got on the cake. Is that normal? My friend, that is not only normal, it is practically a rite of passage. No further questions.
Final Thoughts
See? That wasn’t scary at all, was it? You just took a perfectly delicious chocolate chip cake and elevated it to Instagram-worthy status without breaking a sweat (or a bank). Now go impress someone—or yourself—with your new culinary *art* skills. You’ve earned it! And remember, the best part of any cake is eating it, so dig in!


