So you’re craving something tasty but too lazy to spend forever in the kitchen, huh? Same. Guess what? I’ve got your back with a recipe that’s about to make your taste buds do a happy dance – without breaking a sweat. We’re talking Chocolate Chip and Caramel Cookies. Yeah, you heard right. It’s like a party in your mouth and everyone’s invited!
Why This Recipe is Awesome
Okay, so why this one? Because it’s not just any cookie recipe. This bad boy is ridiculously easy. Seriously, if you can measure and stir, you can make these. It’s practically idiot-proof; even I managed not to burn down the kitchen, which is saying something. Plus, who doesn’t love the combo of classic chocolate and gooey caramel? It’s a flavor bomb, my friend.
Ingredients You’ll Need
- Unsalted butter: 1 cup (2 sticks), softened. No rock-hard butter, please. Let it hang out on the counter for a bit.
- Granulated sugar: ¾ cup. For that sweet, sweet goodness.
- Light brown sugar: ¾ cup, packed. The secret sauce for chewiness. Don’t skip it!
- Eggs: 2 large. Make sure they’re at room temp too, if you’re being a perfectionist (which you totally should be).
- Vanilla extract: 2 teaspoons. The more the merrier, IMO. Good vanilla makes a huge difference.
- All-purpose flour: 2 ¼ cups. The foundation of our cookie dreams.
- Baking soda: 1 teaspoon. Helps them rise and get all puffy.
- Salt: ½ teaspoon. A pinch to balance all that sweetness.
- Chocolate chips: 1 cup. Semisweet is classic, but hey, your cookie, your rules. Milk chocolate or dark chocolate work too!
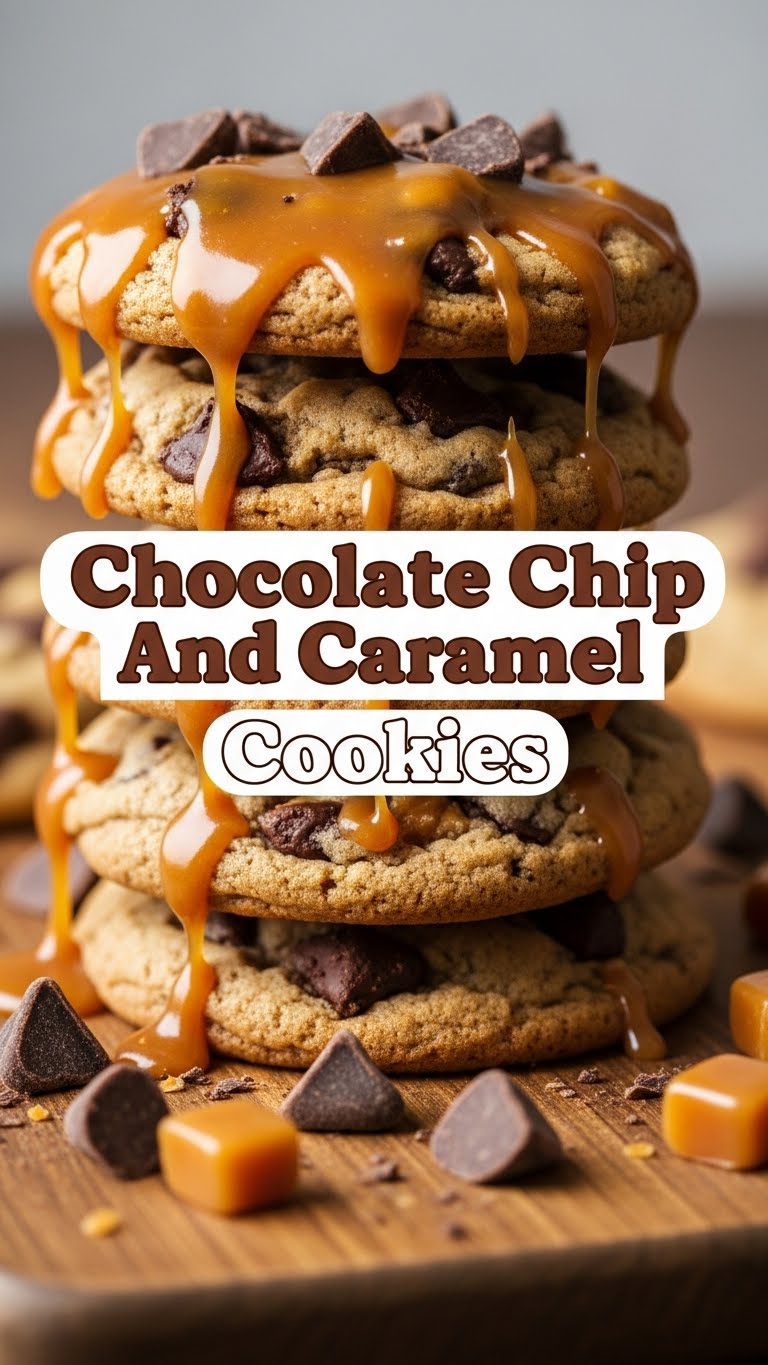
- Caramel bits or chopped caramels: 1 cup. This is where the magic happens. Gooey, melty pockets of pure joy!
Step-by-Step Instructions
- Preheat & Prep: Get your oven ready to rock at 375°F (190°C). Line baking sheets with parchment paper. Trust me, cleanup is a breeze and your cookies won’t stick.
- Cream It Up: In a large bowl, beat the softened butter with both sugars until it’s light and fluffy. Use an electric mixer if you’re fancy, or a strong arm if you’re old-school. This usually takes about 2-3 minutes.
- Egg-cellent Addition: Beat in the eggs, one at a time, until just combined. Then stir in the vanilla extract. Don’t overmix here; just get them combined.
- Dry Mix Fun: In a separate, medium-sized bowl, whisk together the flour, baking soda, and salt. This ensures everything is evenly distributed.
- Combine Forces: Gradually add the dry ingredients to the wet ingredients, mixing until just combined. Don’t overmix! That’s how you get tough cookies, and nobody wants that. Stop as soon as you see no more dry streaks.
- Chocolate & Caramel Time: Fold in the chocolate chips and caramel bits. Make sure they’re evenly distributed, so every bite is a party. You want a good ratio of gooey bits in every cookie!
- Scoop & Bake: Drop rounded spoonfuls (about 1.5-2 tablespoons) of dough onto your prepared baking sheets, leaving about 2 inches between them. They’re gonna spread, so give ’em space.
- Golden Goodness: Bake for 9-12 minutes, or until the edges are golden brown but the centers still look a little soft. That’s the secret to chewy cookies! Don’t wait until they look completely set.
- Cool Down: Let them cool on the baking sheets for 5 minutes before transferring them to a wire rack to cool completely. This helps them set and prevents sad, crumbly cookies.
Common Mistakes to Avoid
- Not preheating the oven: Rookie mistake, seriously. Your cookies won’t bake evenly, and you’ll end up with weirdly shaped, undercooked dough bombs.
- Using cold butter: It won’t cream properly with the sugar, leading to a denser, less airy cookie. Softened butter is absolutely key for that perfect texture.
- Overmixing the dough: This activates the gluten in the flour, making your cookies tough instead of tender. Mix until just combined, then stop.
- Forgetting parchment paper: Unless you enjoy scraping cookies off a pan and a nightmare cleanup, use it. Your future self will thank you for this simple step.
- Baking too long: A few extra minutes can turn perfect chewy cookies into dry hockey pucks. Keep a close eye on them, especially during your first batch!
Alternatives & Substitutions
- Chocolate type: Not a fan of semisweet? Go for milk chocolate, dark chocolate, or even white chocolate chips! Or better yet, a mix of all three for a truly decadent cookie. Mix and match, live a little.
- Caramel: Can’t find caramel bits? Unwrap some soft caramel candies (like Kraft caramels) and chop them up into small pieces. Or, if you’re feeling adventurous, drizzle some store-bought caramel sauce after baking for an extra gooey treat.
- Add-ins: Want more? A sprinkle of flaky sea salt on top before baking really amps up the flavor and cuts through the sweetness. Nuts (pecans, walnuts) are also a classic addition if you’re into that crunch.
FAQ (Frequently Asked Questions)
- Can I use margarine instead of butter? Well, technically yes, but why hurt your soul like that? Butter just tastes better and gives a superior texture. Do yourself a favor and stick to the good stuff.
- My dough is too sticky, what gives? It might be too warm, or your measurements could be off. Try chilling the dough for 20-30 minutes; cold dough is easier to handle. A little extra flour (1-2 tablespoons) can also help if needed, but be careful not to overdo it.
- How do I store these beauties? In an airtight container at room temperature for up to 3-4 days. If they last that long, that is. They tend to disappear quickly!
- Can I freeze the dough? Absolutely! Roll the dough into balls, freeze them on a baking sheet until solid, then transfer to a freezer-safe bag. Bake from frozen, adding a minute or two to the baking time. Fresh cookies anytime, FYI!
- What if my caramel melts out everywhere? Sometimes caramel can be a bit rebellious. Make sure your caramel bits aren’t too large, and try chilling the dough balls for 15 minutes before baking. It helps them hold their shape a bit better.
Final Thoughts
See? That wasn’t so hard, was it? You just whipped up a batch of delicious, warm, gooey chocolate chip and caramel cookies. Go on, pat yourself on the back. You deserve a trophy, or at least a big glass of milk to go with your masterpiece. Now go impress someone—or yourself—with your new culinary skills. You’ve earned it! And maybe, just maybe, share a cookie. Or don’t. I won’t judge.


